Dexcom G5 Mobile System User Guide
86Starting a Sensor Session: Inserting Sensor, Attaching Transmitter, and Starting Your Session
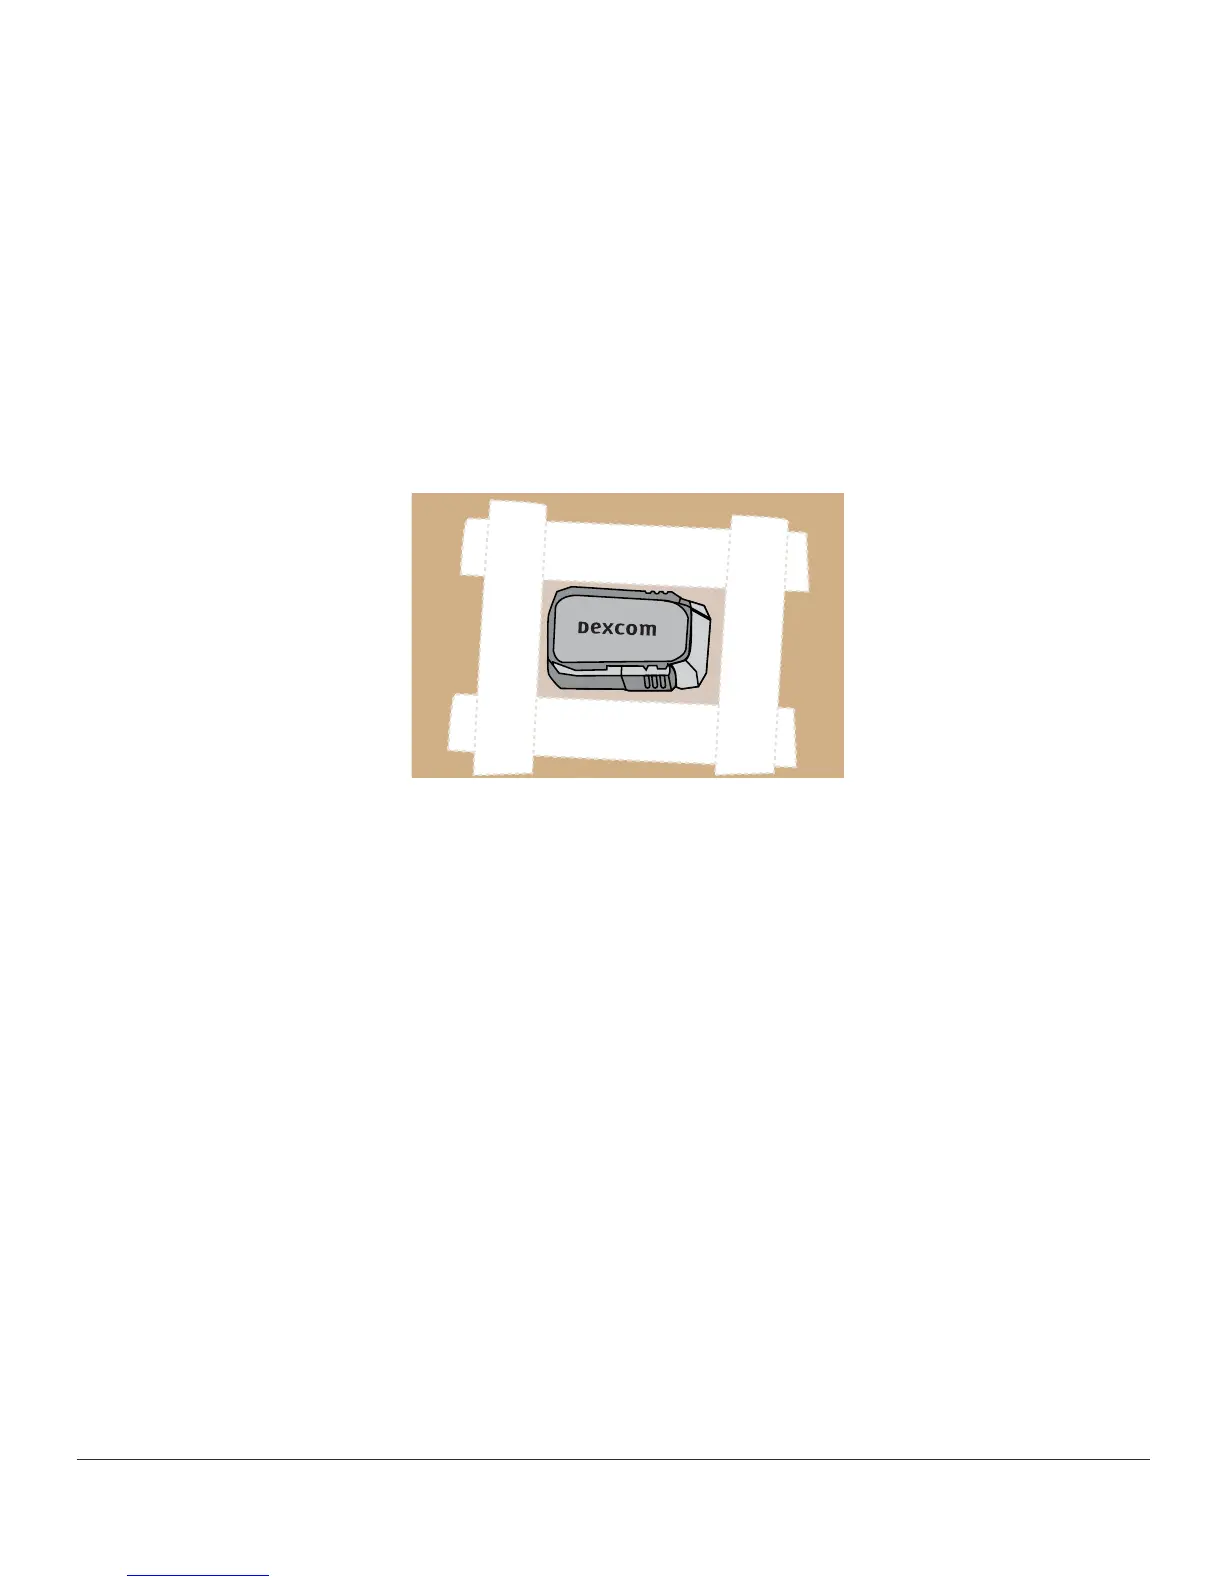
6.7 Loose Sensor Pod
The sensor pod should stay on your skin using its own adhesive.
If the patch peels up, use medical tape (such as Blenderm
™
, Tegaderm
™
, Smith & Nephew
IV3000
®
, 3M
™
tape) for extra support.
• Tape over white adhesive patch on all sides for even support
• Don’t tape over the transmitter or any plastic parts of the sensor pod
• Don’t tape under sensor pod
• Don’t leave any substance on the skin where you insert the sensor
Figure 4. The Right Way to Use Tape for Extra Support
6.8 Starting Your Sensor Session
If you choose to use both the receiver and the app, each system requires individual setups
(see Chapter 5).
After pairing the transmitter to your display device(s), inserting your sensor, and attaching
the transmitter to the sensor pod, your next step is telling your device(s) you want to
start a sensor session. Transmitters are reusable; pairing is required only when using a
new transmitter.
During the warmup period, neither device will provide any sensor glucose readings. Your
sensor glucose readings begin after the two-hour sensor warmup has passed and you
entered the initial two calibration BG values into either the smart device or the receiver.
We’ll first review starting the sensor session for the app.