153
x Platemaking / Master Feed / Ejection Section
chap.4
440115
440116
23S0082
440117
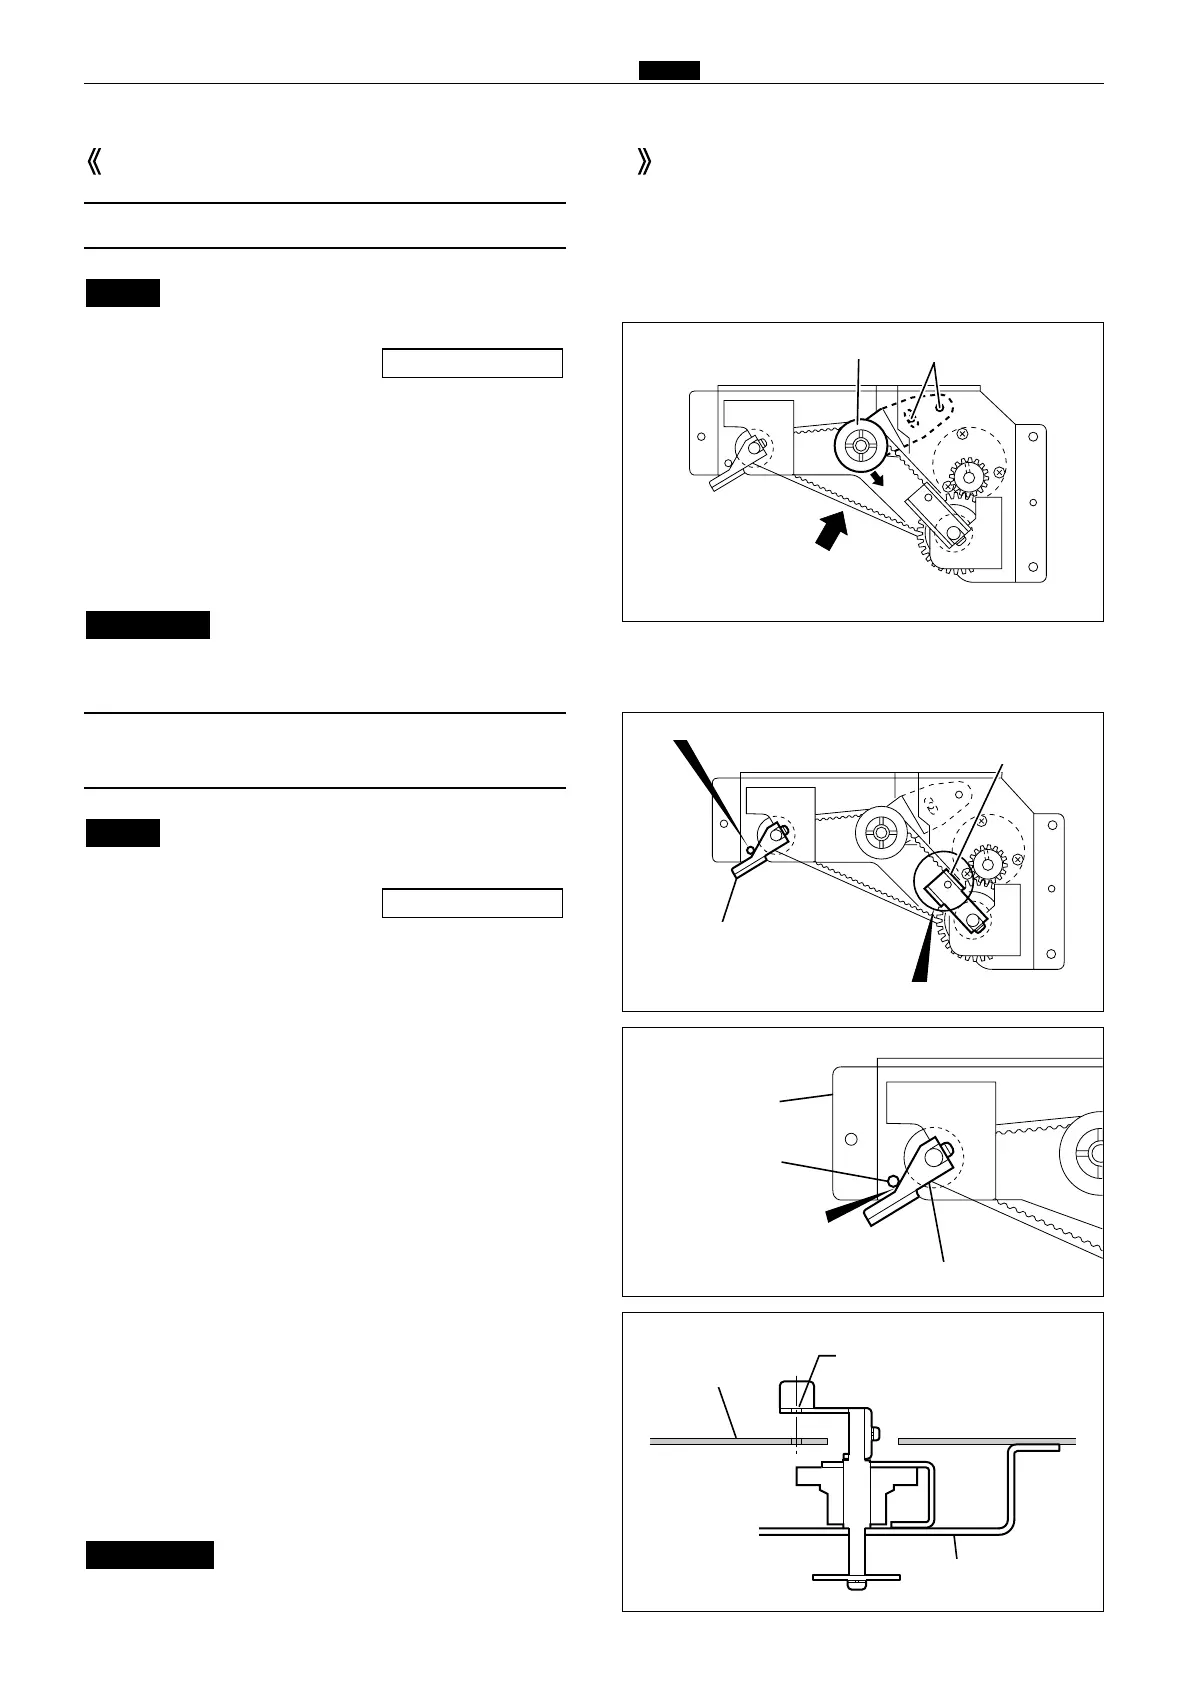
Adjustment procedure
1) Loosen the tension set screw.
2) Use the set screw to adjust the belt's tension to
about 1kg.
After Adjustment
Be sure to adjust the A/B/C mode
after installation to the printer.
IMPORTANT :
1. Master feed master clump opening/closing lever
When tensioning the timing belt, ensure that the
sub frame is positioned so that the upper surface of
the master clump opening/closing lever is aligned
(to within 0.5mm) with the rim of the positioning
hole.
2. Master ejection master clump opening/closing
lever
When tensioning the timing belt, ensure that the
master clump opening/closing lever is co-centered
with the sub-frame's positioning holes.
Tension
Screws
Position hole
Master ejection master
clump opening/closing lever
Positioning hole
Master feed master clump
opening/closing lever
Sub-frame
Positioning hole
Master feed master clump opening/closing lever
Aligned
(to within 0.5mm)
Positioning hole
Main frame R
Master ejection master clump
opening/closing lever
Master Clump Opening/Closing Section
(1) Adjusting the Timing Belt Tension
(2) Positioning the Master Clump
Opening / Closing Levers
¡For removal of master clump opening / closing unit.
\See page 125
NOTE :
After Adjustment
Be sure to adjust the A/B/C mode
after installation to the printer.
IMPORTANT :
¡For removal of master clump opening / closing unit.
\See page 125
NOTE :
¡
Master feed side
¡Master ejection side
1kg