176
, Electrical system
chap.4
Adjustment procedure
1) Perform platemaking and printing of the online test pattern. Adjust with the HELP mode, H-16 so that
the basic line is positioned ± 3mm from the top end of the paper.
(3)
Adjusting the Platemaking Start Position
¡Adjust the platemaking start position when in online after the printing position sensor
and master attachment / detachment position are adjusted.
\See page 164
\See page 162
¡Adjust the platemaking start position with the scanner in use after the printing position sensor
, master attachment / detachment position and top end reading start
position are adjusted.
\See page 164\See page 162
IMPORTANT :
Adjustment procedure
1)
Set the printing position (top and bottom direction)
to the standard.
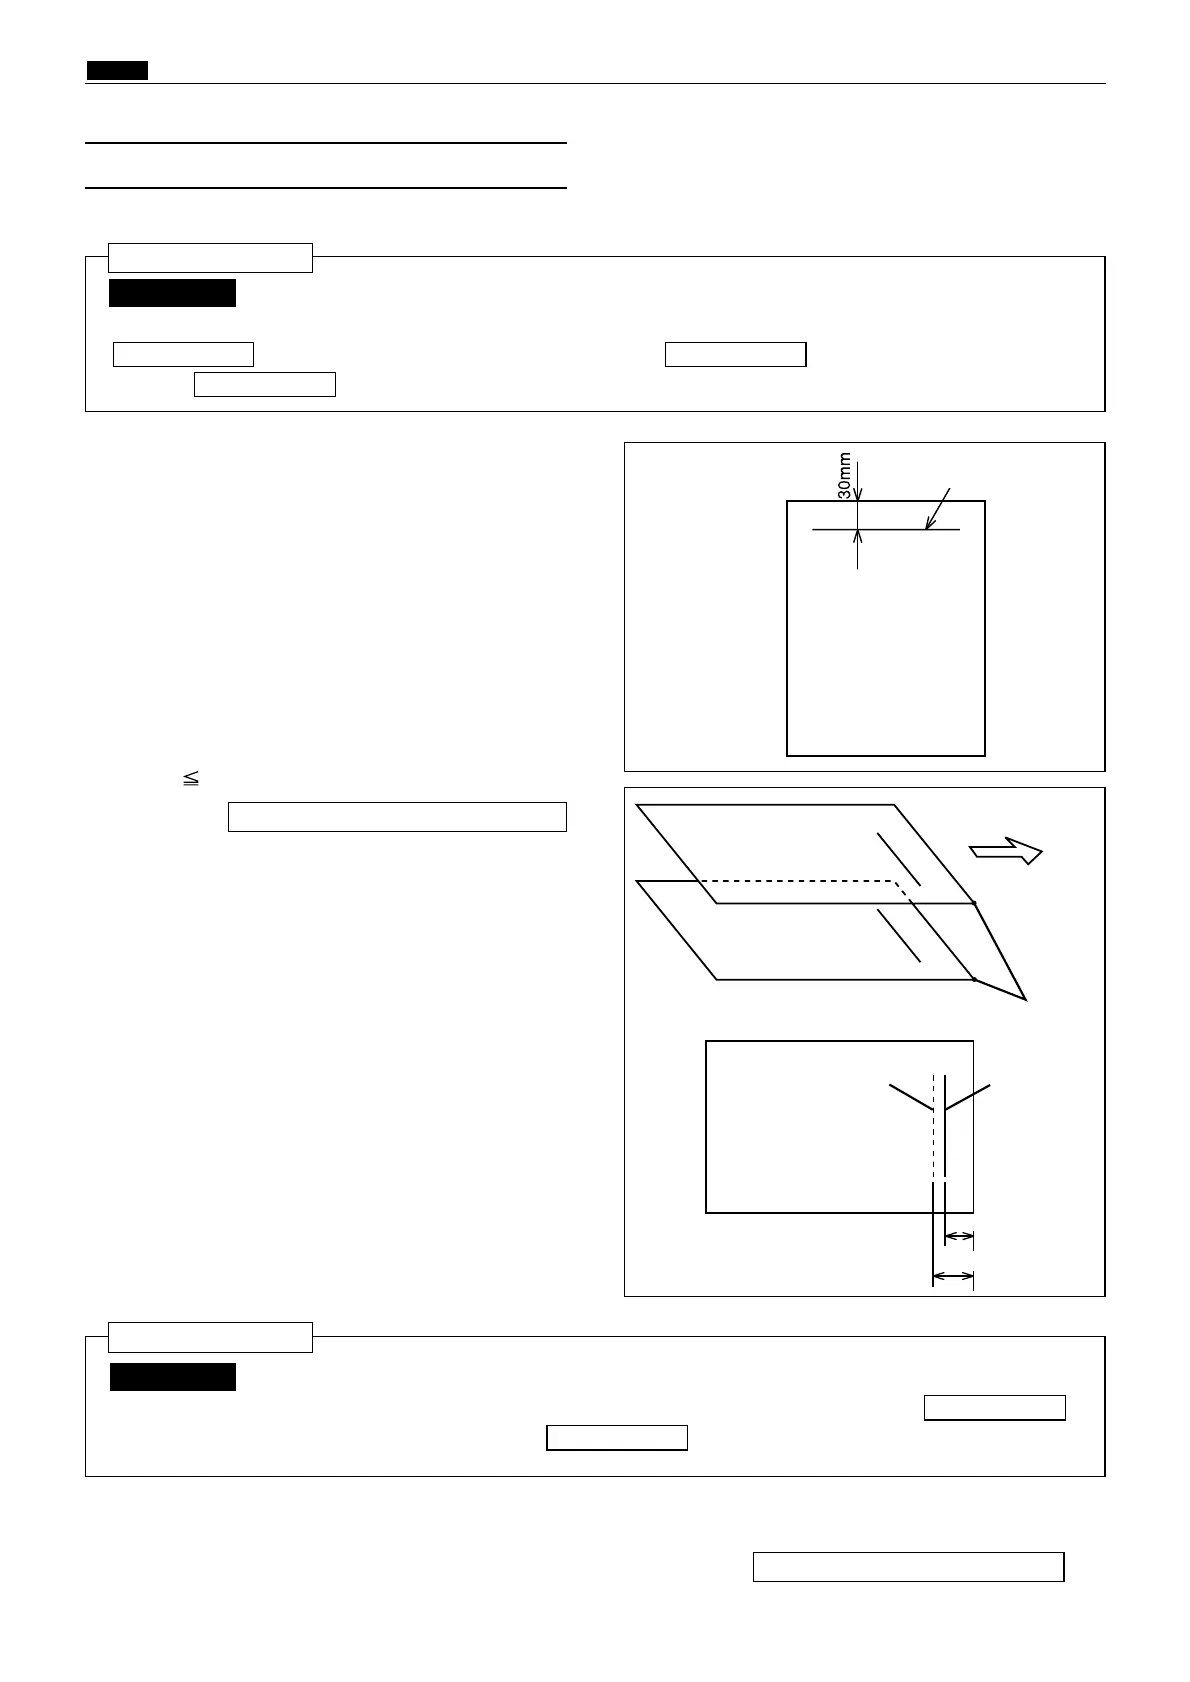
2) Draw a line at the position 30mm from the top
end of the document and prepare a basic document
as shown in the figure.
3) Compare the processed image with the basic
document.
Check the difference of the lines in the line progression
direction.
4) Adjust with the HELP mode, H-37 so that
L1 - L2 ± 3mm.
Adjusting direction
¡L1<L2 : Upward
¡L1>L2 : Downward
HELP mode H-37 \ see p.259
¡Standard document
HELP mode H-16 \ see p.238
Mark this corner with each other
Document
basic line
L2
L1
Document
Printing paper
Print ejection direction
Basic line of the
printed sample
23S0316
23S0317
Draw a line at the position 30mm
from the top end of the document
1. When the Scanner Is in Use
Before adjustment
2. When in Online
IMPORTANT :
\See page 175
Before adjustment