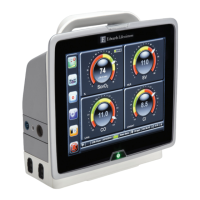
HemoSphere Advanced Monitor 10 Monitoring with the HemoSphere Pressure Cable
139
10.4 Pressure Cable Monitoring with a TruWave DPT
The HemoSphere pressure cable connects to a single TruWave pressure transducer to provide location based
intravascular pressure. Available pressures measured by a TruWave DPT include central venous pressure
(CVP) when monitored from a central venous line, diastolic pressure (DIA), systolic pressure (SYS), mean
arterial pressure (MAP), and pulse rate (PR) when monitored from an arterial line, and mean pulmonary
arterial pressure (MPAP) when monitored from a pulmonary arterial line. See table 10-1.
10.4.1 Connect TruWave DPT
1 Connect one end of the pressure cable to the HemoSphere advanced monitor.
2 To de-air and prime I.V. flush bag and TruWave transducer: Invert normal saline bag
(anticoagulation per institution policy). Spike I.V. bag with fluid administration set, keeping drip
chamber upright. While keeping I.V. bag inverted, gently squeeze air out of bag with one hand
while pulling flush tab (Snap-tab) with the other hand until air is emptied from I.V. bag and drip
chamber is filled to desired level (½ or full).
3 Insert flush bag into pressure infuser bag (DO NOT INFLATE) and hang on IV pole at least 2
feet (60cm) above the transducer.
4 With gravity only (no pressure in Pressure Bag), flush TruWave transducer holding pressure tubing
in upright position as the column of fluid raises through the tubing, pushing air out of the pressure
tubing until the fluid reaches the end of the tubing (flushing under pressure creates turbulence and
increased occurrence of bubbles).
5 Pressurize the pressure bag until it reaches 300 mmHg.
6 Fast-flush transducer tubing while tapping on tubing and stopcocks to remove any residual
bubbles.
7 Use a straight in or out motion to connect the TruWave DPT to the HemoSphere pressure cable.
8 Connect tubing to catheter, and then aspirate and flush system to assure catheter is intra-vascular
and remove residual bubbles.
9 Use routine transducer calibration procedures (according to institutional policy) to ensure proper
pressure signals are being transmitted. Refer to the TruWave pressure transducer’s instructions for
use.
10 Follow steps for entering patient data. See Patient Data on page 88.
11 Follow the instructions below for zeroing the transducer.
10.4.2 Zero Intravascular Pressure
The TruWave DPT must be zeroed to atmospheric pressure to ensure accurate monitoring.
1 Touch the Zero & Waveform icon located on the navigation bar.
OR
Press the physical zero button directly on the pressure cable (see figure 10-1).
2 The current intravascular pressure waveform is displayed and continually updated on the screen.
This is to confirm the zero operation is successful.
Status = Released Printed Date: 2018-01-16 Released Date: 2017-09-14

 Loading...