47
HemoSphere Advanced Monitor 3 Installation and Setup
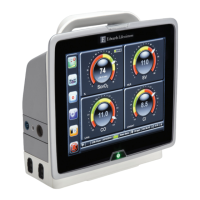
Do not use the monitor as a handheld device.
3.3.2 Battery Installation
Open the battery door (figure 3-3) and insert the battery into the battery bay, ensuring pack is fully inserted
and seated. Close the battery door and ensure that the latch is securely fastened. Follow instructions below
to connect the power cord and then fully charge the battery. Do not use a new battery pack as a power source
until it has been fully charged.
NOTE To ensure that the battery charge level displayed on the monitor is accurate, please
condition the battery before first use. For information on battery maintenance and
conditioning, see Battery Maintenance on page 216.
The HemoSphere battery pack is intended as a backup power source during power-loss
and can only support monitoring for a limited time period.
WARNING Make sure the battery is fully inserted and the battery door is properly latched. Falling
batteries could seriously injure patients or clinicians.
Only use Edwards approved batteries with the HemoSphere advanced monitor. Do not
charge the battery pack outside of the monitor. Doing so can damage the battery or
injure the user.
To prevent any interruptions to monitoring during power loss, it is recommended to
use the HemoSphere advanced monitor with the battery inserted.
In cases of power failure and battery depletion, the monitor will go through a controlled
shut off procedure.
3.3.3 Connecting Power Cord
Before connecting the power cord to the rear panel of the monitor, ensure that the power entry cover is
installed:
1 If the power entry cover is already installed, remove the two screws (figure 3-5) that attach the
power entry cover to the rear panel of the monitor.
2 Connect the detachable power supply cord. Ensure that the plug is seated securely.
3 Attach the power cord entry cover over the plug by routing the power cord through the cover
opening and then pressing the cover and gasket up against the rear panel of the monitor, aligning
the two screw holes.
4 Reinsert the screws to fasten the cover onto the monitor.
5 Plug power cord into a hospital grade outlet.
Status = Released Printed Date: 2018-01-16 Released Date: 2017-09-14