CHAPTER 5
75
Printing Jobs on the GERBER SOLARA ION
4/29/10 Rev G
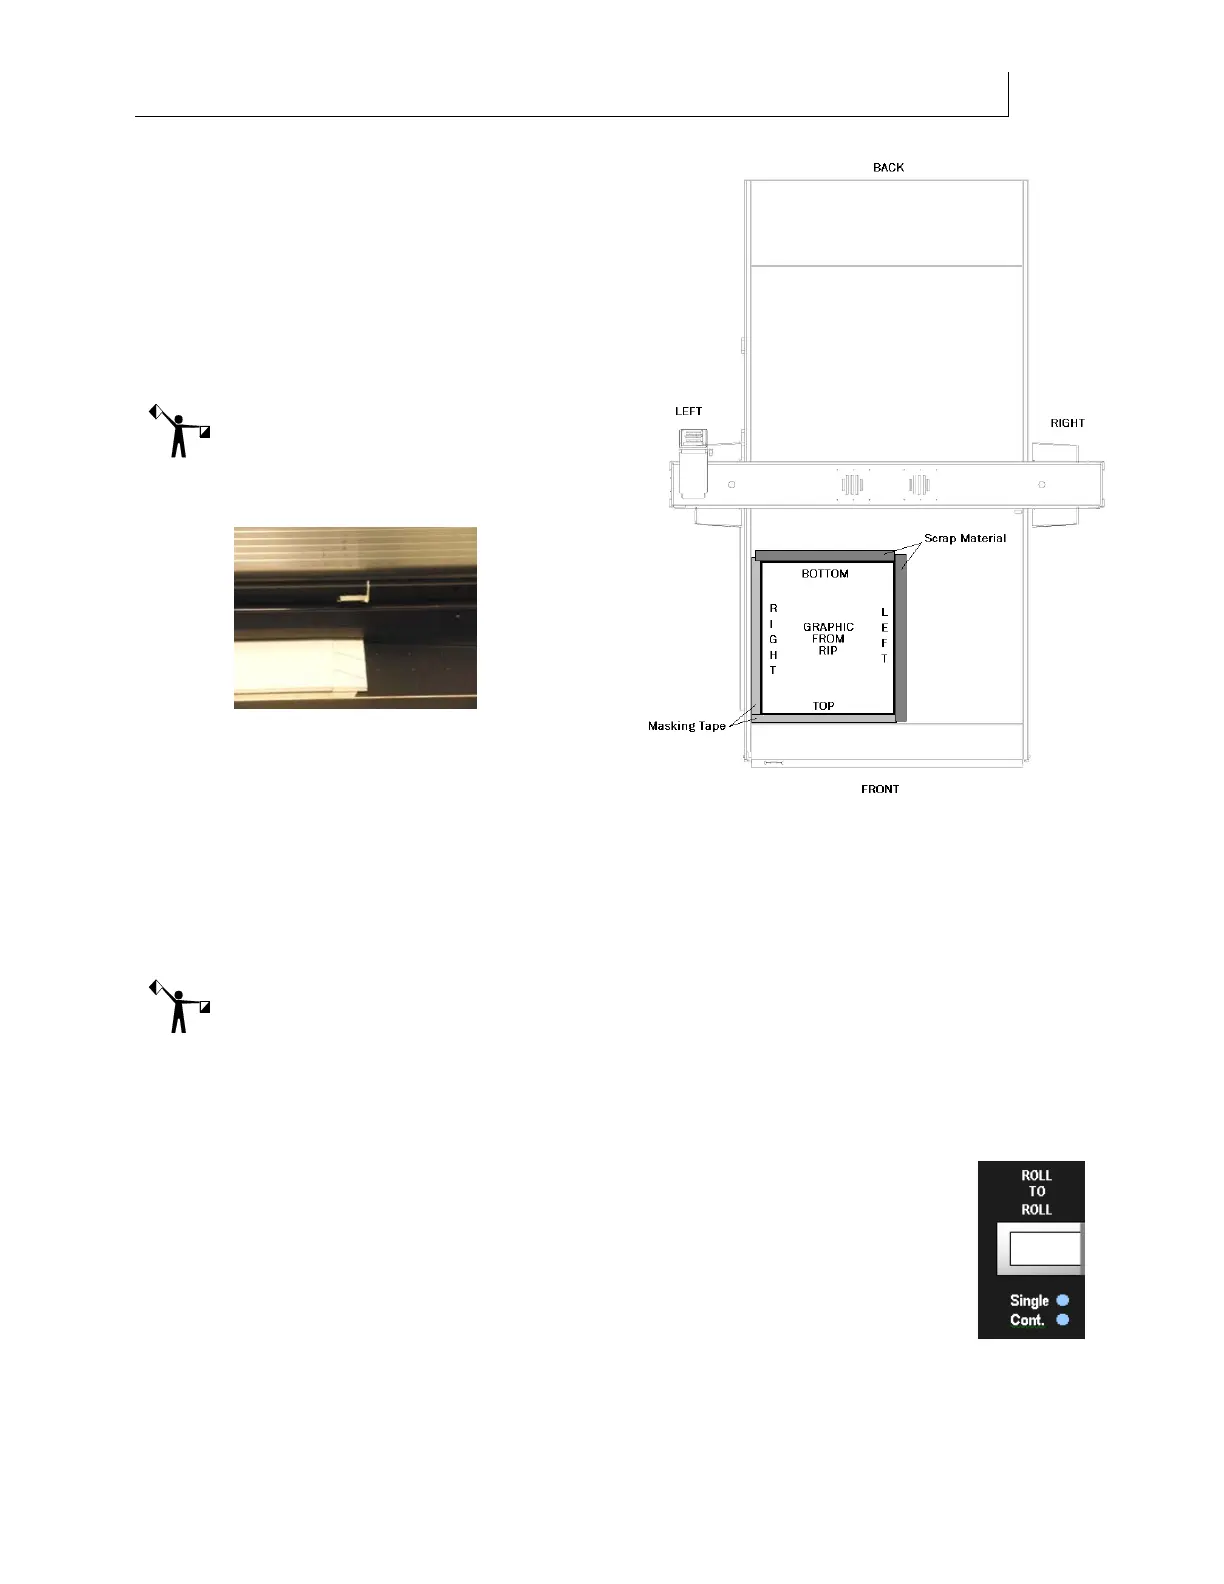
6 Using the new page size, send the job
to the printer and start printing by
pressing the Run Job button in the
Solara ion. When the Solara ion asks
you to move the UV shield, move the
UV shield so that it is aligned with the
scrap material, not the substrate’s
edge.
Note: It is important to align the UV
shield with the scrap material so that the
printer does not inadvertently print on the
shield and result in ink build-up that can
cause head strikes.
7 When the first side is complete, flip the
sign blank over left to right (if the top
of the job is located at the front of the
printer as shown in the previous
illustration). Place the sign blank in the same location as the first side, completely
inside the masking tape and scrap material. Repeat printing on this side.
8 Remove all masking tape and scrap material so that the ink does not build up too high
and scratch the heads.
Note: The scrap material on the back and right sides of the sign blank should be removed after
every job; the masking tape at the edges of the table can be used a few times since it is thinner
than the sign blank. Just be sure to remove and replace the tape whenever the ink build up
starts to approach the height of (or is higher than) the sign blank on which you are printing.
Printing multiple Roll-to-Roll jobs in Continuous mode
Continuous mode lets you run several jobs in Roll-to-Roll mode without having to
press Run Job between each one. When one job finishes, the next job begins
immediately on the same material loaded in the printer. When all jobs that have
been sent are completed, the printer waits for another job and begins printing as
soon as it is received. Continuous mode is designed for printing multiple jobs on
the same rolled material.
In continuous mode the operator is not prompted to turn on the platen hold-down
vacuum at the start of a job. The operator must turn the vacuum on or off as appropriate using
the LOAD/UNLOAD key.