Before you begin
The account domain group and CIFS setup must already exist.
Procedure
1. On the detail page for a share, click the plus sign (+) to open the Create
Groups page.
2. In the Group Name field, type in a user group name from the account
domain.
3. Choose permissions; Full Control, Change, or Read.
4. Click Submit.
A job is started to add the group to the share.
Updating a share
You can update a share to change the file system path, permissions, and
access configuration.
Procedure
1. Access the Update Share page by clicking Edit in a Share detail page.
2. (Optional) Enter a new path in the Modify File System Path field.
3. (Optional) In the Access Configuration field, enter IP addresses of the
clients who can access the share (up to 5,957 characters allowed in this
field).
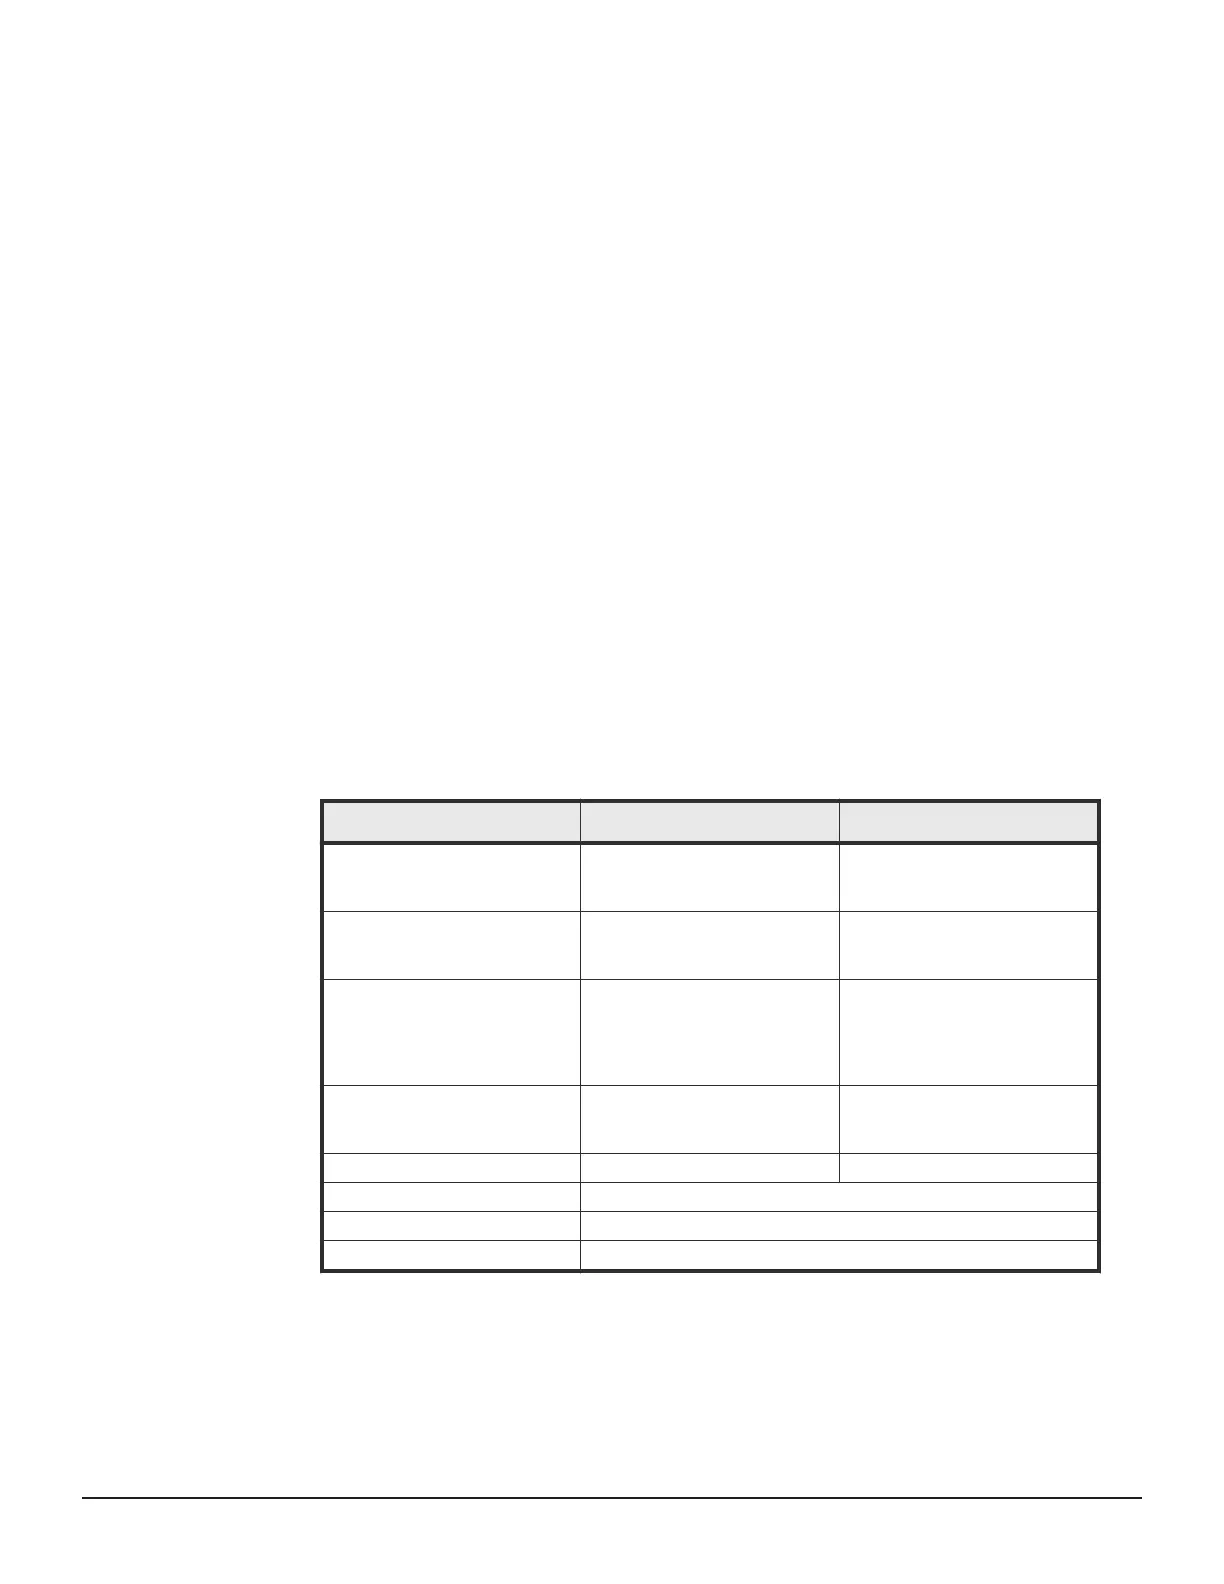
What to type
Means Example
Blank or * Partial addresses
using wildcards.
All clients can access the
share.
10.168.*.* Clients with
matching addresses can
access the share.
Specific addresses Only clients with the specified
IP address can access the
share.
10.168.20.2
Specific address range Only clients with an IP
address within the specified IP
address range (10.168.20.0
to 10.168.20.255) can access
the share.
10.168.20.0/16
Partial addresses using
wildcards
Clients with matching
addresses can access the
share.
10.168.*.*
Permisssions
What to type Permissions granted
(rw) read-write
(ro) read only
Configuring the storage system 117
System Administrator Guide for VSP Gx00 models and VSP Fx00 models
 Loading...