169
• Enter IP address 192.168.1.5, the IP address of Host C.
• Select Hold Time and set the hold time of this blacklist entry to 50 minutes.
• Click Apply.
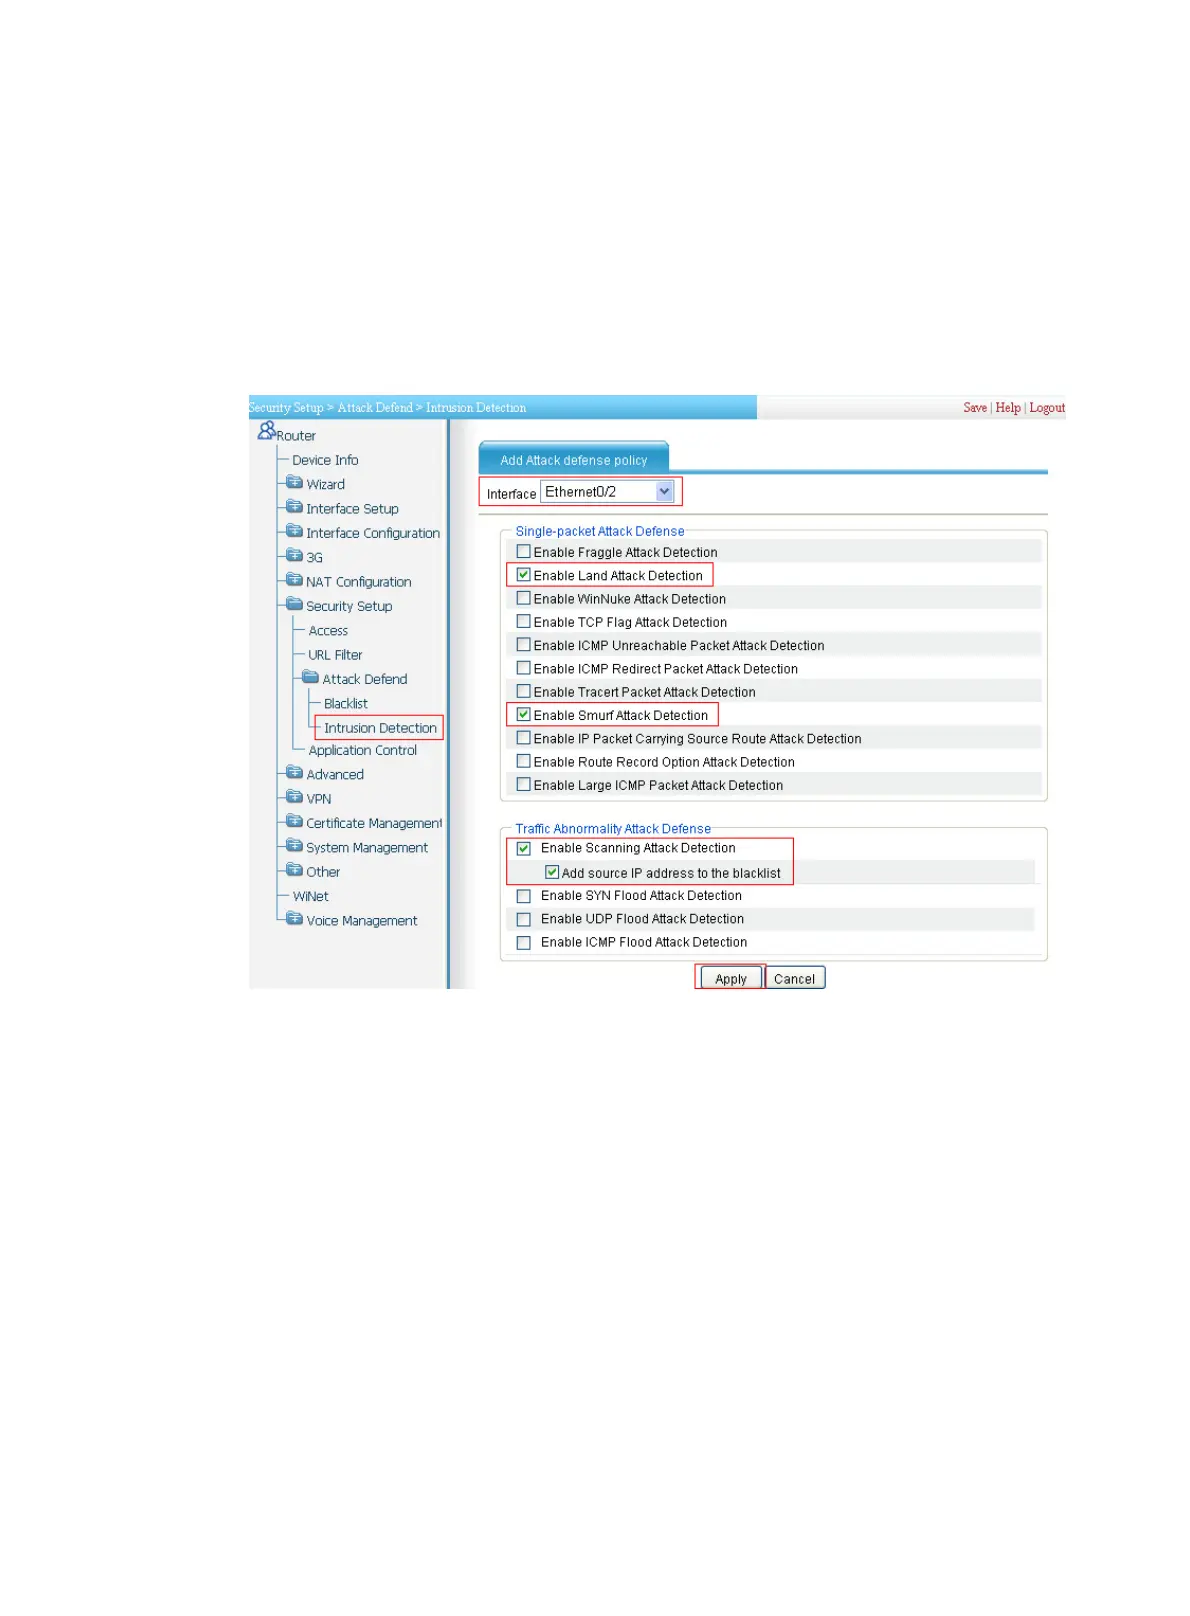
# Configure intrusion detection on Ethernet 0/2: Enable scanning attack protection, and enable blacklist
function for it; enable Land attack protection and Smurf attack protection.
• Select Security Setup > Attack Defend > Intrusion Detection from the navigation tree. Click Add and
then perform the following configurations, as shown in Figure 173.
Figure 173 Configuring intrusion detection
• Select interface Ethernet0/2.
• Select Enable Attack Defense Policy.
• Select Enable Land Attack Detection, Enable Smurf Attack Detection, Enable Scanning Attack
Detection, and Add Source IP Address to the Blacklist. Clear all other options.
• Click Apply.
Verifying the configuration
• Select Security Setup > Attack Defend > Blacklist. Host D and Host C are in the blacklist.
• Router drops all packets from Host D unless you remove Host D from the blacklist.
• Router drops packets from Host C within 50 minutes. Then, Router forwards packets from Host C
correctly.
• Upon detecting the scanning attack on Ethernet 0/2, Router outputs an alarm log and adds the IP
address of the attacker to the blacklist. You can view the added blacklist entry by selecting Security
Setup > Attack Defend > Blacklist.

 Loading...