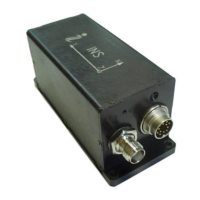
INS
GUI User’s Manual
Inertial Labs, Inc
TM
Address: 39959 Catoctin Ridge Street, Paeonian Springs, VA 20129 U.S.A.
Tel: +1 (703) 880-4222, Fax: +1 (703) 935-8377 Website: www.inertiallabs.com
131
10.6. INS automatic start
Since firmware version 1.0.2.0 the Inertial Labs
TM
INS auto start is
implemented that allows start of its operation and data output after power on
without any command from the host computer. There is possible to choose
desirable output data format for auto start. See Appendix C for more details
about data formats.
The auto start option can be enabled or disabled in the drop-down list “Auto
start” in the “IMU” tab of the “Devices Options” window – see Fig. 4.2. To
allow this option the INS should be connected to PC and powered.
The drop-down list “Auto start” contains list of all available output data
formats, see Fig. 10.23. Please choose desirable output data format for the
INS auto start. Default is “No Auto start” option that disables automatic start.
Usually just INS GUI software is used to start and stop the INS operation. To
allow the INS GUI to receive data from the INS that was started
automatically, it is necessary to select the “Allow auto start” checkbox in the
“Test options” window – see Fig. 4.1. After the “Allow auto start” checkbox is
selected, it is necessary to close the INS GUI and start it again to apply this
setting. Operation with automatically started INS is close to those described
in the section 10.1, with a little difference.
Step 1. Connect the INS to PC and power on. The INS LED indicator
will light yellow during about 15 seconds until the GNSS receiver
initialization is completed. After that the INS starts calculations and its LED
indicator changes color to green.
Step 2. Wait not less than set time for the initial alignment (30 seconds
on default) and run the INS GUI. If the COM port number was set correctly
and “Allow auto start” checkbox was selected then INS GUI will show the
INS continuous data in chosen output data format.
The next possible steps are the same as described in section 10.1,
steps 11 – 17. For example, you can:
Step 3. To save data to file please click the “Write” button.
Step 4. To stop the INS click “Stop” button. If the data were being
written in a file then the writing is stopped too.

 Loading...