INS
GUI User’s Manual
Inertial Labs, Inc
TM
Address: 39959 Catoctin Ridge Street, Paeonian Springs, VA 20129 U.S.A.
Tel: +1 (703) 880-4222, Fax: +1 (703) 935-8377 Website: www.inertiallabs.com
144
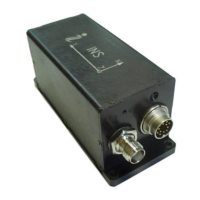
10.9. INS and OS3D-FG SAMC axes alignment
For correct operation of the INS with external OS3D-FG SAMC, it is
necessary to align the SAMC axes with INS axes, otherwise heading angle
and hence position of the a carrier object will be calculated inaccurately.
The Inertial Labs INS GUI provides a procedure of the INS and external
SAMC axes alignment. This procedure does not require any additional
equipment, but it requires to place a carrier object, on which the INS and
OS3D-FG SAMC is mounted, to a few positions with essentially different
pitch and roll angles.
10.9.1. Description of the axes alignment procedures
Perform Step 1 and Step 2 from the section 10.1.
Note, OS3D-FG SAMC should be connected to the INS how it’s shown in
the INS ICD, section “5.9. Connection of OS3D-FG Stand Alone Magnetic
Compass to INS”.
Step 3. Select “Mag axes alignment” item from the “Plugins” menu
(see Fig. 3.5). “Mag axes alignment” window (Fig. 8.7) will open.
Step 4. Set time value in “Accumulation Time” field or leave default
value - 10 sec.
Axes alignment procedure consists of accumulating data in at least
three positions at different pitch and roll angles. See Table 10.4. for
examples of angles at which a carrier object should be while accumulating
data.
Table 10.4 Example of rotation angles
Step 5. Fix a carrier object in the first position and click “Start” button.
The window (Fig. 10.35) will appear.
 Loading...