5. Clean the lower mounting surface on the robot (>>> 7.3.2 "Installing
the machine frame mounting assembly" Page 180).
6. Lower the robot vertically onto the mounting surface. Ensure that an
entirely vertical position is maintained in order to prevent damage to
the locating pins.
7. Insert 8 M20x60-8.8 Allen screws with conical spring washers.
8. Tighten 8 M20x60-8.8 Allen screws with a torque wrench in diagonally
opposite sequence. Increase the tightening torque to the specified val-
ue in several stages.
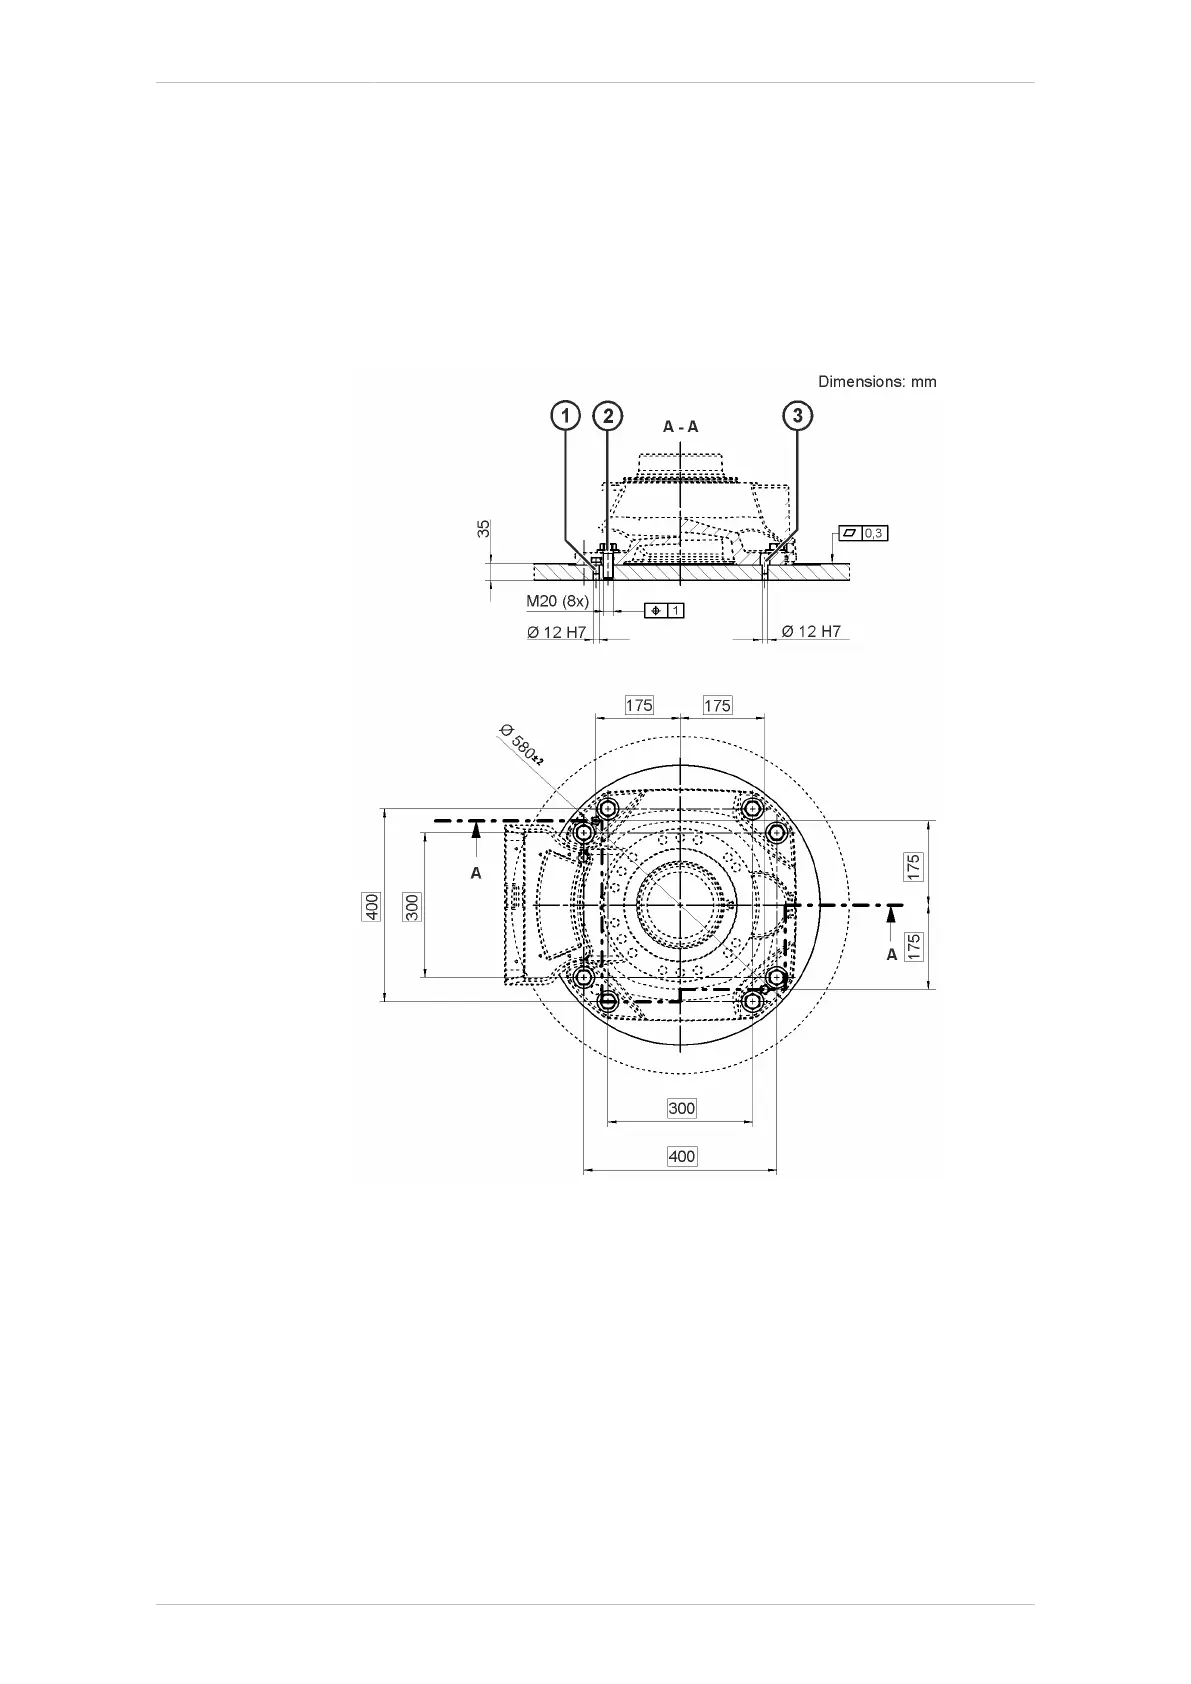
Fig. 7-7: Machine frame mounting, dimensioned drawing
1 Locating pin, cylindrical
2 M20x60-8.8-A2K hexagon screw with lock washer (8x)
3 Locating pin, flat-sided
7.3.3 Removing KR IONTEC fork slots
Procedure
1. Remove the M16x35-8.8 Allen screws and lock washers.
2. Remove the Load Lifting Attachment.
KR IONTEC
MA KR IONTEC V4 | Issued: 11.05.2021 www.kuka.com | 181/344
Start-up and recommissioning

 Loading...

