8.5.1 Draining the gear oil from A3
1. Tilt the link arm slightly forward and move the arm to a horizontal po-
sition.
2. Place a receptacle under the oil drain hole. Unscrew the M18x1.5
magnetic screw plug (>>> 8.5.1 "Draining the gear oil from A3"
Page 205).
3. Remove the upper M18x1.5 magnetic screw plug for venting and
catch the oil as it drains out.
4. Store or dispose of the drained oil in accordance with the pertinent
regulations.
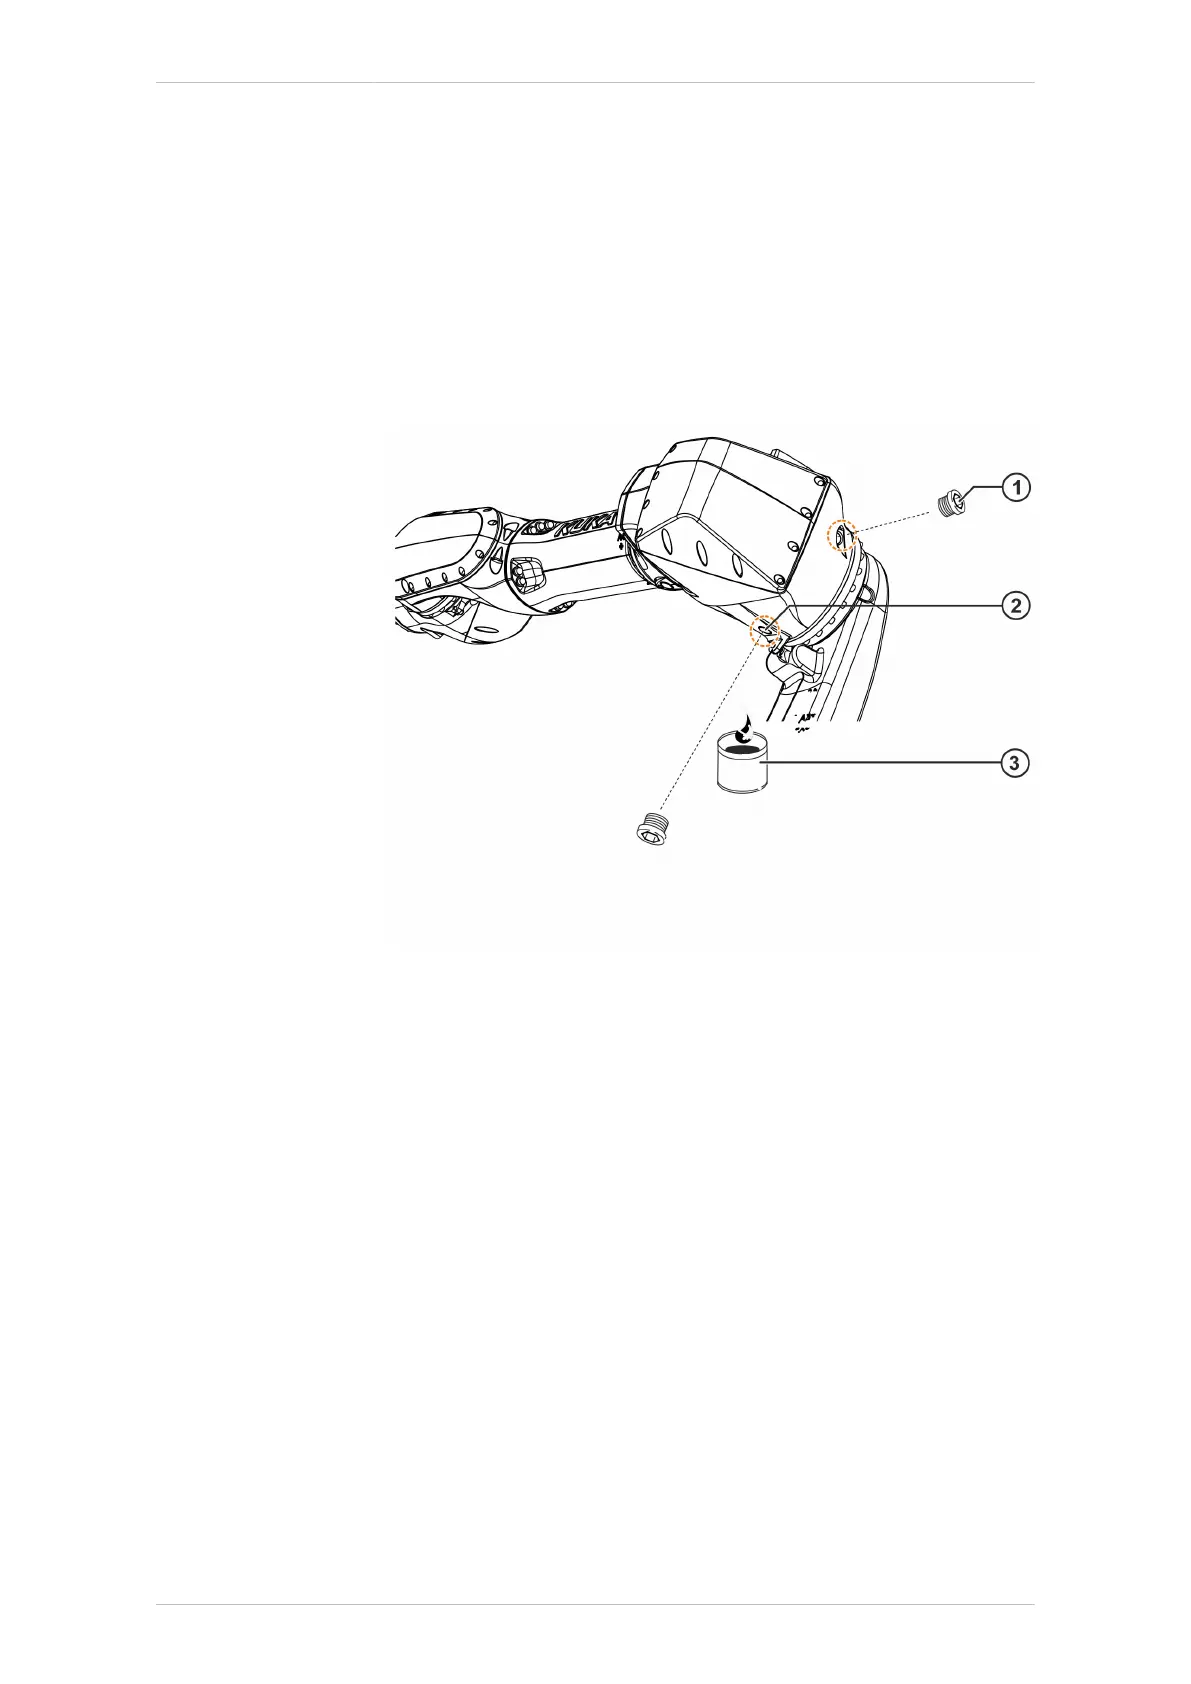
Fig. 8-8: Draining the gear oil from A3
1 M18x1.5 magnetic screw plug for venting
2 Oil drain hole with M18x1.5 magnetic screw plug
3 Collection receptacle
8.5.2 Filling gear unit A3 with gear oil
Procedure
1. Move the robot to the specified axis position. Axis 2 and axis A3 pro-
duce an angular position of 0° (>>> "Axis position for checking the fill
level on A4" Page 209).
2. Clean both M18x1.5 magnetic screw plugs and check the sealing ele-
ments; exchange magnetic screw plugs if damaged (>>> 8.5.2 "Filling
gear unit A3 with gear oil" Page 205).
3. Connect the oil pump to the oil drain hole.
4. Fill the amount of oil from below up to the lower edge of the inspec-
tion hole = vent hole.
5. Insert and tighten the M18x1.5 magnetic screw plug; M
A
= 20 Nm.
6. Remove the oil pump.
KR IONTEC
MA KR IONTEC V4 | Issued: 11.05.2021 www.kuka.com | 205/344
Maintenance

 Loading...

