7. Pull the sinuous spring off the motor.
8. If the motor is not to be reinstalled, it must be disposed of properly or
protected against corrosion before being put into storage.
9.5.3.4 Removing motor A5
Procedure
1. Unscrew 2 M6x12-8.8-A2K Allen screws each from both holders.
Mark the position of cable strap on the cable. Cut off the cable strap
at the first holder.
2. Remove holder from the robot arm.
Carefully cut off cable strap on plug-in connection A6 (far right) with
diagonal cutting pliers.
Remove plug-in connection A6 from the holder and disconnect it.
3. Unscrew 18 M6x35-8.8-A2K Allen screws between the in-line wrist
with arm extension and the arm.
Carefully pull the in-line wrist with arm extension a little way out.
4. Remove grounding from in-line wrist with arm extension. Release and
unplug connectors XM4/XP4 and XM5/XP5 at the right-angle connec-
tors.
5. Remove the in-line wrist with arm extension and set it down on a pre-
pared support.
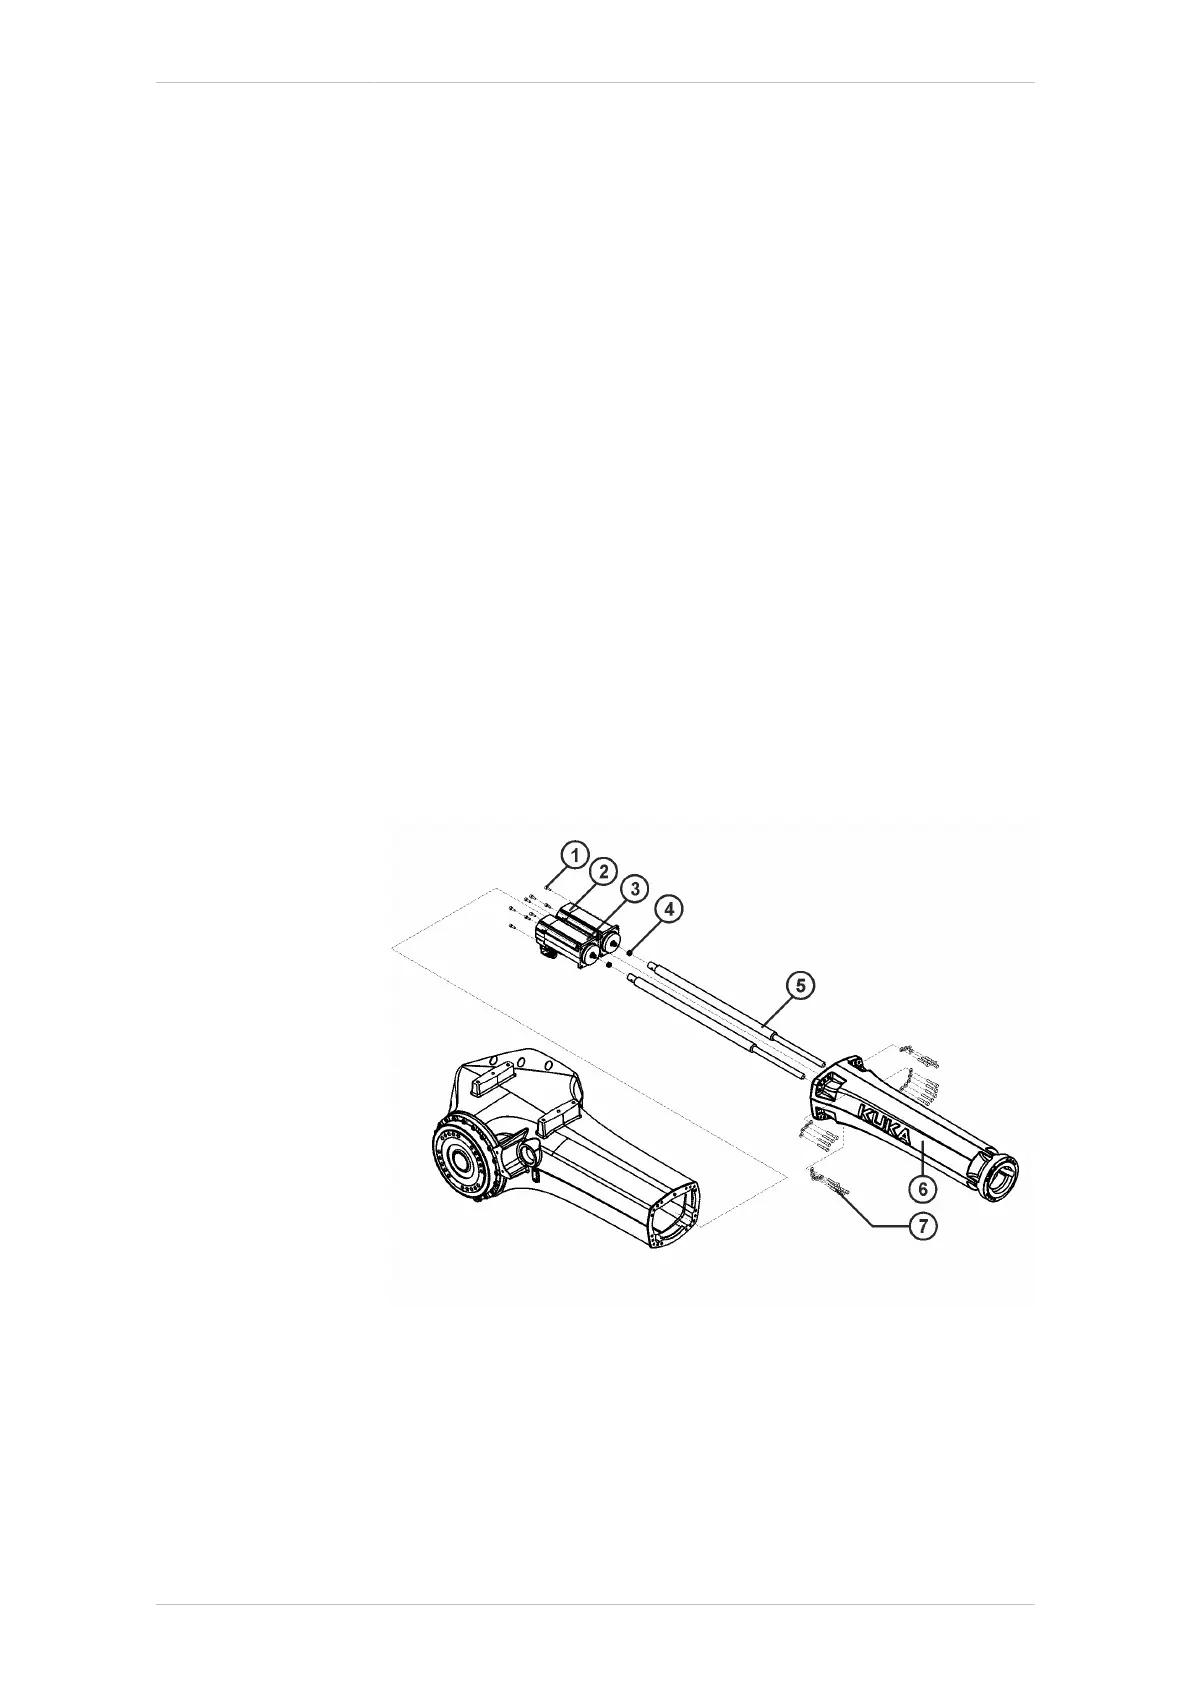
6. Unscrew 4 M5x14-8.8 Allen screws from motor A5 and pull out the
motor. Do not tilt while removing.
Fig. 9-36: KR 20 R3100 – Removing/installing motors A4 and A5
1 M5x14-8.8-A2K Allen screw (4x per motor)
2 Motor A4
3 Motor A5
4 Sinuous spring 0.25x11.43x15.88 (2x)
5 Connecting shaft R3100 (2x)
6 Arm extension
KR IONTEC
MA KR IONTEC V4 | Issued: 11.05.2021 www.kuka.com | 277/344
Repair

 Loading...

