4. Mount motor A4 onto the connecting shaft together with the lock
washer and sinuous spring. Do not tilt while fitting.
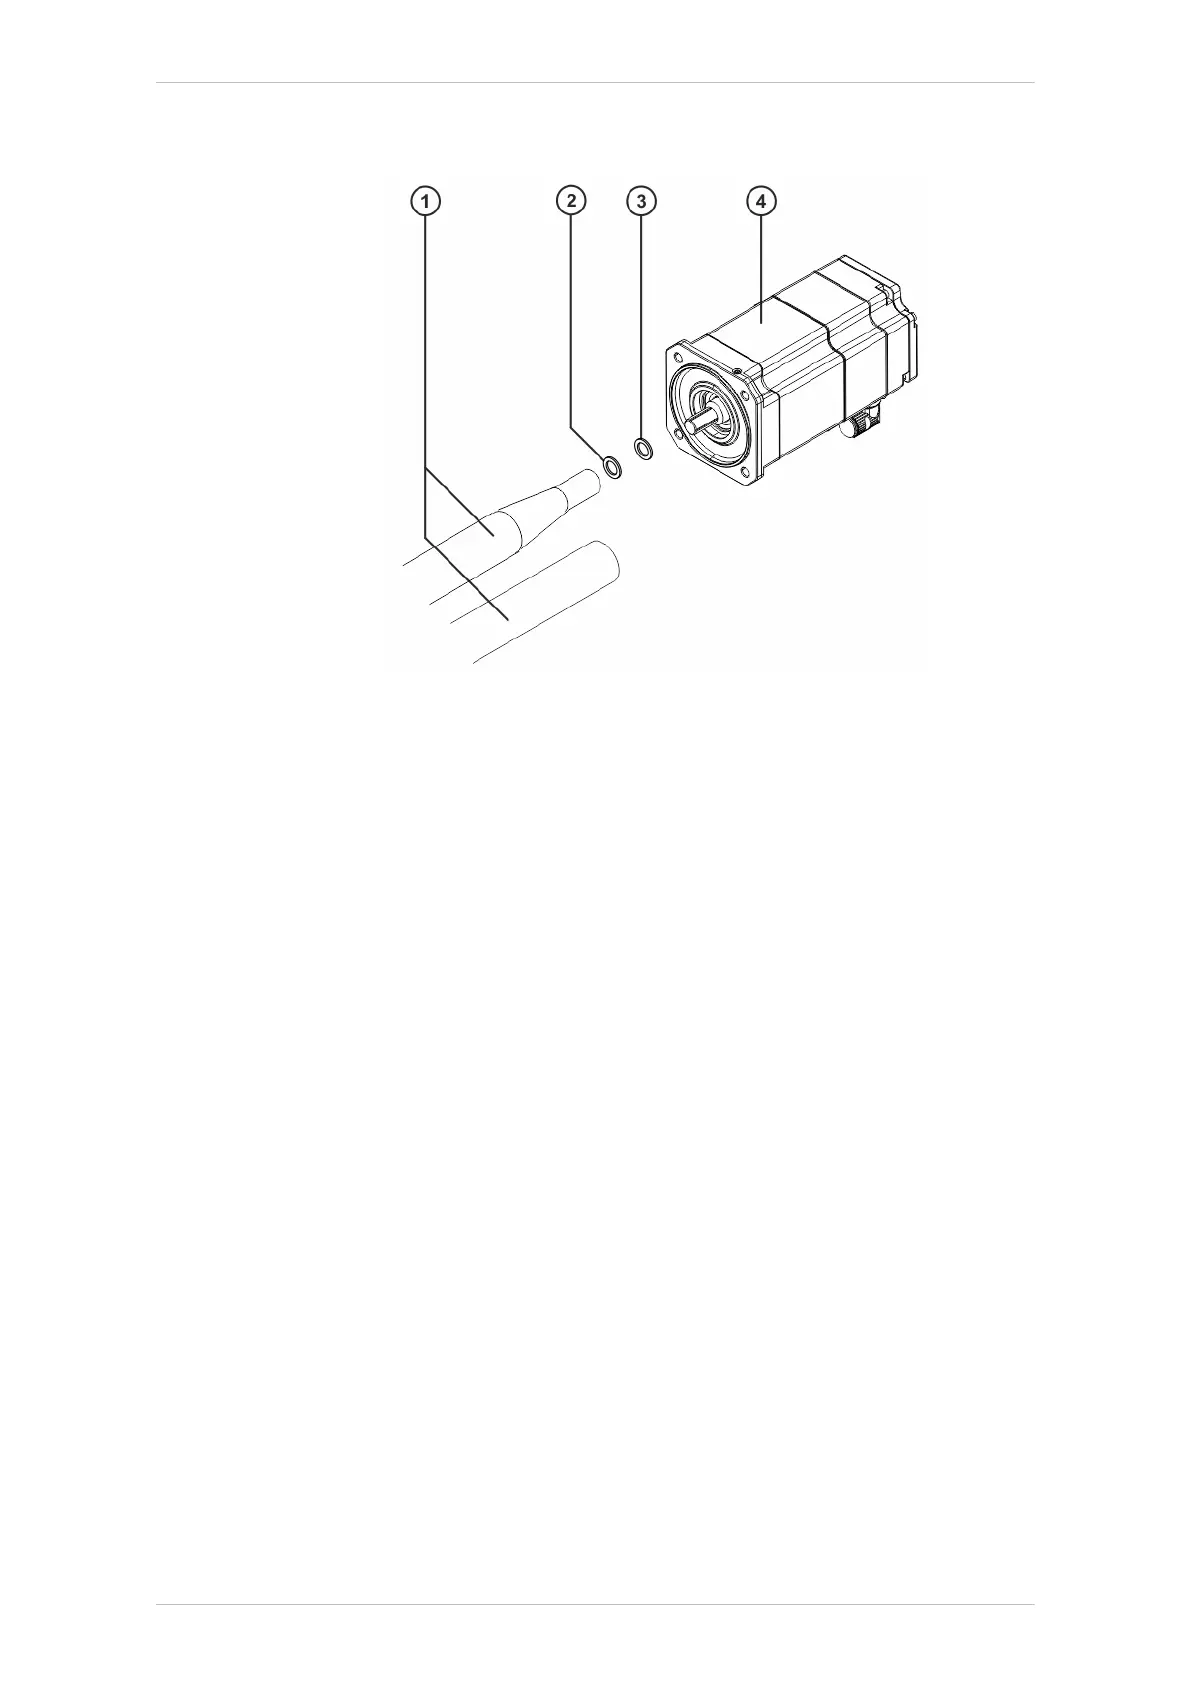
Fig. 9-41: Motor with connecting shaft
1 Connecting shaft (according to robot type)
2 Lock washer
3 Sinuous spring
4 Motor
5. Insert 4 M5x14-8.8 Allen screws and tighten with a torque wrench in
diagonally opposite sequence. Increase the tightening torque to the
specified value in several stages.
6. Lift the in-line wrist and arm extension to the height of the arm using a
sling and crane.
7. Pull the cable for motor A6 through the arm.
8. Plug connectors XM4/XP4 and XM5/XP5 into the right-angle connec-
tors. The pins and coding elements of the connectors must be taken
into consideration. When inserting the connectors, turn them until they
clearly lock into the coding elements (twist-proof). Reconnect ground-
ing to in-line wrist with arm extension.
KR IONTEC
282/344 | www.kuka.com MA KR IONTEC V4 | Issued: 11.05.2021
Repair

 Loading...

