RF Planning and Deployment
80
ProSAFE Wireless Controller
To manually add and manage individual antennas on a floor map for an RF plan:
1. Open a web browser, and in the browser’s address field, type the wireless controller’s IP
address.
By default, the IP address is 192.168.0.250.
The wireless controller’s login window opens.
2. Enter your user name and password.
3. Click the Login button.
The wireless controller’s web management interface opens and displays the Summary
page.
4. Select Plans > Planning.
The page displays the Planning icons.
5. In the building tree on the left, click the + icon of the building that contains the floor.
The floor names display.
6. Click the floor name.
The floor map displays.
7. Click an access point to select it.
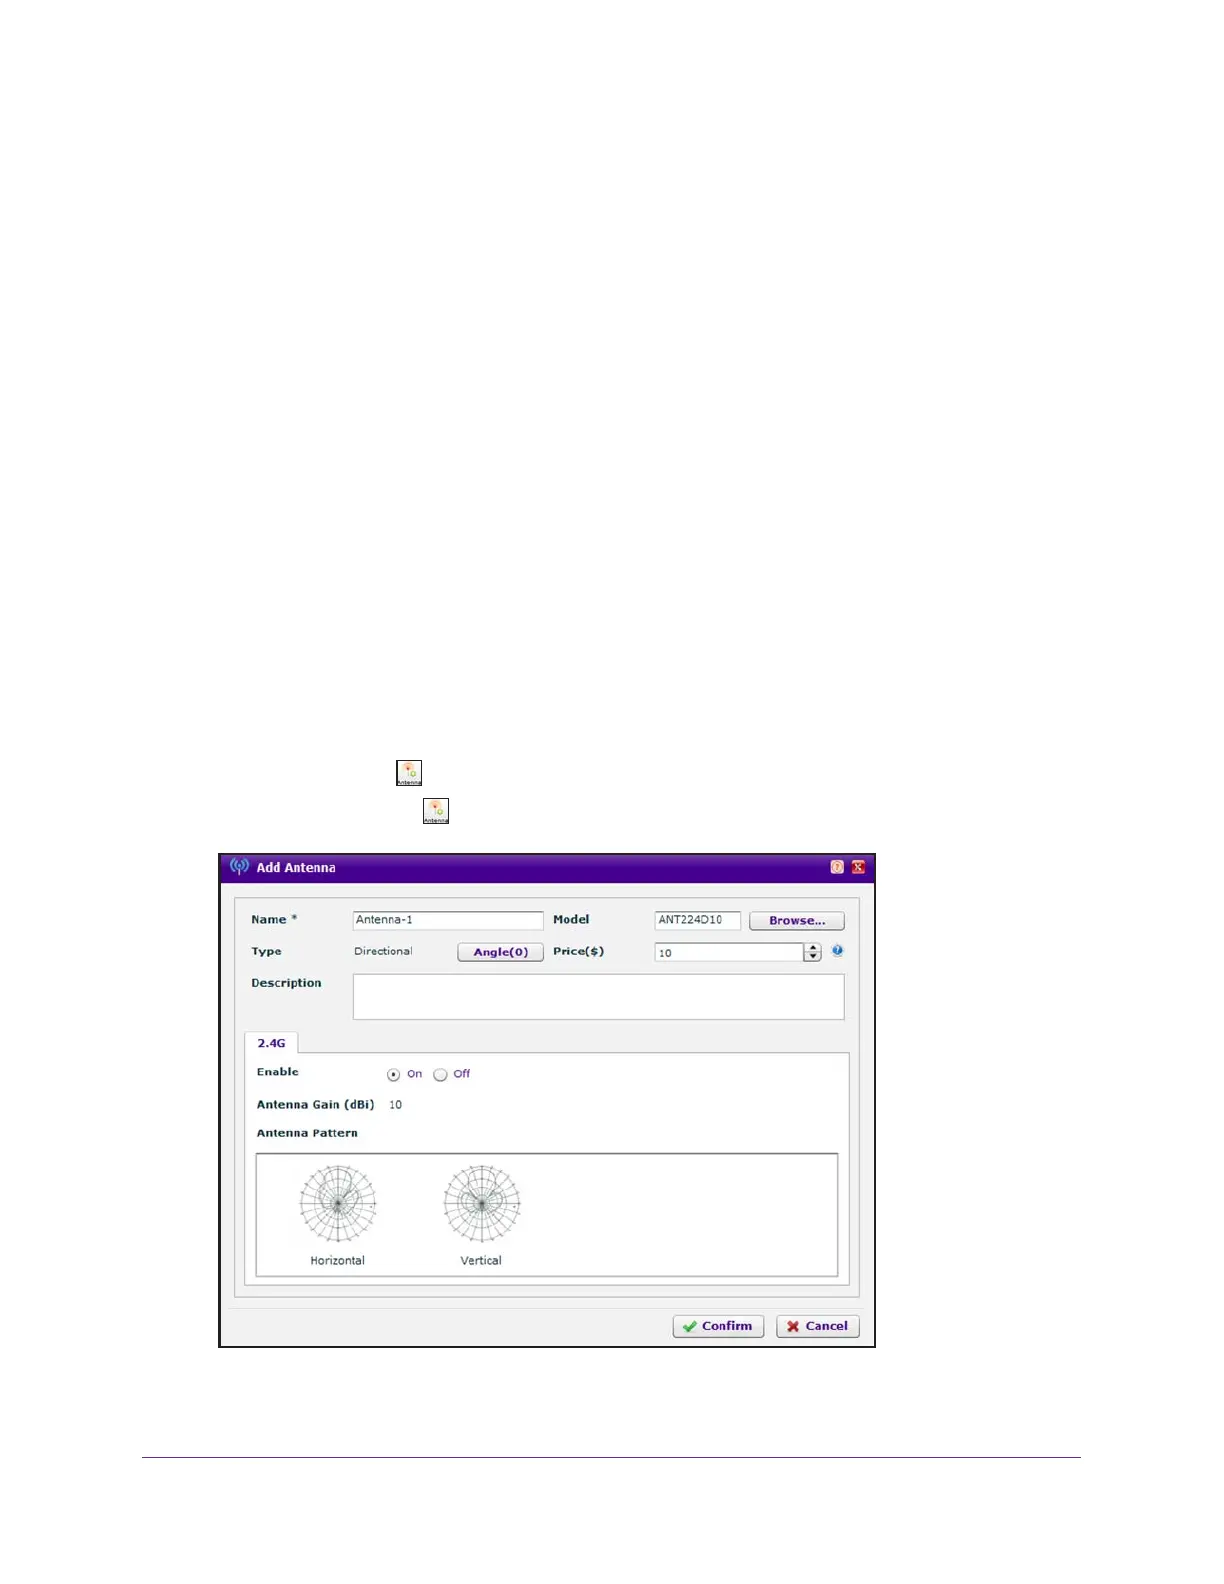
8. Click the Antenna icon.
Note: The Antenna icon is masked if you do not select an access point.