94 Océ 9600 Copier/Printer User Manual
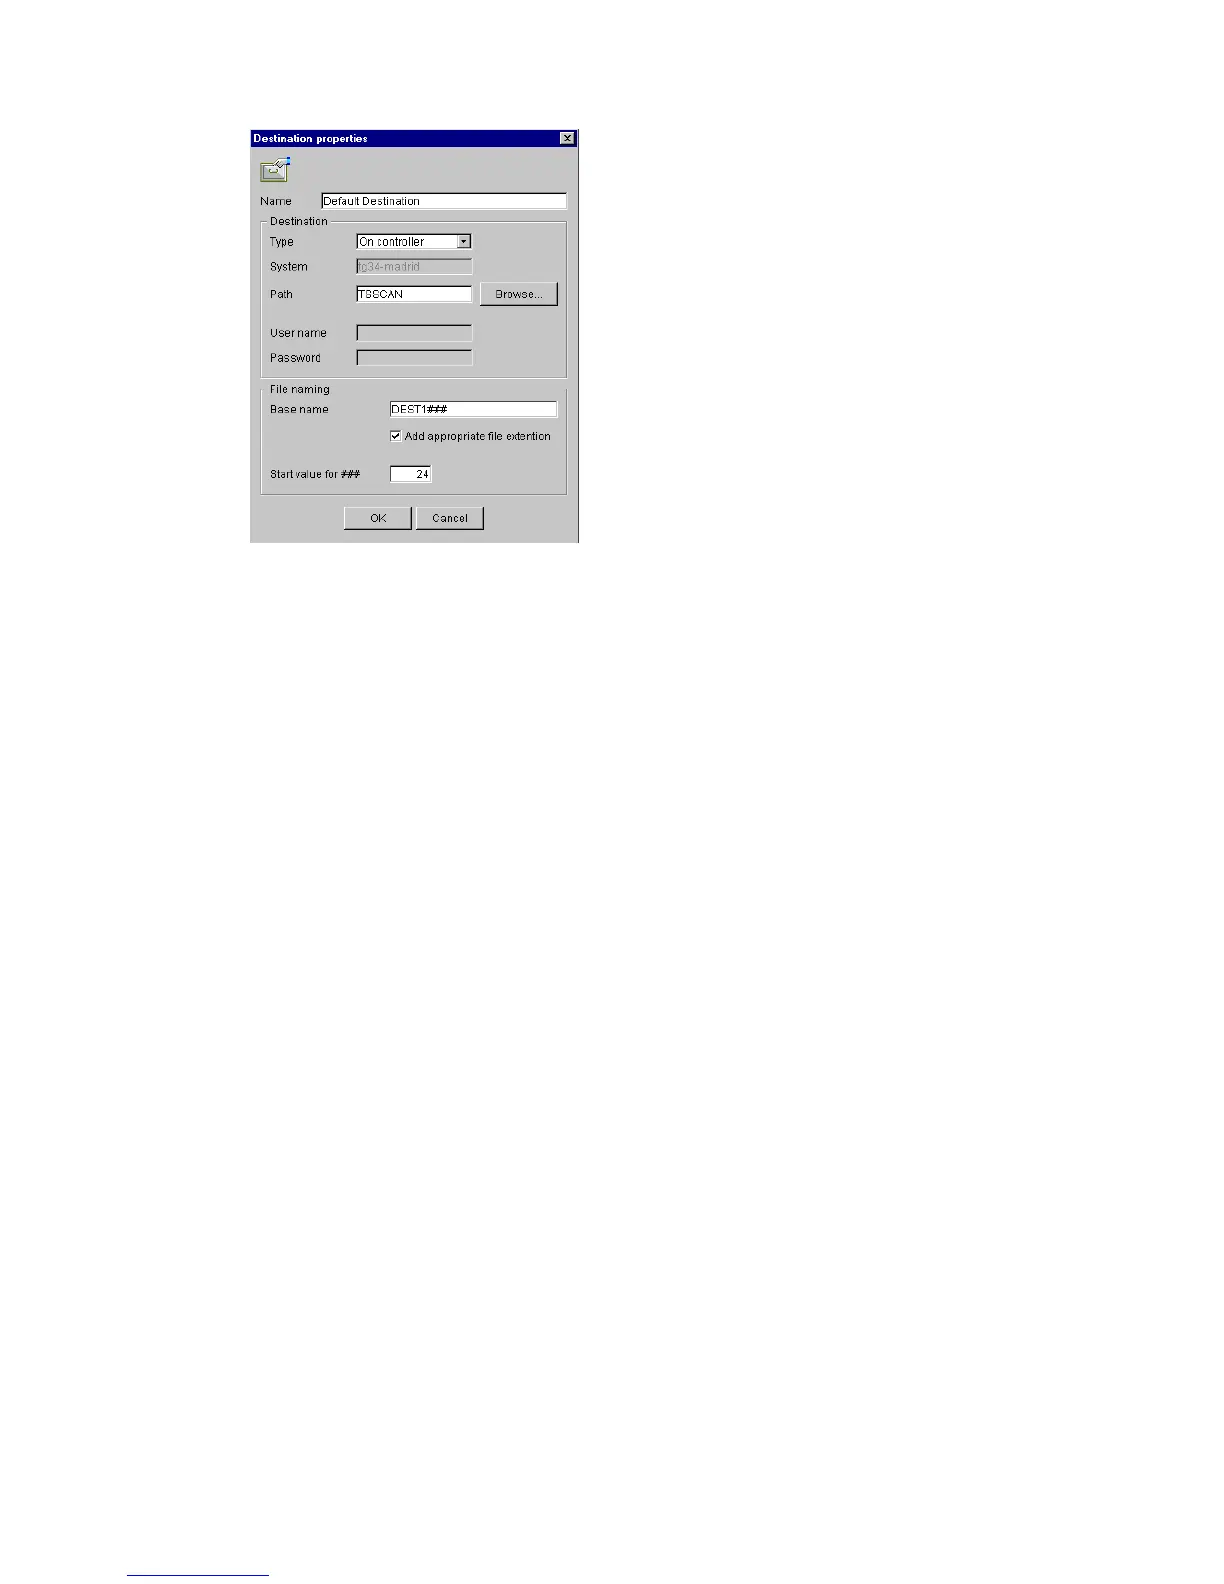
The following dialog box appears (see figure 49):
[49] ‘Destination properties’ window
3
Enter a logical name for the destination in the ‘Name’ text box.
This logical name also appears on the scanner panel (see figure 41 on page 83).
4
Choose a destination type from the ‘Type’ drop-down list box.
You can choose between File Transfer Protocol (FTP), Server Messages Block
(SMB) or local storing in the temporary store on the controller.
5
Enter the name of the system you want to scan your files to in the ‘System’ text
box.
6
Enter a path of the target folder in the ‘Path’ text box. You can also click the
‘Browse’ button to select the path.
Note:
This is only possible if you choose ‘On the controller’ as ‘Type’ (see
step 4).
7
Enter, if required, a user name for the network destination in the ‘User name’
textbox.
8
Enter, if required, the appropriate password for the network destination in the
‘Password’ textbox.
9
Click Ok to accept the destination properties.
Note:
You can create a maximum number of 10 destinations.
A key operator can determine whether a destination can be modified by an
anonymous user. This done by locking and unlocking a destination.
▼
▼▼
▼
Lock a destination
1
Select a destination.
2
Open the ‘File’ menu and select ‘Properties’.
3
Check the ‘Locked’ check box.