OMRON CHAPTER 2 – Pages
Release 2.0 Page 19
1, 2, 3…
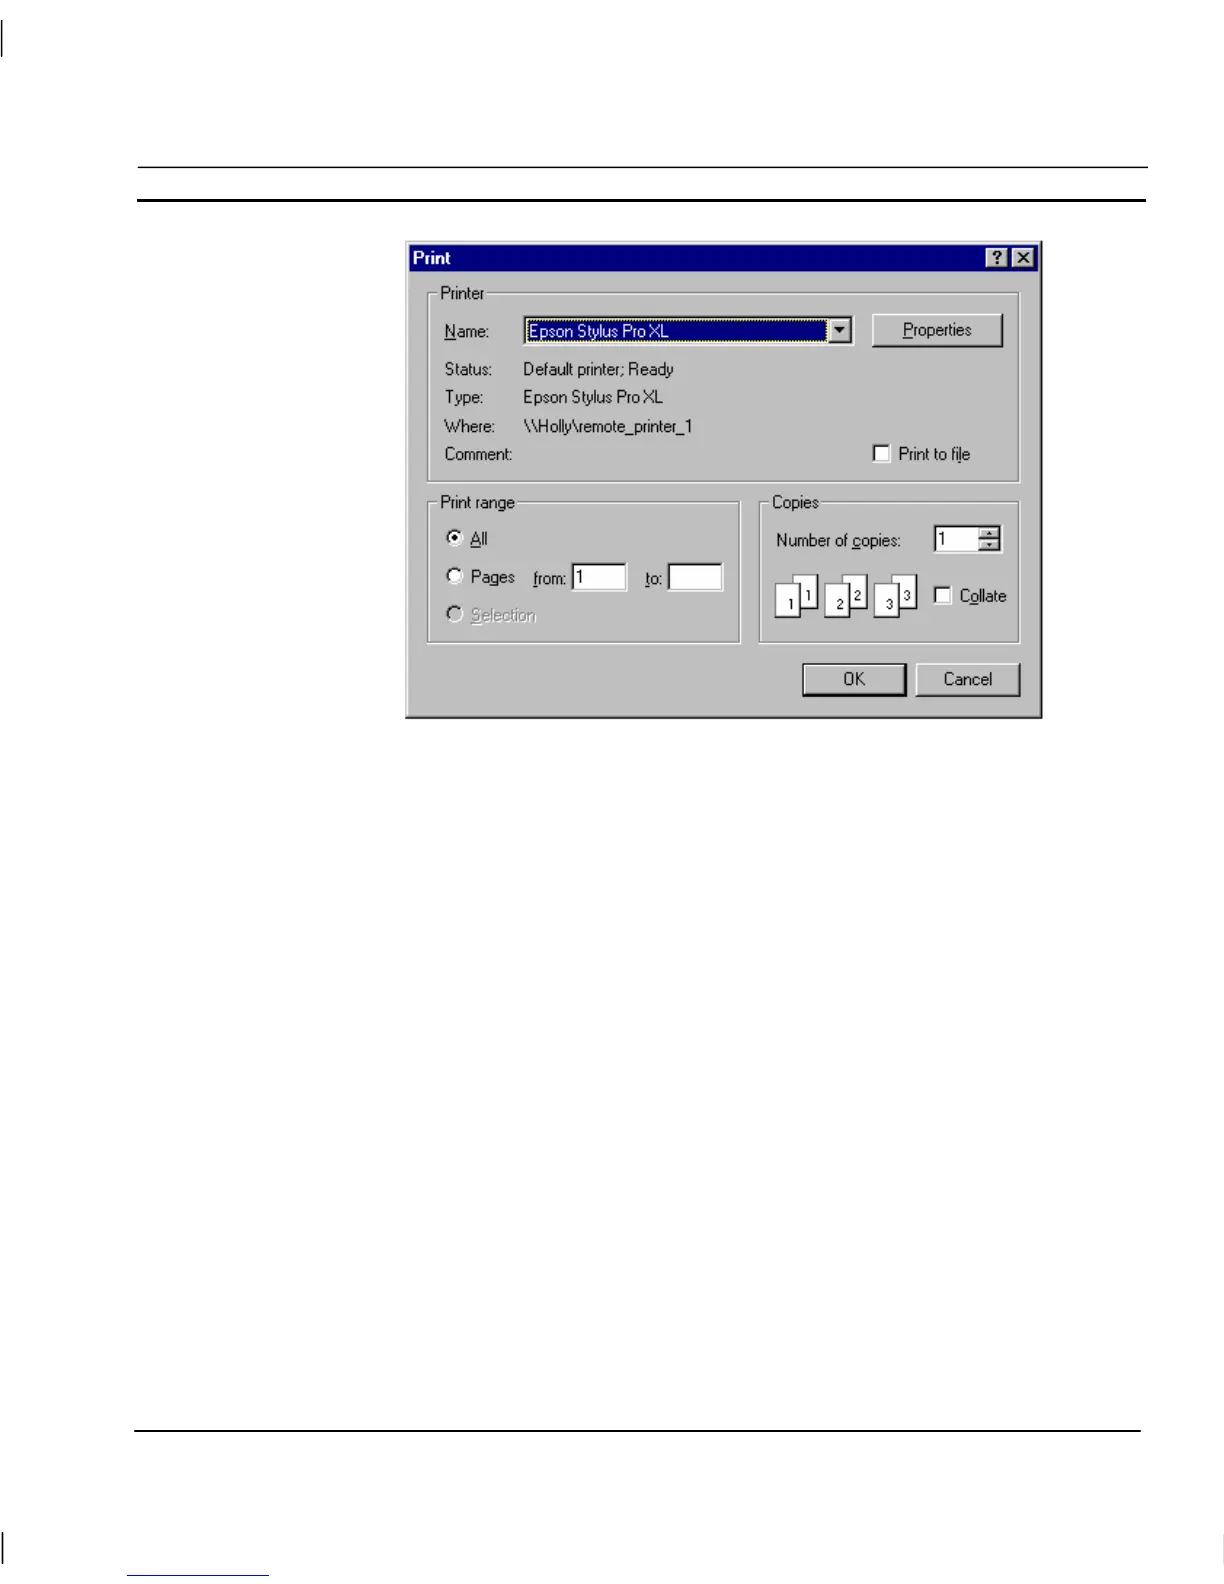
1. Set the print range by clicking one of the settings in the Print range
settings. The Selection setting is only enabled when an item (or items) are
selected on the page prior to starting the print process. Click the Pages
setting and enter a range of pages in the from and to fields.
2. To change the number of copies to be printed, enter a new value in the
Copies field.
3. If multiple copies are selected, click the Collate setting to instruct the
printer to collate the copies as they are printed.
4. To print to file, click the Print to file setting.
5. Click the OK pushbutton to activate printing. Whilst printing is in
progress, a dialog is displayed showing the status of the print job. Clicking
the Cancel pushbutton at this point aborts the printing. Once printed, the
dialog disappears. The final printed version should be similar to that shown
in the Print Preview dialog, with a header describing the project, and a
footer describing the page with a page number and date stamp.
Note: The Properties pushbutton on the Print dialog gives access to advanced printer
configuration functions for the selected printer. For details of these functions,
please consult the Windows User Manual, On-line Help, or the appropriate
Manufacturer’s handbook.