2. Right upper cover [B] ( x 2)
• Before tightening the screws when re-attaching, make sure that 1) the tabs [C] on the cover are
engaged with the grooves on the machine, and 2) the catches on the cover are engaged with
the shoulder screws.
3. Lower right cover [D] ( x 2)
• After removing the screws, slide the cover down to remove it.
• When re-attaching, before tightening the screws make sure that the tabs [E] on the cover are
engaged with the grooves on the machine.
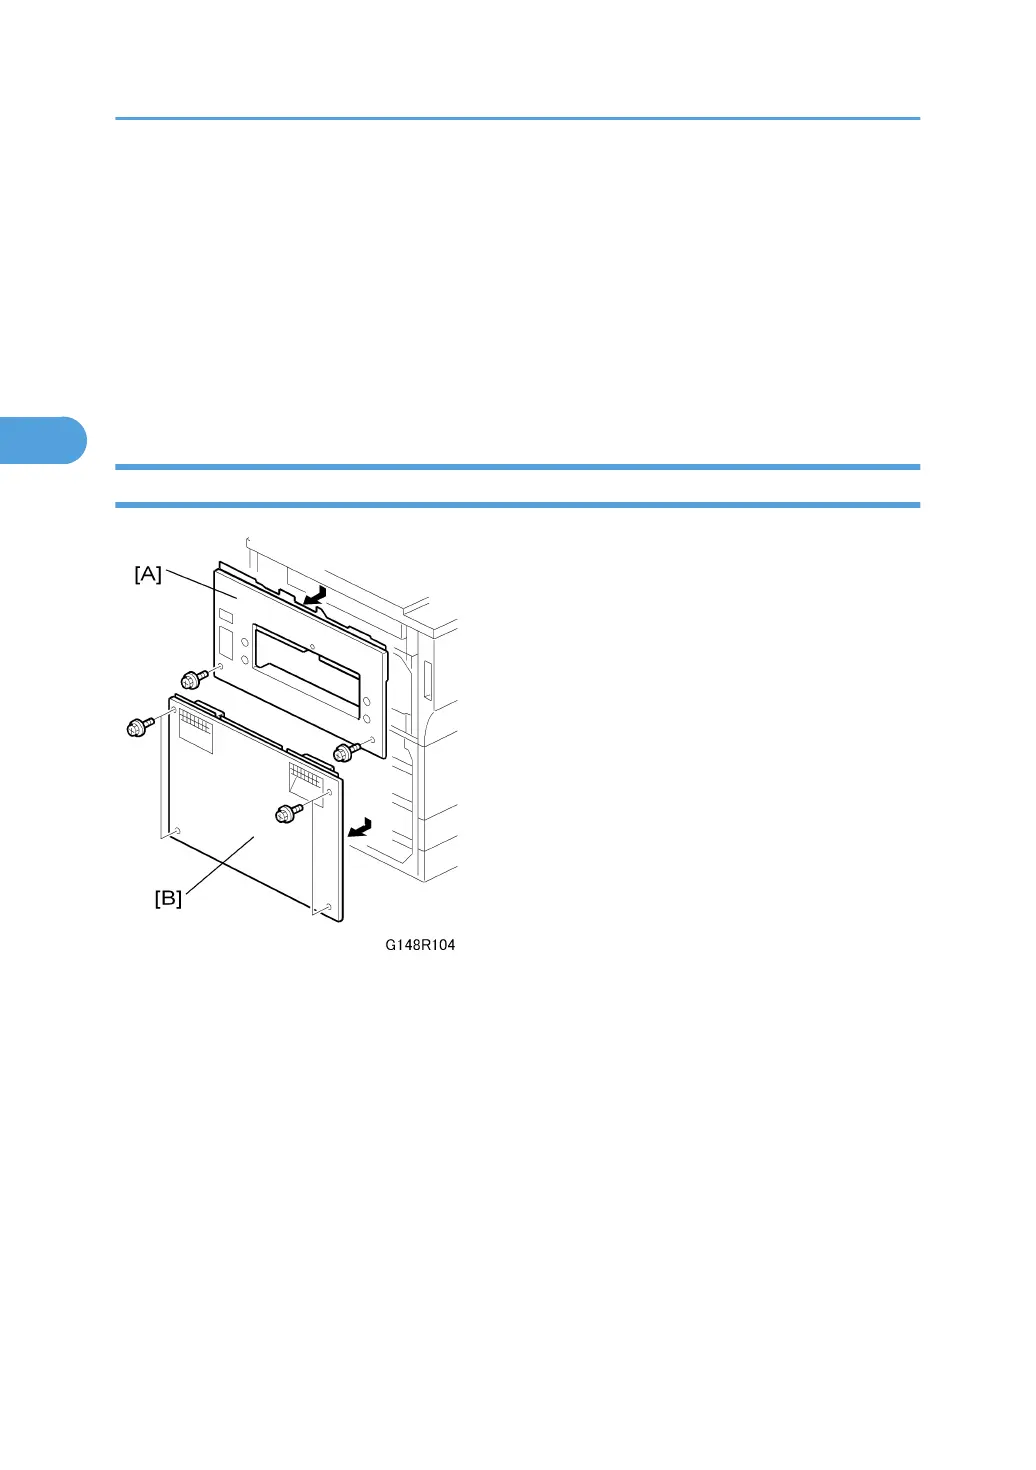
Left Covers
1. Left upper cover [A] ( x 2)
• Slide down to remove.
• When re-attaching, before tightening the screws make sure that 1) the tabs on the cover are
engaged with the grooves on the machine, and 2) the catches on the cover are engaged with
the shoulder screws.
2. Left lower cover [B] ( x 2)
• Slide down to remove.
• When re-attaching, before tightening the screws make sure that the tabs on the cover are en-
gaged with the grooves on the machine.
3. Replacement and Adjustment
136