Nip Band Width Adjustment
1. After the machine is powered on with the main switch, make an A4/LT LEF copy, then stop
the machine while the paper is still in the fusing unit by switching it off.
• This is easier with an OHP sheet. Use an OHP sheet if you have one available.
2. Open the front door, then turn the fusing knob to feed out the copy.
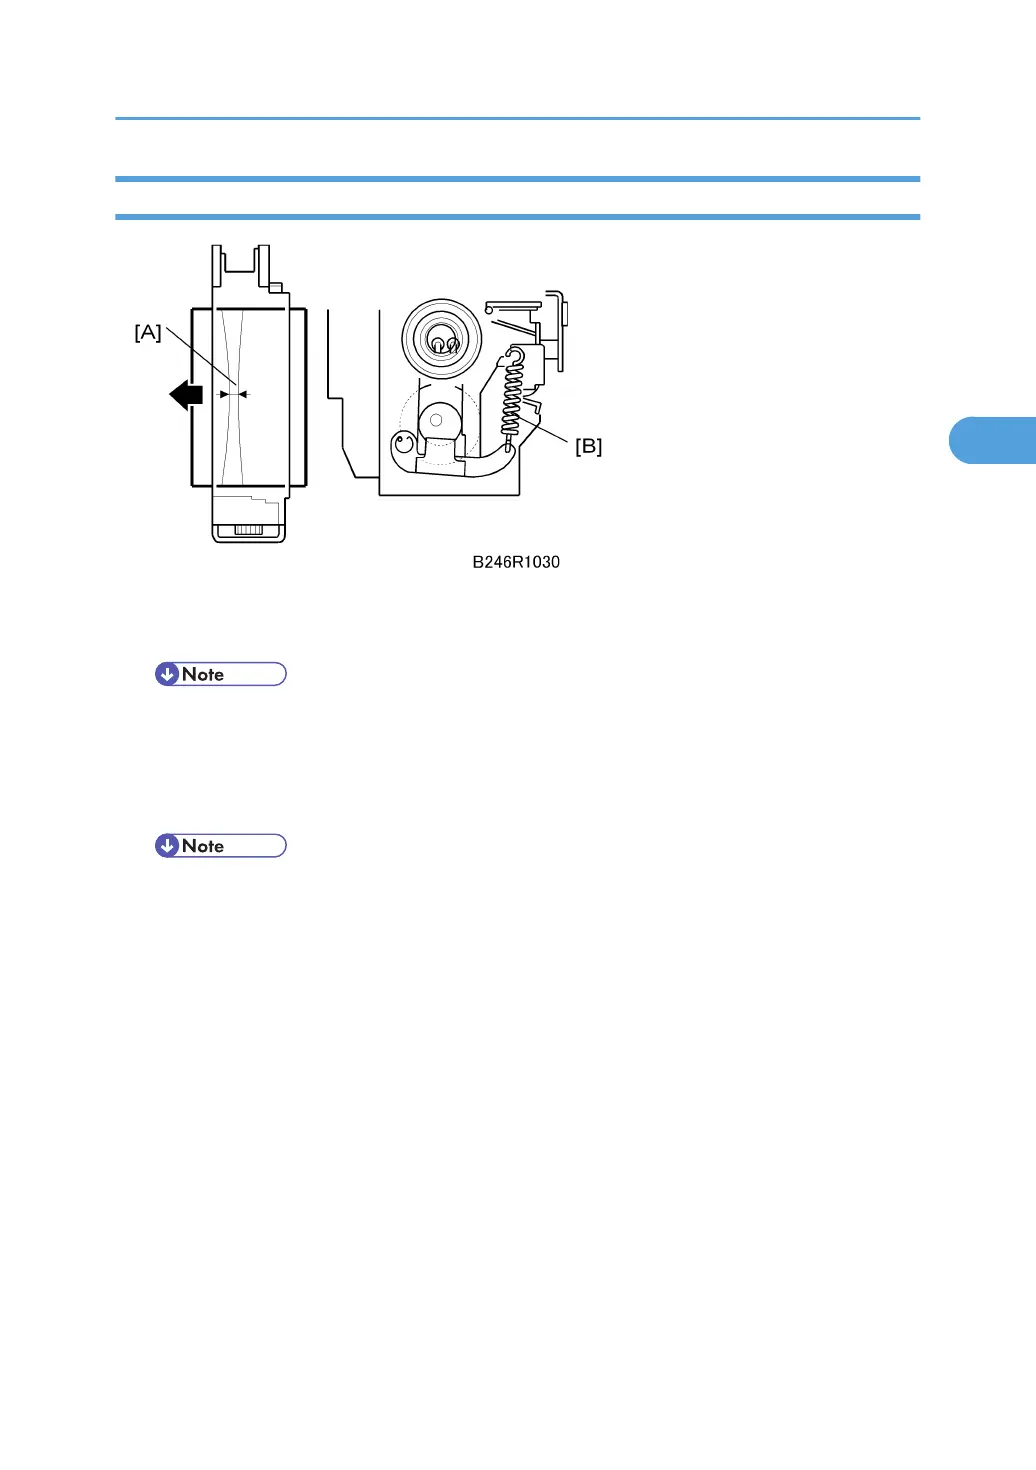
3. Measure the width of the band on the part of the image where it is particularly black. The
band, called the nip band [A], should be 9.0±0.7 mm at the center.
• When the fusing is incorrect (wrinkles, offset, curl), measure the nip band width.
• The nip band width can be adjusted by changing the position of the springs [B] on either end of
the pressure roller.
• The fusing temperature can also be adjusted with SP1105 (Fusing Temperature Adjustment) for
Normal, OHP, and Thick Paper.
Fusing Unit
193