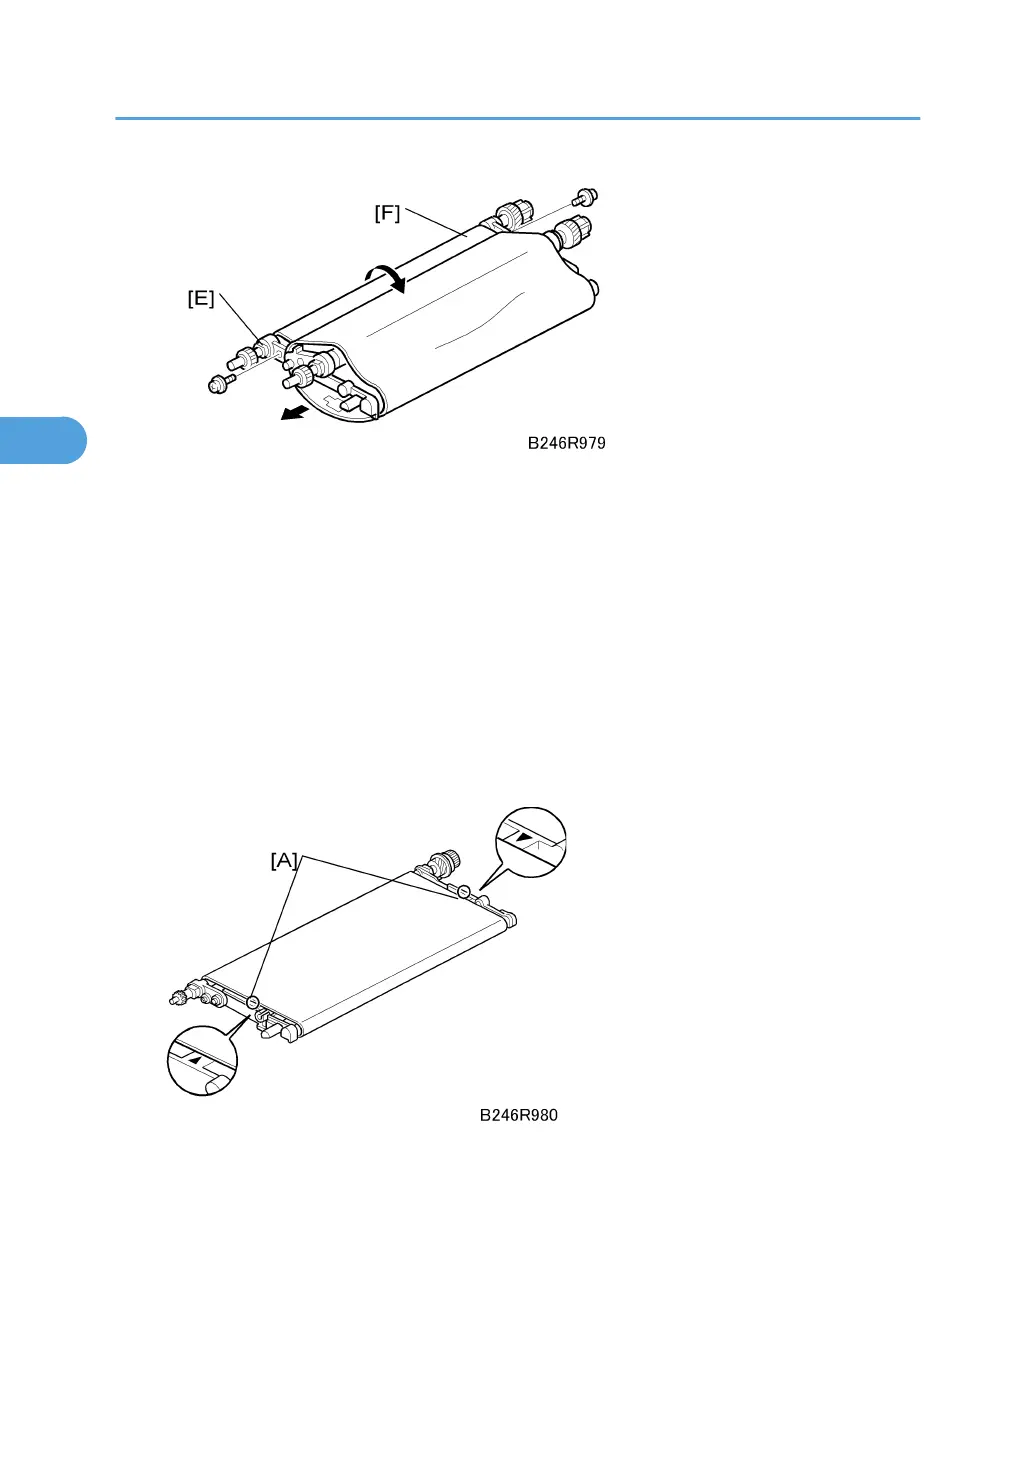
3. Release the drive roller [E] ( x 2).
4. Press in on the drive roller to collapse the unit into a “U” shape [F].
5. Remove the belt and replace it.
Re-installation
• Before re-assembling the transfer belt unit, use a clean cloth and alcohol to clean the contact points
of the drive roller, idle roller, and transfer roller. Make sure these areas are clean and free from
toner, paper dust, etc.
• Never touch the surface of the belt with bare hands and never apply alcohol to the surface of the
belt. Clean it with a blower brush. Check the underside of the transfer belt and clean with the blower
brush.
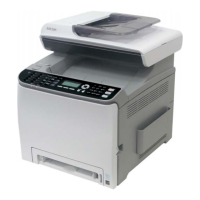
• When re-assembling the transfer belt unit, make sure that the transfer belt is centered between the
triangular marks [A] on either side of the unit.
• After re-assembly, make sure that the transfer belt is inside the transfer current terminal. The belt
could be cut if it is not positioned correctly.
• Confirm that both the ground and transfer current terminal are connected and that the harnesses
are not touching the release lever.
3. Replacement and Adjustment
174