• Fusing unit. See "Fusing Unit Removal"
1. Upper cover [A] ( x 1)
2. Press in on the internal pawls [B] to release them then remove them.
• Make sure that the pawls [B] engage correctly when you reinstall the unit.
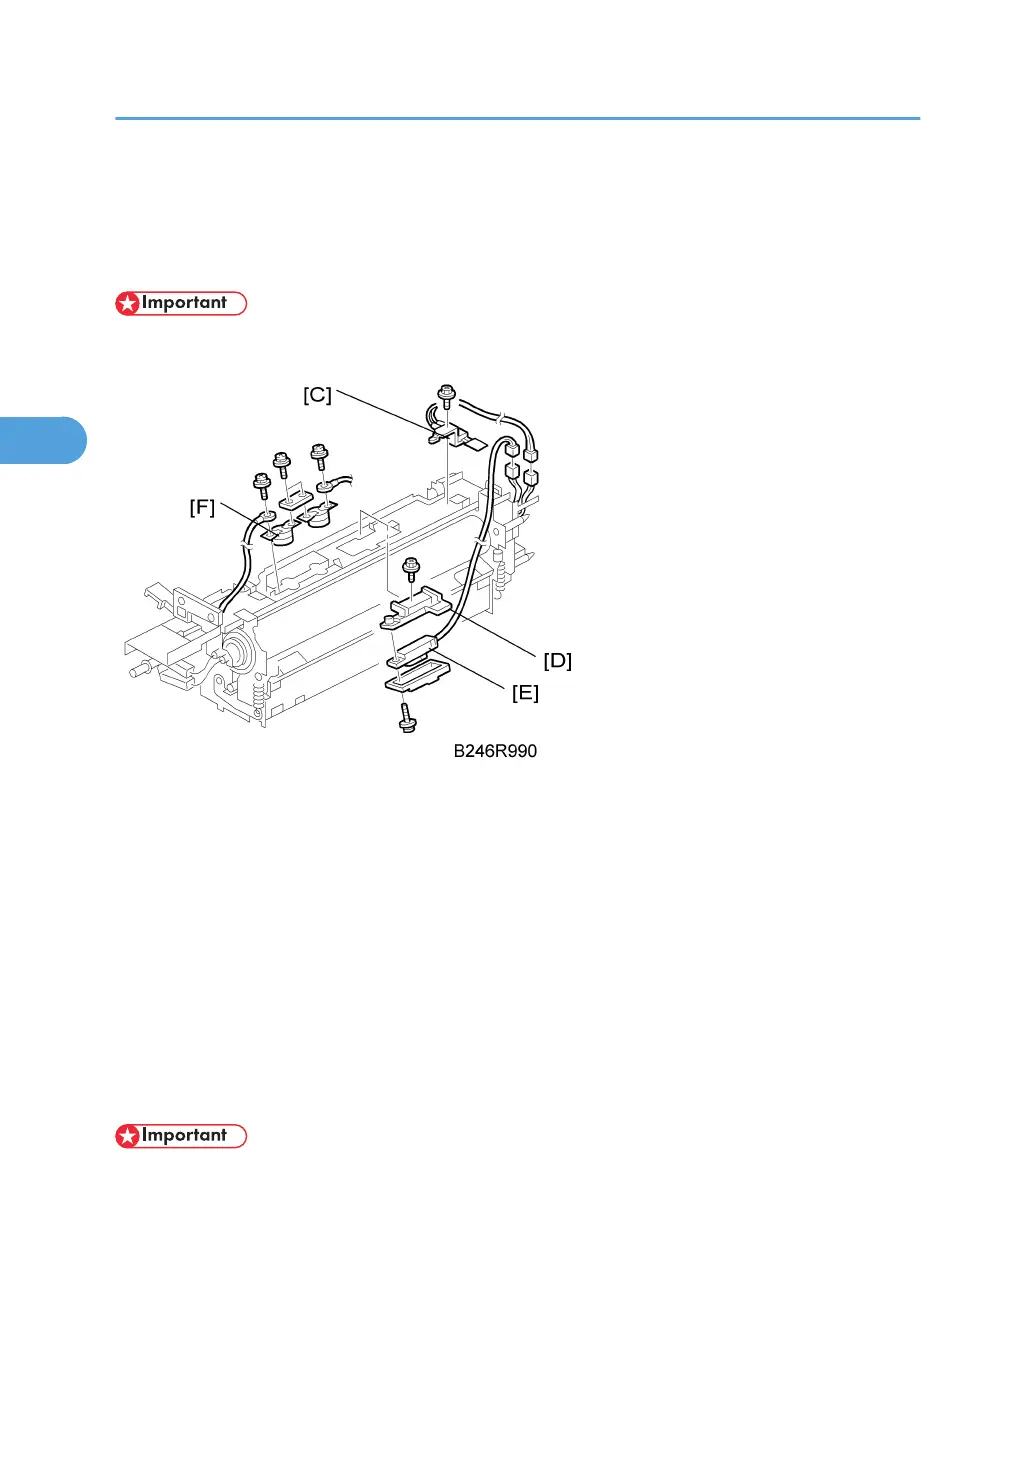
1. End thermistor [C] ( x 1, x 1)
2. Bracket [D] ( x 1)
3. Center thermistor [E] ( x 1)
4. Two thermostats [F] ( x 4)
Reinstallation
• To prevent damage to a thermostat, never touch its detection surface.
• Place the end of the thermostat harness that has the round lead [A] in between the two ribs ¶, · in
the bracket.
• Tighten the screw for the round lead [A] as tight as possible without damaging the screw or screw
hole.
• If the harness is not positioned between the between the bracket ribs ¶, · (as shown under “Incorrect"
below), this could cause an error (SC542 or SC545).
3. Replacement and Adjustment
180