Chapter 3 Functions for Master Making
54
Adjusting the Gradation of Photos
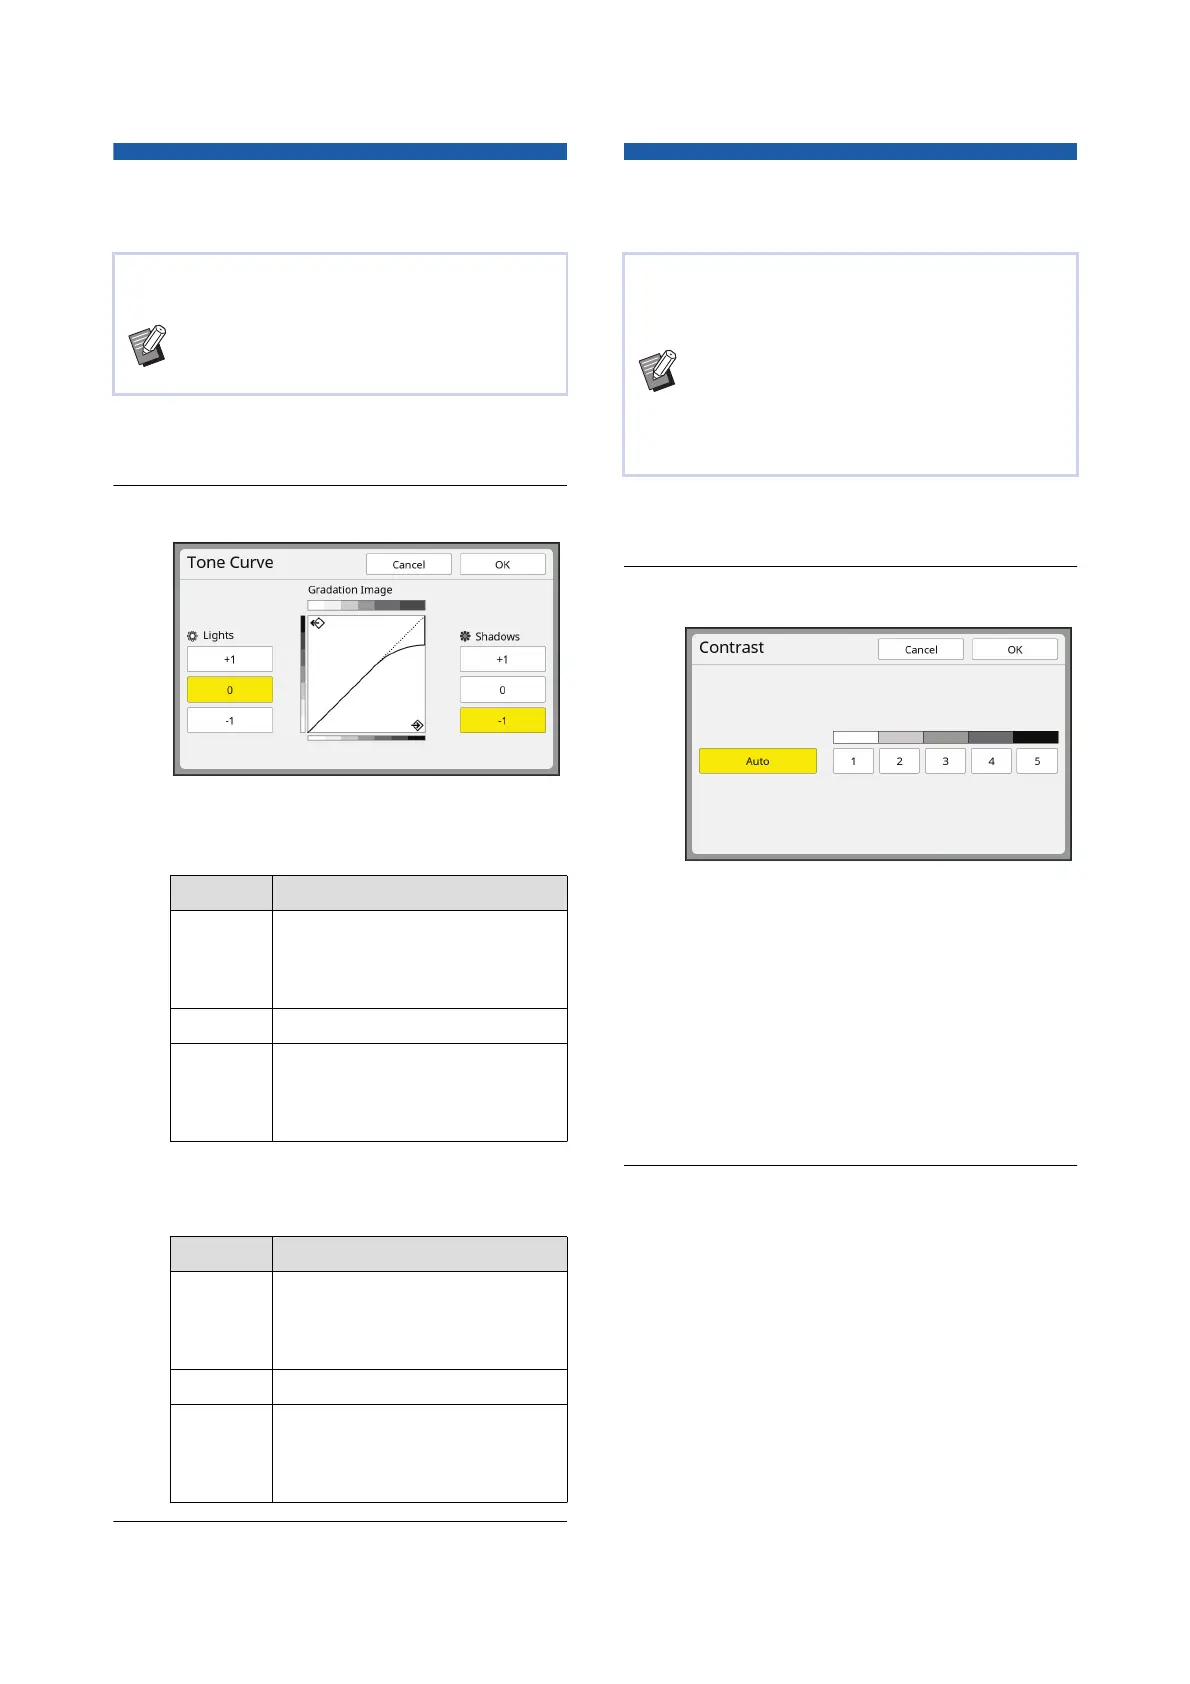
[Tone Curve]
1
Touch [Tone Curve] in the [Func-
tions] tab screen.
2
Touch a target setting button.
■ [Lights]
You can adjust the expression of the bright
parts in the photo.
■ [Shadows]
You can adjust the expression of the dark parts
in the photo.
3
Touch [OK].
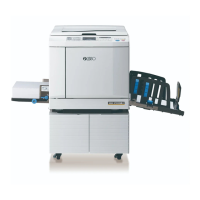
Adjusting the Contrast of the
Original [Contrast]
1
Touch [Contrast] in the [Basic] tab
screen.
2
Touch a target setting button.
■ [Auto]
You can select this button only when [Line] is
selected in [Image] (A 51).
When you select [Auto], the contrast is
adjusted optimally according to the paper color
of the original.
■ [1] to [5]
You can adjust the scanning density in five lev-
els.
Select [1] for the lowest density.
Select [5] for the highest density.
3
Touch [OK].
You can adjust the tone of the bright parts and dark
parts in a photo in incremental levels.
B[Tone Curve] can only be selected when a
setting other than [Line] is specified for
[Image] (A 51).
Setting Description
[+1] Reduces the range that is
expressed in bright colors.
The fine parts within the bright
range becomes more visible.
[0] Applies standard processing.
[-1] Enlarges the range that is
expressed in bright colors.
Some fine parts within the bright
range may not be visible.
Setting Description
[+1] Enlarges the range that is
expressed in dark colors.
Some fine parts within the dark
range may be blurred.
[0] Applies standard processing.
[-1] Reduces the range that is
expressed in dark colors.
The fine parts within the dark
range becomes more visible.
You can adjust the contrast according to the condi-
tions such as the paper color and the tint of the orig-
inal.
BYou can change the default setting in
[Scanning Contrast] (A 118) under
[Admin.].
BThe [Contrast] setting cannot be changed
when [Ink Saving] (A 56) is turned on.