Chapter 4 Functions for Printing
80
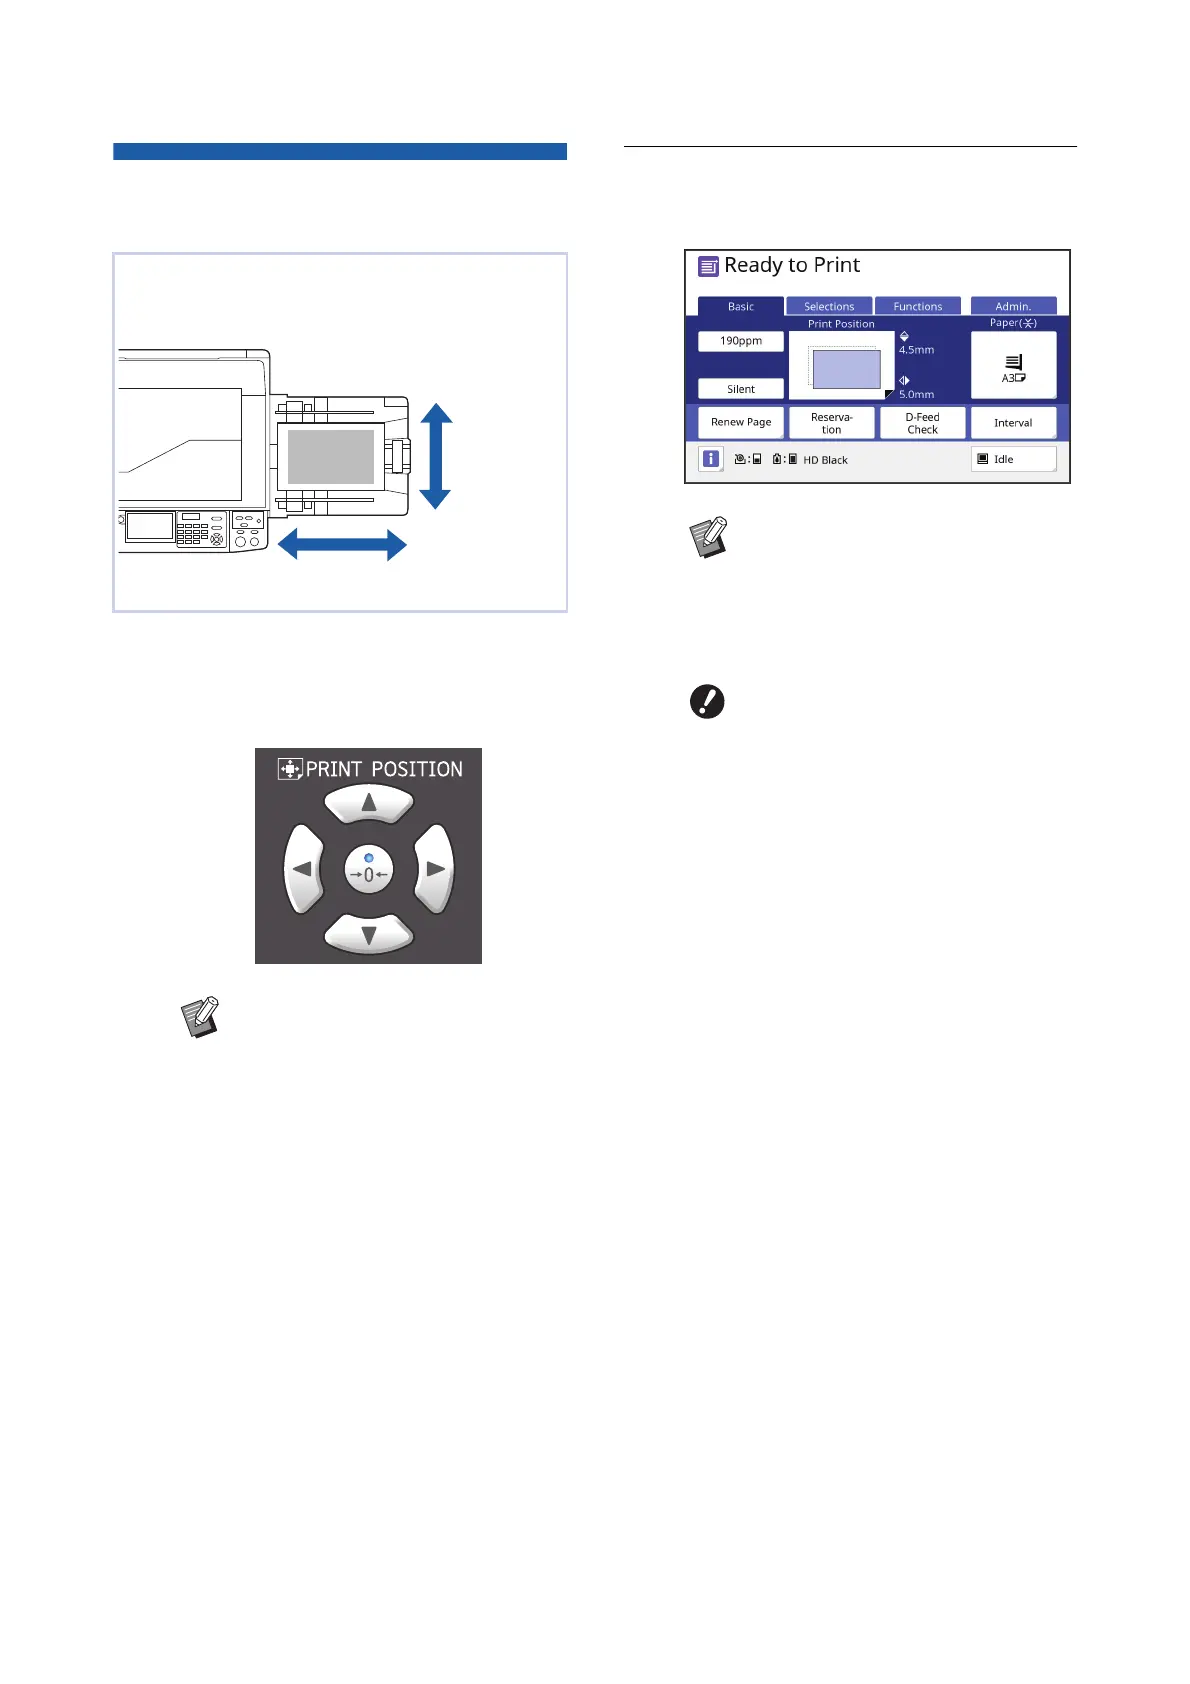
Adjusting the Print Position
[PRINT POSITION]
1
Press the [PRINT POSITION] keys
([M], [V], [O], and [N]).
Each press of the key moves the printed image
by 0.5 mm (1/64 inches).
2
Check the shifted length.
The length that the printed image has been
shifted is displayed on the touch panel screen.
You can adjust the print position.
It is possible to adjust the print position not only
before but also during the printing process.
BPress the [P] key to return the
printed image to the standard posi-
tion.
BTo return the printed image to the
standard position during the printing
process, press and hold the [P]
key.
BWhen [Fine Adjust Mode] in the
[Functions] tab screen is turned on,
you can adjust the print position by
approximately 0.1 mm (1/254
inches). If [Fine Adjust Mode] is not
displayed, consult your dealer or
authorized service representative.
Vertical
direction
Horizontal direction
BThe shifted length that is displayed
on the screen is a reference value.
After the adjustment, press the
[PROOF] key to check the printed
paper.
BIf the following operations are
performed, the print position is
returned to the standard position.
CPress the [RESET] key.
CTurn off the power.