Chapter 3 Functions for Master Making
68
Adjusting the Master Making
Position [Binding Margin Adj.]
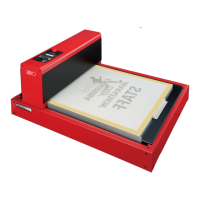
1
Touch [Binding Margin Adj.] in the
[Functions] tab screen.
2
Touch the button for the side
where you want to extend the mar-
gin.
3
Specify the length to shift.
You can specify the length to shift using either
of the following methods.
• Entering a numeric value using the numeric
keys.
• Touching [F] or [G].
4
Touch [OK].
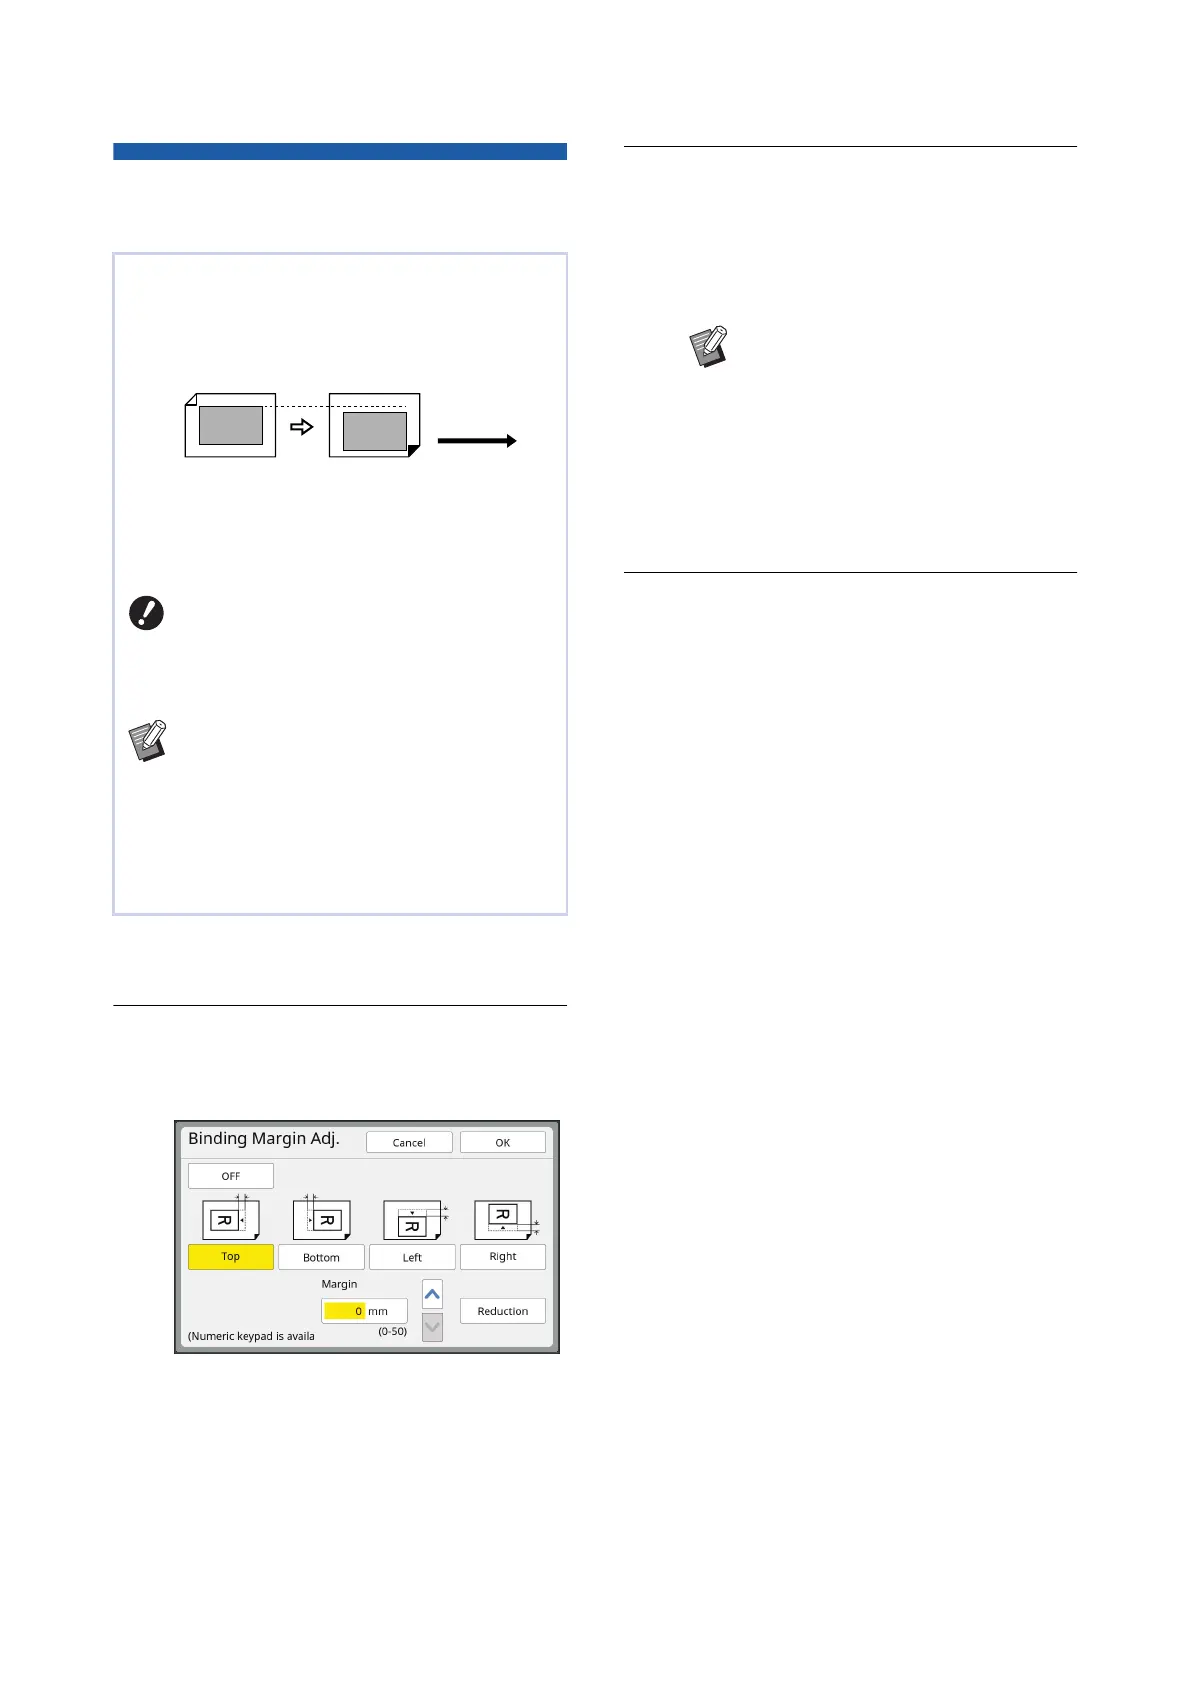
You can adjust the master making position, for
example, when you want to extend a margin to bind
the printed paper.
Select the side where you want to extend the mar-
gin, and then specify the length to shift.
If you place multiple originals on the optional auto
document feeder, you can perform master making
for all originals with the master making position
shifted.
BIf there is insufficient margin for an
original and you shift the master mak-
ing position to extend the margin on
one side, some images may be missing
on the other side.
BYou cannot use this function with the fol-
lowing functions.
C[Layout] (A 60)
C[Multi-Up Print] (A 62)
C[2 Up] (A 66)
C[Book Shadow] (A 55)
C[Overlay] (A 76)
C[Quick Master Making] (A 57)
Paper feeding
direction
BPressing the [C] key returns the
length to [0 mm] ([0.0 inches]).
BWhen you touch [Reduction], the
original size is reduced so that the
original size fits the paper size. As a
reference, this operation uses the
center of the page after the margin
is omitted by the amount that is
specified in [Margin].