Chapter 3 Functions for Master Making
71
3
5
Set the other required printing
conditions.
(A 50 “Functions for Master Making”)
6
Press the [START] key.
Scanning of the original starts.
If you placed an original on the glass platen in
step 1, place the original that is to be scanned
next and then press the [START] key every
time the scanning of one original is finished.
7
Touch [Exit].
When scanning is complete for all the originals,
touch the [Exit] button.
A screen is displayed to confirm the start of
master making.
8
Touch [Yes].
Master making starts.
The basic screens for master making and print-
ing for a data original are displayed.
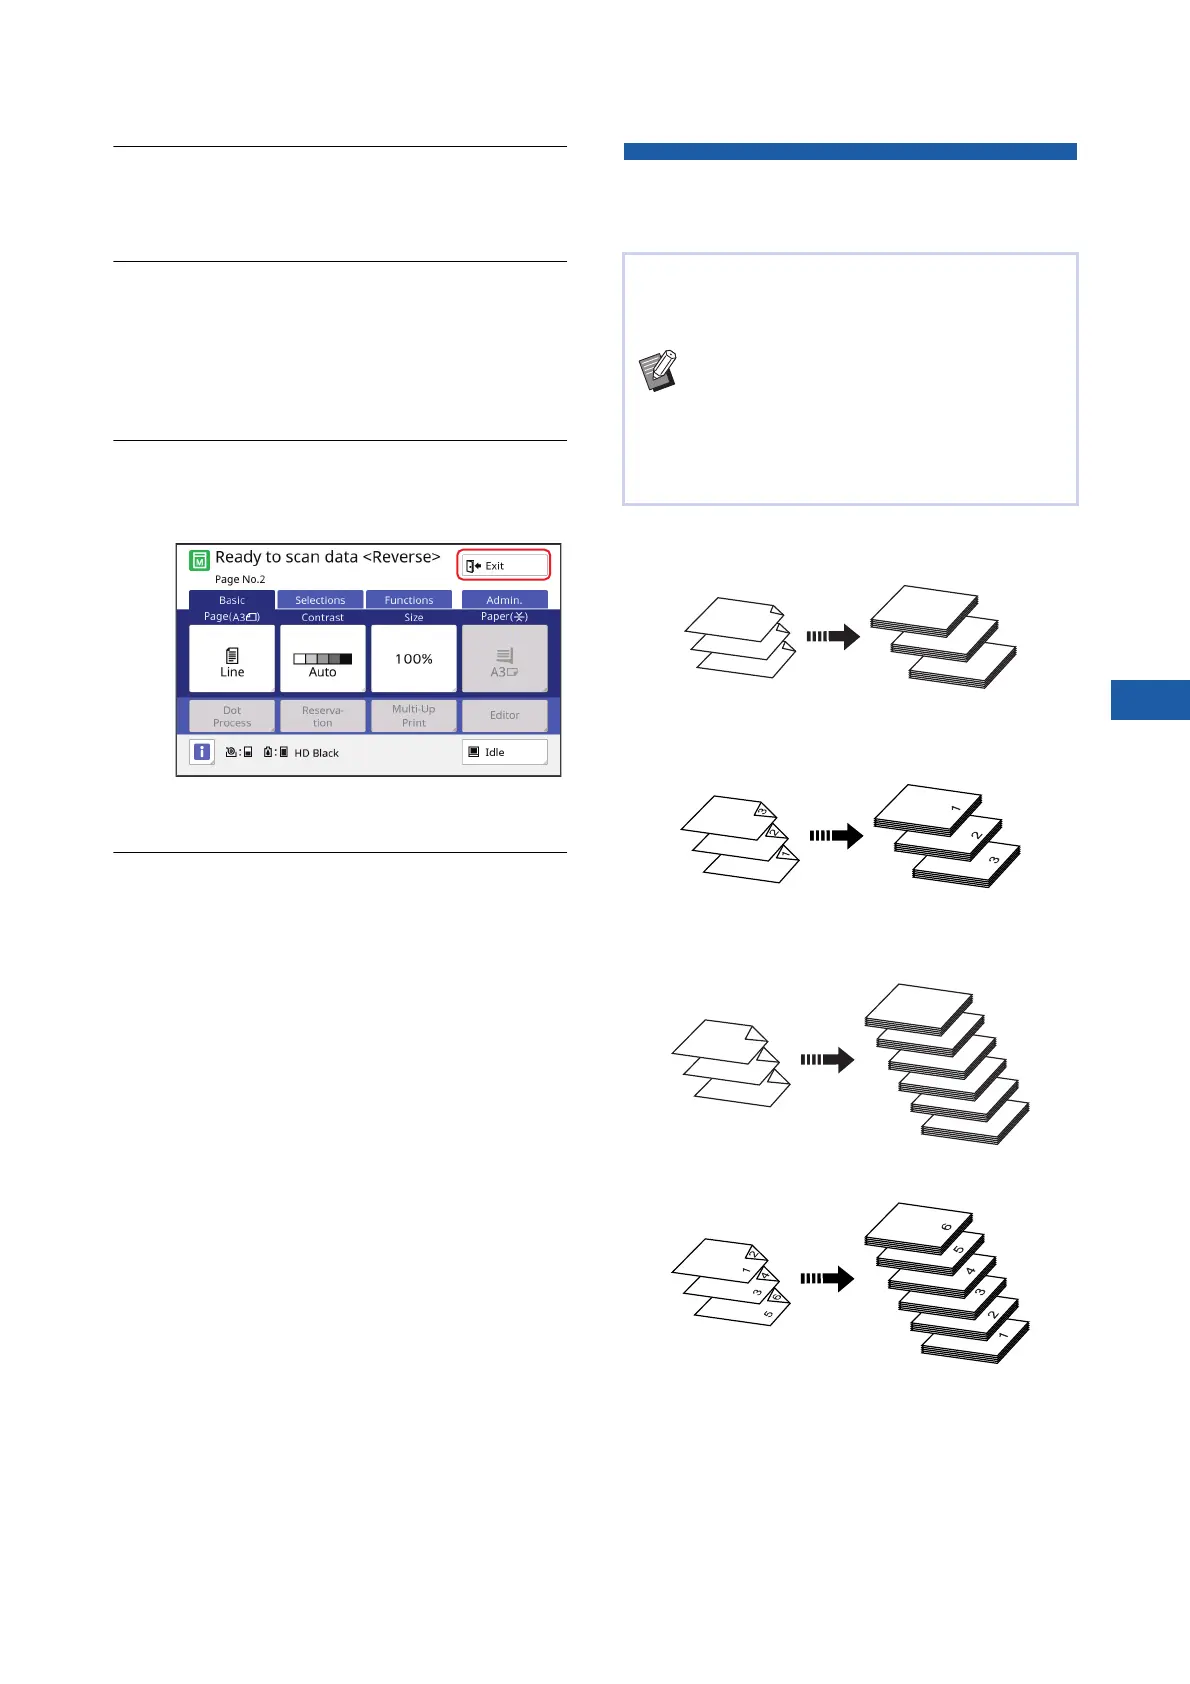
Specifying the Scanning Side of
Original [Scanning Side -ADF]
■ [Front Side -> Simplex]
■ [Back Side -> Simplex]
■ [Duplex -> Simplex]
You can specify which side of the original is
scanned when the optional auto document feeder is
used.
BYou can change the default setting in
[Scanning Side -ADF] (A 118) under
[Admin.].
BYou cannot use this function with the fol-
lowing function:
C[Top Margin Adj.] (A 67)
1
2
3
1
2
3
Original Printed paper
Original Printed paper
1
3
2
5
6
4
4
5
6
1
2
3
Original
Printed paper
Original
Printed paper