Chapter 3 Functions for Master Making
61
3
2
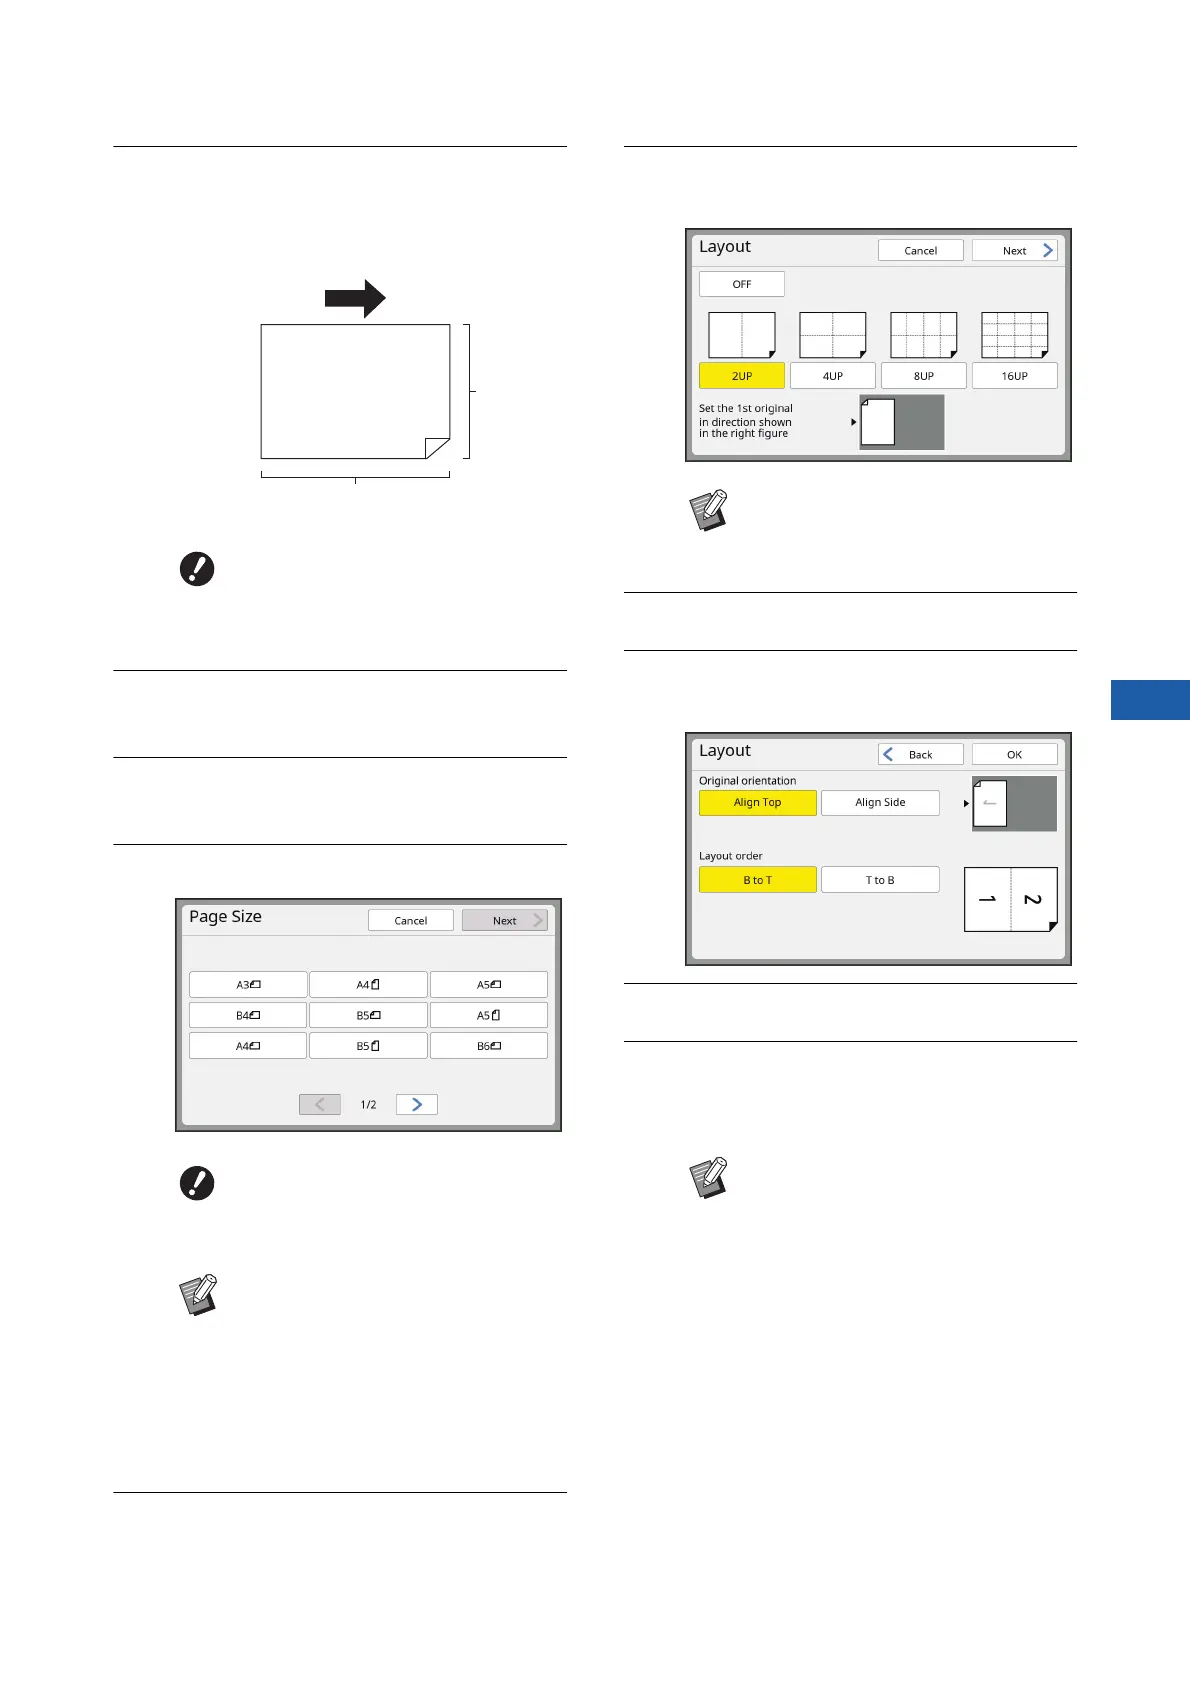
Place the paper.
Place the paper in the direction of a short edge
paper feed.
3
Set the paper receiving tray.
(A 33 “Setting up the paper receiving tray”)
4
Touch [Layout] in the [Functions]
tab screen.
5
Touch an original size.
6
Touch [Next].
7
Touch the number of copies to be
laid out on a single sheet of paper.
8
Touch [Next].
9
Set [Original orientation] and [Lay-
out order].
10
Touch [OK].
11
Set the other required printing
conditions.
(A 50 “Functions for Master Making”)
BUse a standard size of paper. You
cannot use custom size paper or
paper sizes that are registered in
[Admin.].
BFor 4-up and 16-up printing,
touch an original size button that
shows a R symbol.
BThe magnification rate is automati-
cally calculated using the selected
original size and the size of the
paper that is placed. If the magnifi-
cation rate is out of the range
between 50 and 200%, the combi-
nation of the original and paper
sizes cannot be used.
Paper feeding direction
Short side
Long side
BCheck that the original is placed in
the direction shown at the bottom of
the screen.
BTo cancel [Layout], perform step 4
again and display the setting
screen. Touch [OFF] and then [OK].