Chapter 3 Functions for Master Making
65
3
2
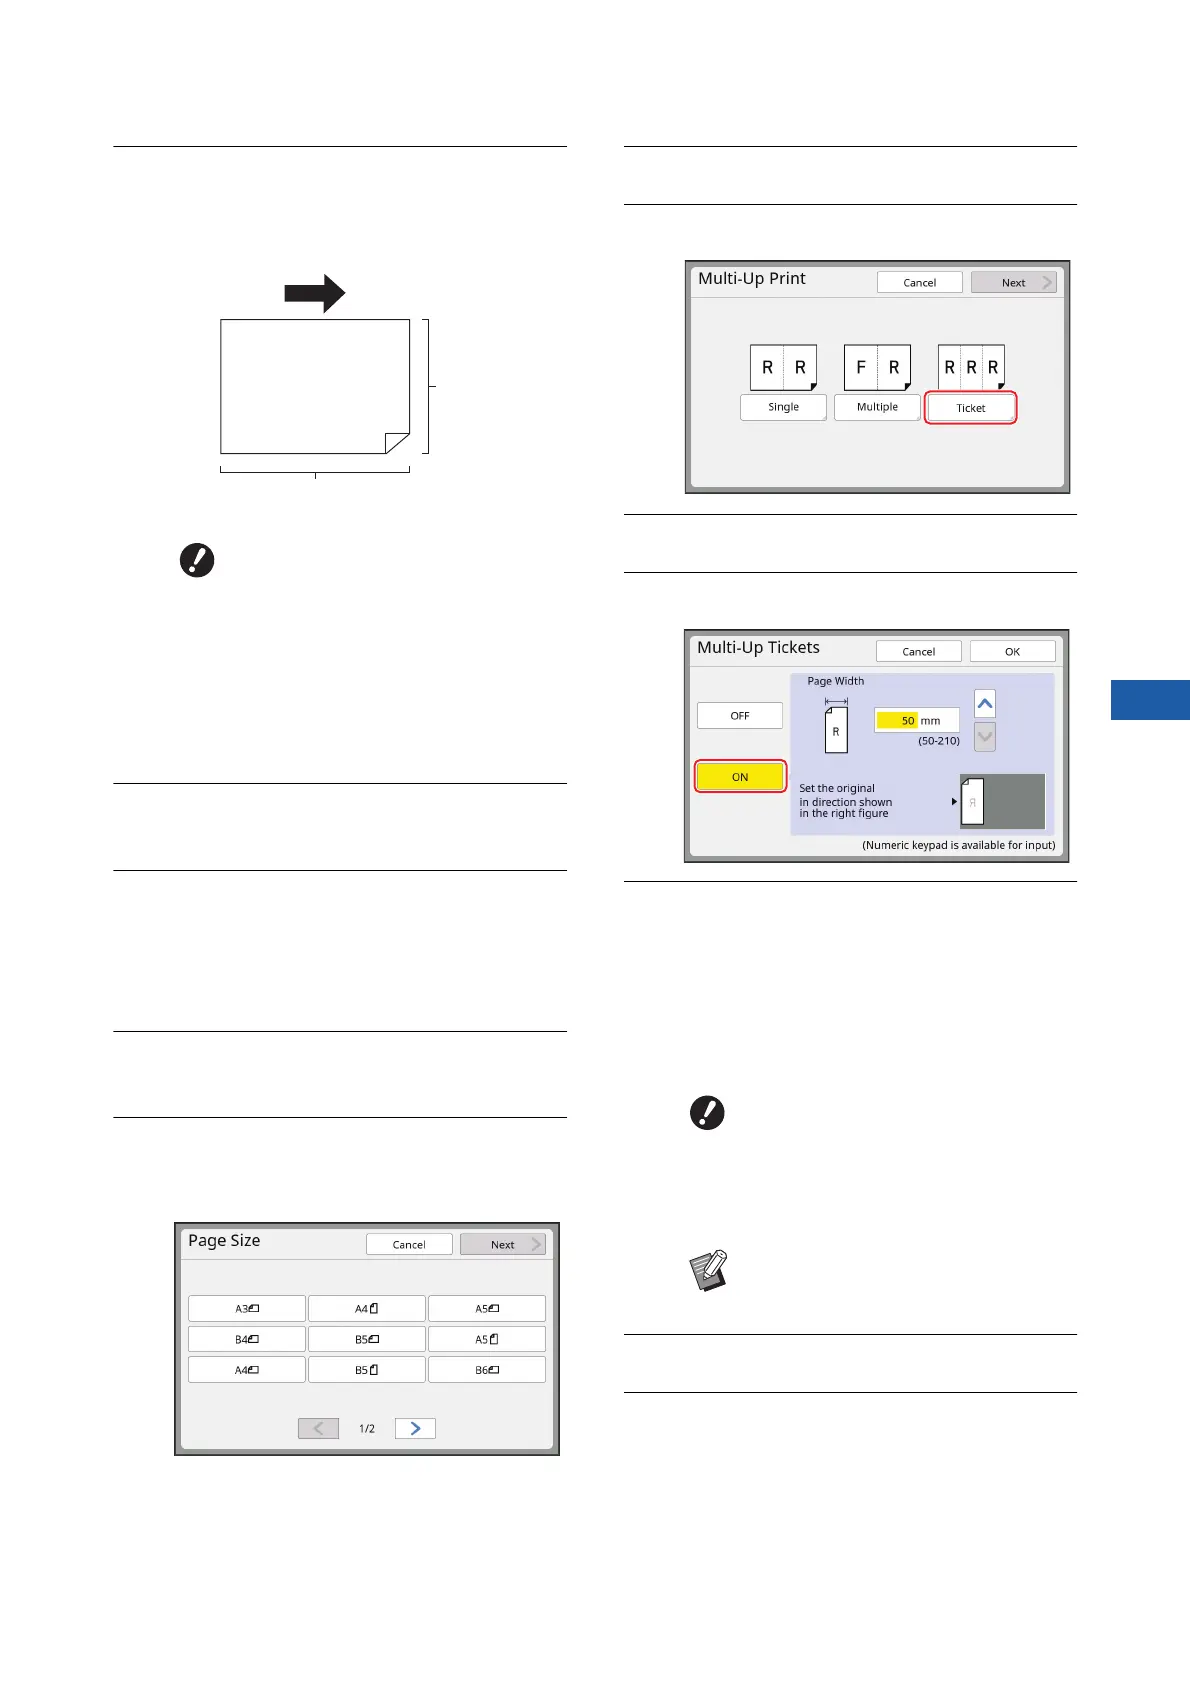
Place the paper.
Place the paper in the direction of a short edge
paper feed.
3
Set the paper receiving tray.
(A 33 “Setting up the paper receiving tray”)
4
Check that the master making
basic screen is displayed.
If a screen other than the master making basic
screen is displayed, press the [MASTER MAK-
ING] key (A 24).
5
Touch [Multi-Up Print] in the
[Functions] tab screen.
6
Touch any size.
The selected size has no effect in multi-up tick-
ets.
7
Touch [Next].
8
Touch [Ticket].
9
Touch [Next].
10
Touch [ON].
11
Specify the short side length
(width) of the original.
You can specify the short side length using
either of the following methods.
• Entering a numeric value using the numeric
keys.
• Touching [F] or [G].
12
Touch [OK].
13
Set the other required master mak-
ing conditions.
(A 50 “Functions for Master Making”)
(A 90 “Useful Functions”)
BUse a standard size of paper. You
cannot use custom size paper or
paper that are registered in
[Admin.].
BWhen you set [Size] in step 13 of
the printing condition setting,
place the paper that is appropri-
ate for the original size after it has
been enlarge or reduced.
Paper feeding direction
Short side
Long side
BWhen you set [Size] in step 13 of
the printing condition setting,
specify the size of the original
after it has been enlarged or
reduced.
BPressing the [C] key returns the
length to [50mm] ([2.0"]).