User’s Manual
122 Software Configuration
The eye dropper tool to the right of the pen option can be used to select an existing color from the matrix to set as
your current pen color.
Load from image - Click this button to map any image to the matrix.
Copy from previous step - Use this to copy the state of the previous step to this step.
Additional controls allow you to tweak the brightness, red, green or blue content of the matrix.
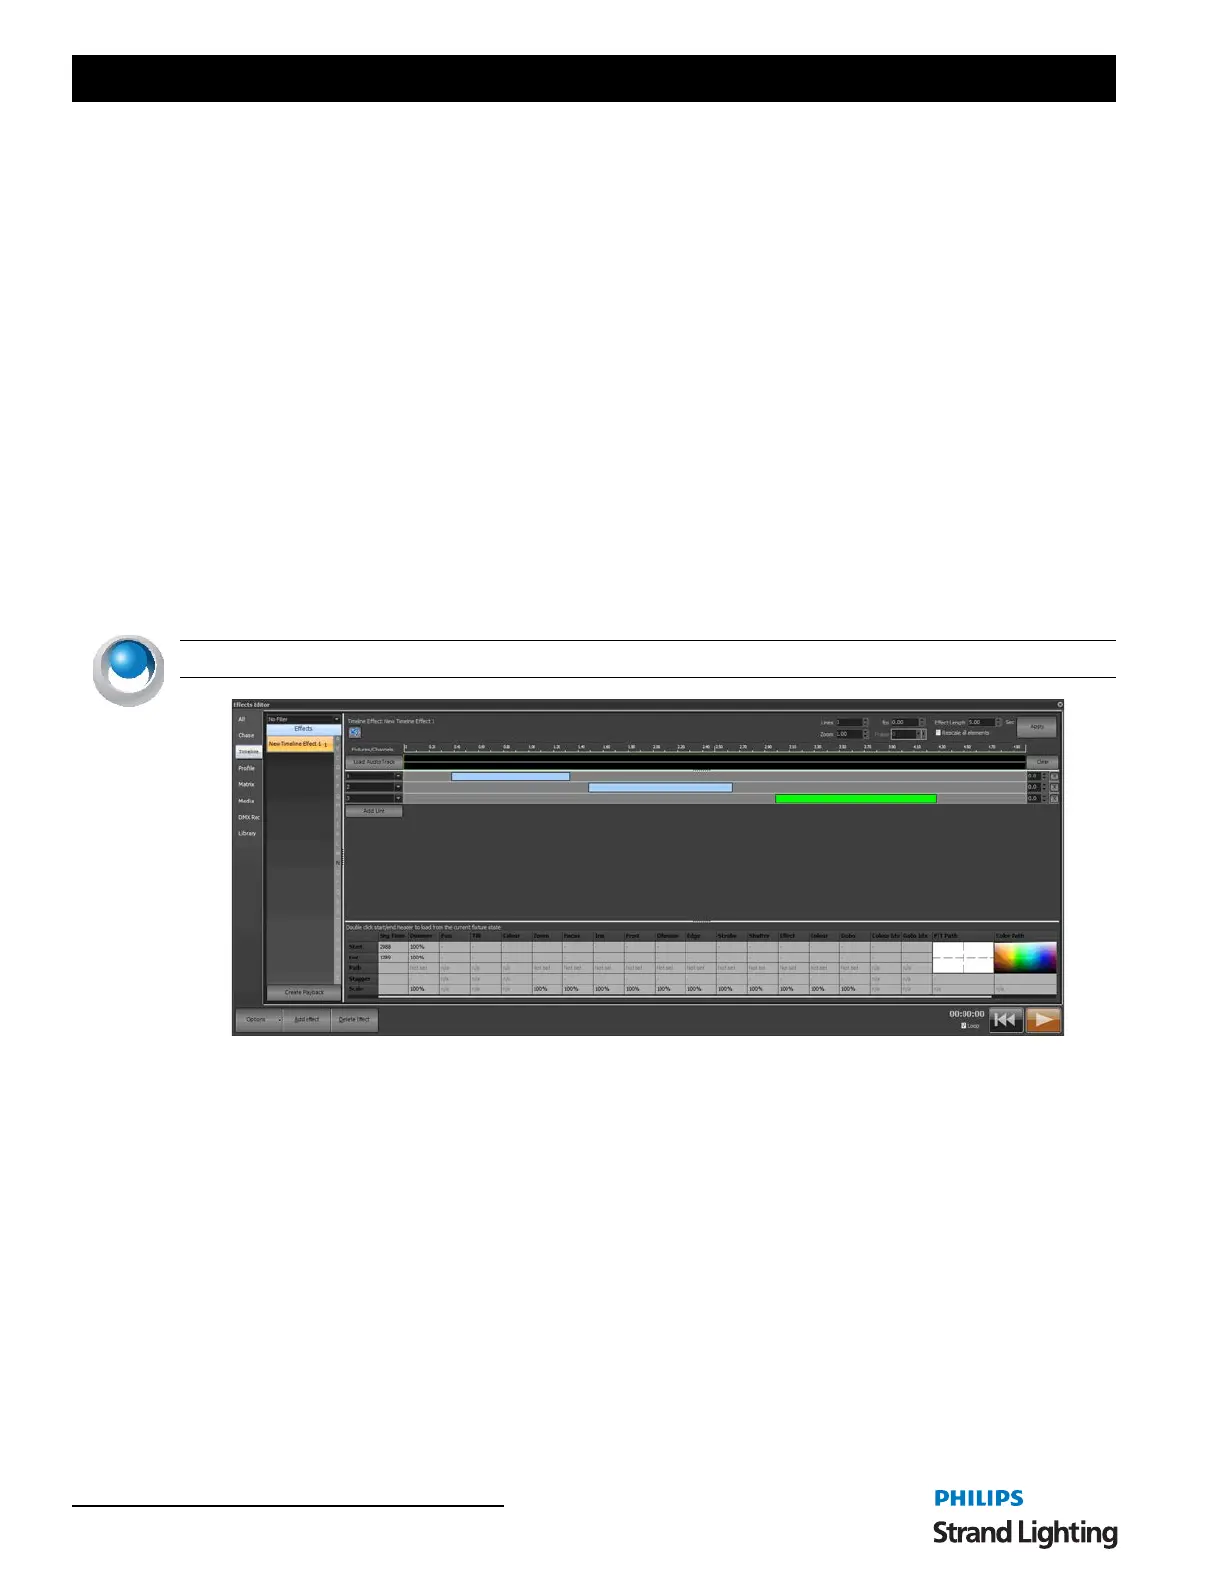
Timeline Effects
An effect segment has a start offset time, start state, length and end state. When an effect runs it will progress through
the list of segments executing each one in turn. If for example the first segment has an offset of 10 seconds, the
segment will execute 10 seconds after the effect itself has started.
When a segment is executed, its start lighting state will be set immediately. The fixture will then perform a fade for
the length of the segment to its end lighting state. If a segment is for an intelligent fixture then all of the attributes
(excluding dimmer) will be pre-fetched and set up for the start state at the end of the previous segment. If for example
a moving light will start in a different position for the second segment then it will be moved to this new position at the
end of the previous segment. When the effect starts, intelligent fixtures will be set to the start state of the first
segment.
Timeline effects are viewed in NEO as a Fixture vs. Time graph. Along the top of the effect view, you will see a time
scale from 0 to the length of the effect. On the left of the effect view is a list of the fixtures included in the timeline.
NEO NOTES & TIPS: Each segment of an effect cannot overlap any other segment.
Along the top of the view is the number of lines in effect. This can be used to add or remove fixtures. If this number
is increased, new lines will be added when the "Apply" button is pressed. Each line can have as many fixtures in it as
you want. Use the standard channel selection syntax to enter channels into the fields provided. If more than one
fixture is added to a line then all the fixtures in that line will do the same thing when the effect is run.
Each line can also reference channels in a channel group. Select the channel group using the drop down box to the
right of this field. The channels contained in group will automatically be used for the effect.
Also along the top is the "Effect Length" edit that determines the default duration of the effect. Changing the effect
length will change the time bar and increase or decrease how long an effect takes to run. To change the length of the
effect enter the desired time and click on the apply button.
By default, changes to the length of an effect will not change any of the existing segments. If you make the effect
shorter, any segments that go beyond the new length will be truncated. Use the "Rescale" check box to ensure that all
segments are rescaled to any length changes. If this is checked and you make the effect shorter, all of the segments
will also be resized by the same proportion.
Effects Editor, Time vs. Fixture Effect