User’s Manual
230 Let's Get Started!
STEP 2
Double click on channel 8 to bring it up to 100%.
STEP 3
Unselect channel 8 and select channel 9. Set the value of channel 9 to 80%.
STEP 4
Now that the third scene is set, click on the "Record Cue" or press control-c.
STEP 5
In the resulting "Create New Cue" dialog, cue 3 should already be set in the "Cue" edit box. If this is not the case,
enter the number 3 and press the "OK" button.
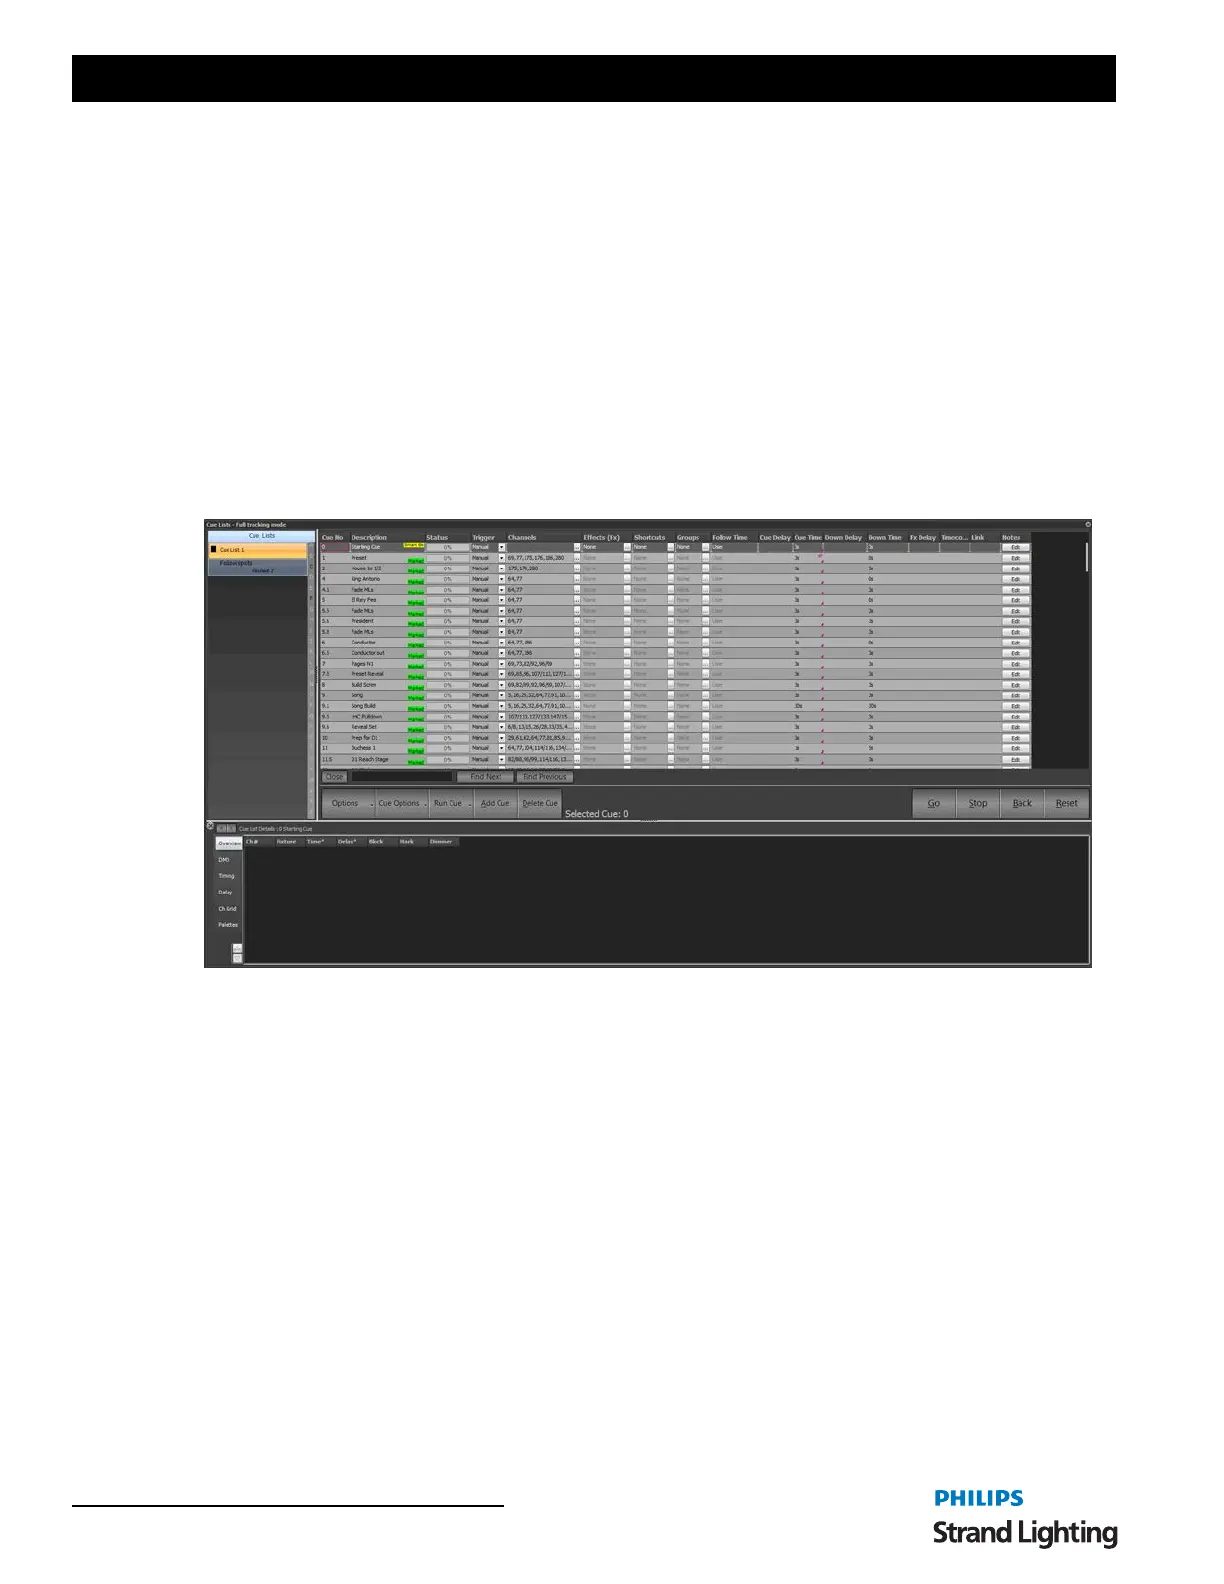
The Cue List Editor
To view the newly created cue list, open the "Cue List Editor" by clicking the button on the Command Line interface
or by pressing F4 on your keyboard.
This window will show the three cues we just created, and we will see in the channel field the fixtures we selected.
Setting the Transition Between Cues
In this example, we have decided to apply the following transition between each cue.
1) Cue 1 will fade up slowly over 5 seconds
2) Cue 1 will fade down in 2 seconds
3) Cue 2 will then fade up quickly (1 second)
4) Cue 2 will fade down in 3 seconds while cue 3 fades in.
To apply these rules, we need to set the fields on the right-hand side of the window.
STEP 1
In the row for cue 1, enter the number 5 into the field labelled "Fade In" and the number 2 into the field labelled "Fade
Out".
Cue List Editor Window