Shortcuts 63
NEO Lighting Control Console
Enter the new name of the group into the box provided and click "OK" to save the change. The new label will be used
for all pages of shortcuts.
Options
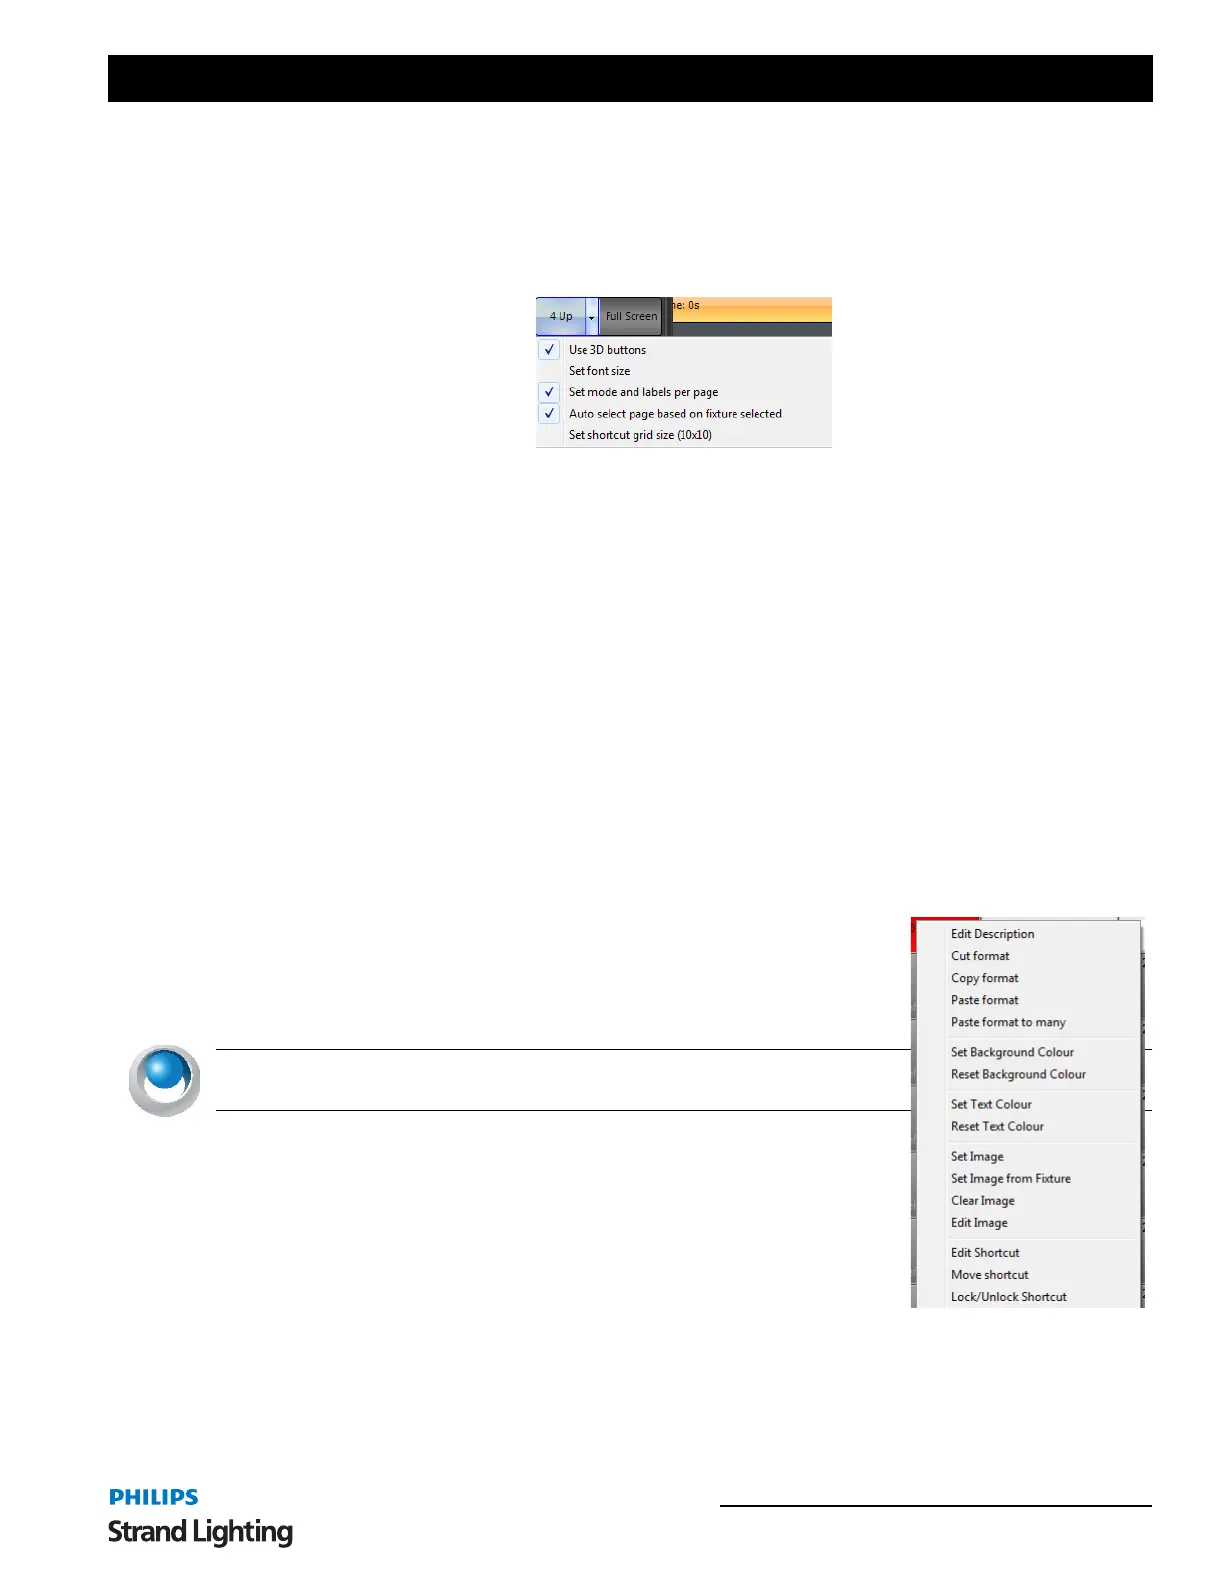
To change the global display options for the shortcut window click on the drop down menu on the right of the mode
button.
Figure 9: Shortcut window display options
Use 3D buttons - (Default on) Use this option to change how each button is displayed. When this option is on the
buttons will have a 3D style gradient.
Set font size - Use this option to change the overall size of the text in each of the shortcuts.
Set mode and labels per page - When this option is turned on the 4Up and normal mode can be set for each page.
The labels will also be remembered for each page separate to each other.
Auto Select page based on fixtures selected - With this option turned on the shortcut page will change if a palette
page is setup for the fixture. This works on the name of the shortcut page. If a single fixture type is selected then NEO
will search through the page labels to try and locate one that matches the fixture name. If a page name match is found
then the page will automatically switch. This is a convenient way for the window to always show the shortcuts related
to the fixture you have selected.
Set shortcut grid size (Columns x Rows) - Select this option to set the number of rows and columns you want to
appear in the shortcut grid. This can be a useful option to set the on-screen shortcuts to match any physical hardware
you are using.
Right click options
Right clicking on any of the active shortcuts will produce a pop-up menu that will
allow you to edit the description and change the button and text color, add an image
or jump directly to the appropriate edit window of the shortcut.
You can also use the popup menu to copy and paste the formatting (color, text color
etc) of the shortcut to other shortcuts.
NEO NOTES & TIPS: Changes made to the description or color will remain
until the shortcut is reassigned.
Edit Description - Select this option to change the label displayed on the shortcut
button.
Cut/Copy/Past Format - These options allow you to copy and past the
background and text colors to other shortcuts. The "past to many" option is a
convenient way to set the colors of multiple shortcuts at the same time.
Background and Text Color - For every shortcut you can change the background
color and the text color. To reset either of these to the default use the "Reset
background color" and "Reset text color" options.
Images - Each shortcut can have an image assigned that will be displayed to the left of the label. The "Set image"
option will allow you to select an image from your system by bringing up a familiar image selection dialog. Use the
"Set image from fixture" option to select any of the images stored with the NEO fixture library.