PROCEDURE
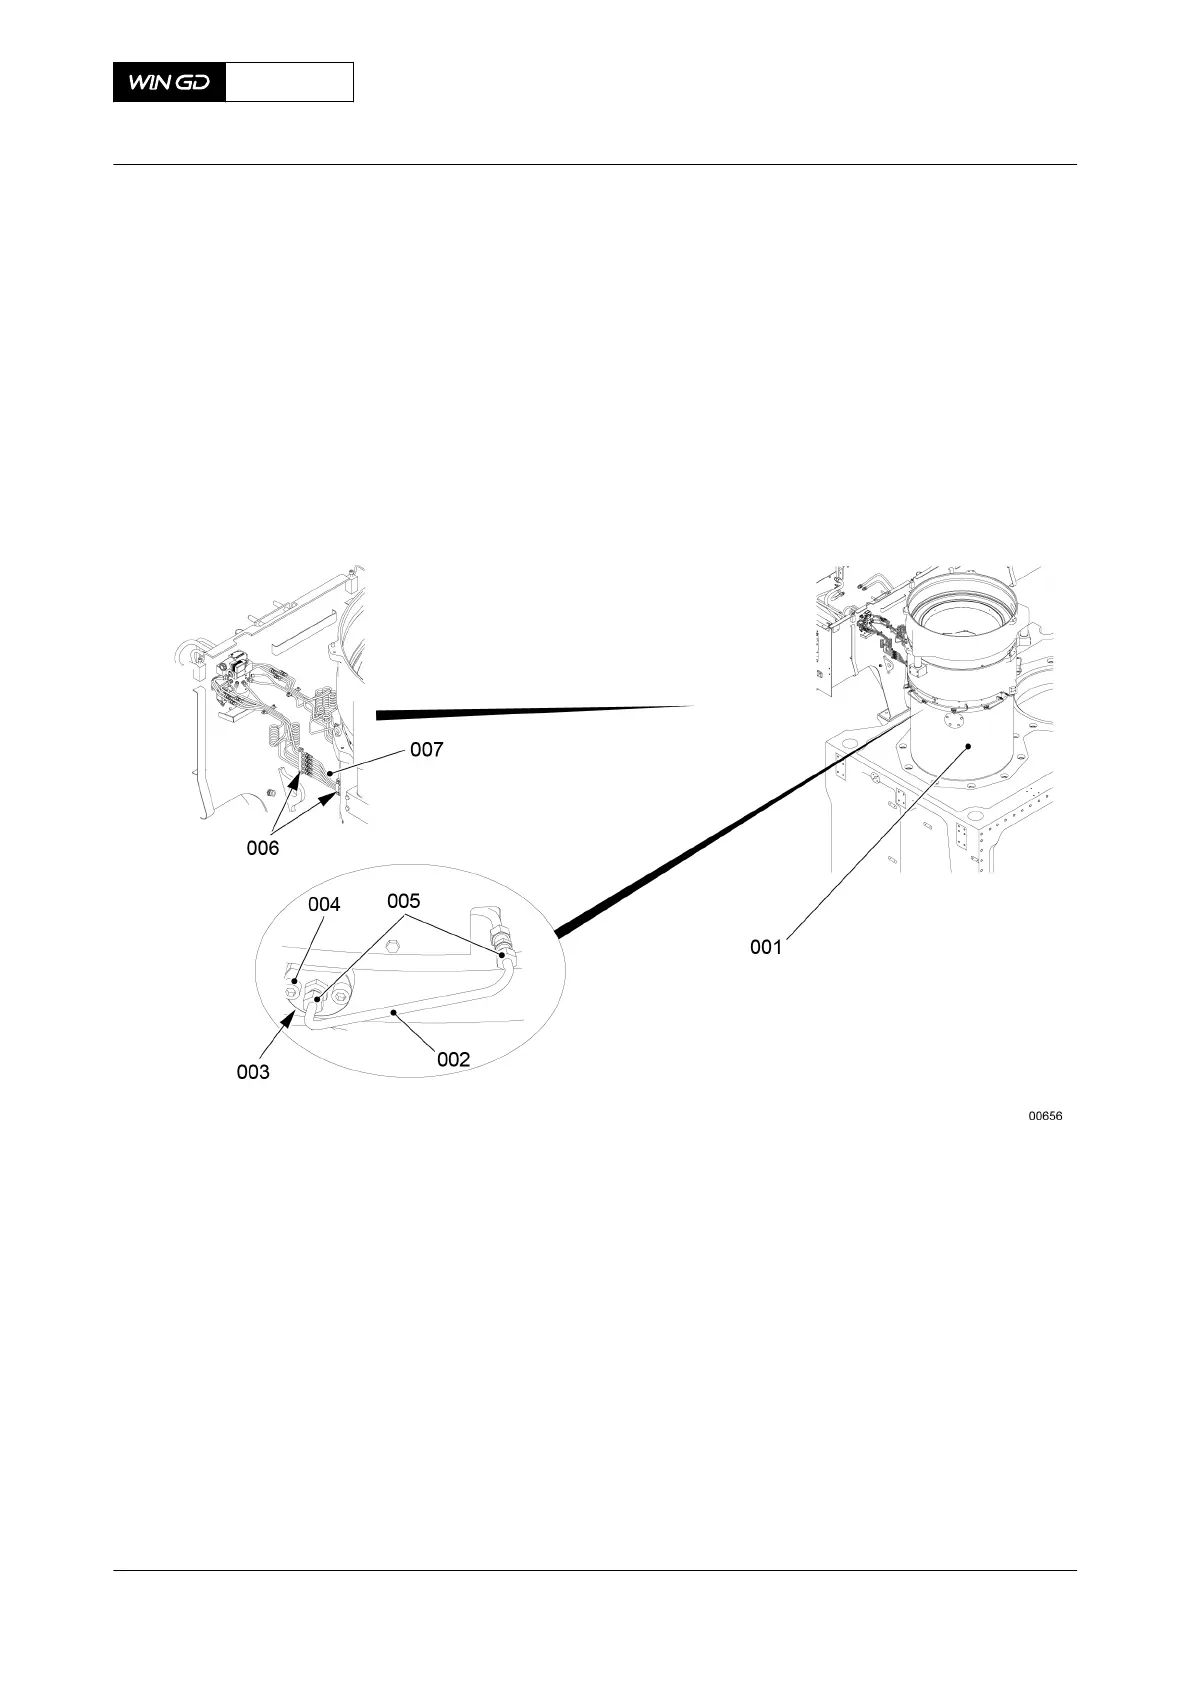
1 Loosen the nuts (005, Figure 7-13) of the unions.
2 Carefully remove the pipe (002) from the lubricating quill (003).
3 Seal the pipe (002) with an applicable plug to prevent contamination.
4 Remove two the bolts (004).
5 Remove the lubricating quill (003).
6 If necessary, do a function check of the lubricating quills, refer to 7.2.2 Lubricating quill -
do a functional test.
Fig 7-13 Lubricating quill (example)
CLOSE UP
• None
X62DF
AA00-2138-00AAA-520A-A
Maintenance Manual Lubricating quill - remove
Winterthur Gas & Diesel Ltd.
- 195 - Issue 002 2020-10