PROCEDURE
1 If you have removed the pilot valve, install the pilot valve as follows:
1.1 Make sure that the pin of the pilot valve is correctly in the pilot valve (plan side is
flush with the surface).
1.2 Use the T-handle to install the pilot valve. Make sure that the pin does not fall
out.
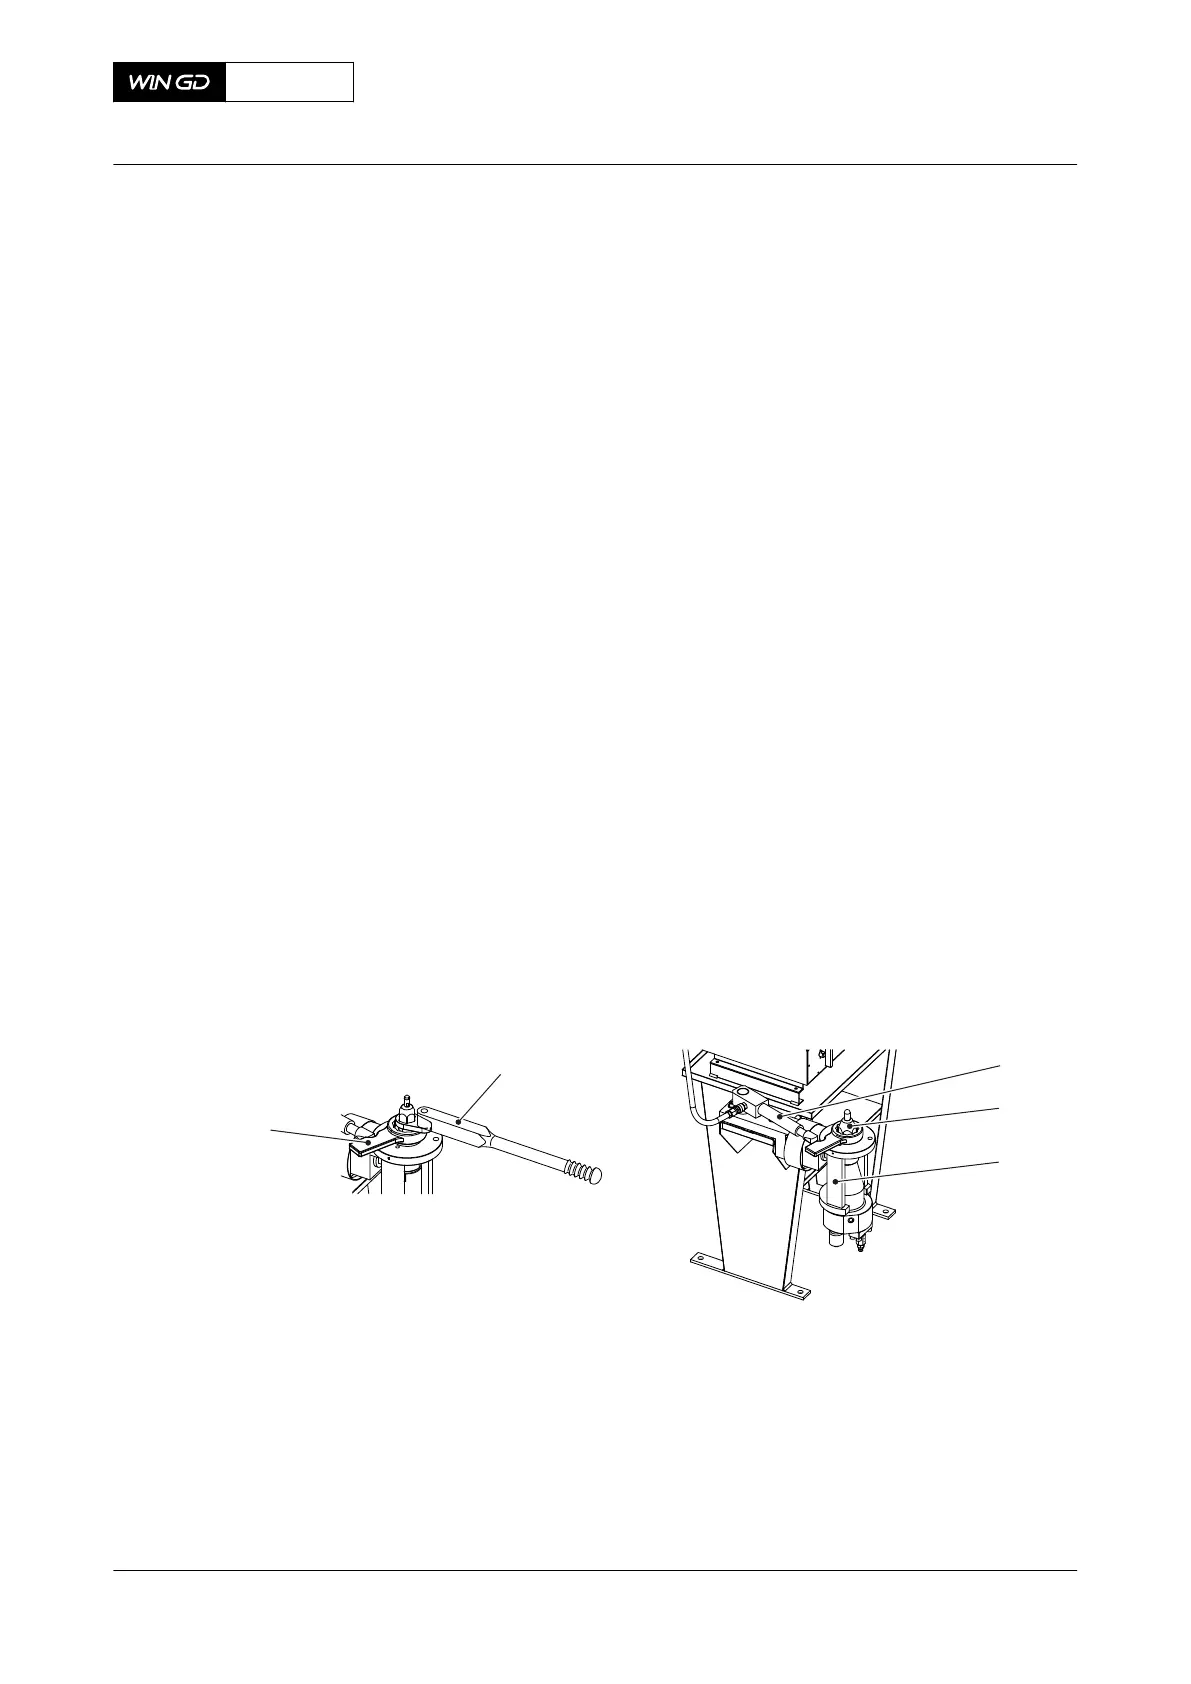
1.3 Turn the valve holder (003, Figure 7-45) through 90° so that the pilot valve points
up.
2 If you have removed the nozzle tip, install a new nozzle tip as follows:
2.1 Make sure that the dowel pin is installed on the nozzle body.
2.2 Put the nozzle tip on the nozzle body and align the recess in the nozzle tip with
the dowel pin.
2.3 Use a rubber hammer to tap the nozzle tip down.
2.4 Apply a thin layer of Never-Seez NSBT to the thread and seating face of locknut.
2.5 Install the locknut onto the nozzle tip and tighten it with your hand.
3 Put the complete nozzle body in position of the injection valve.
4 Apply a thin layer of Never-Seez NSBT to the thread and seating face of the coupling
nut.
5 Install the coupling nut and tighten it with your hand.
6 Use a torque spanner to torque the coupling nut to the specified value, refer to section
16.1 Tightening instructions.
7 Use a torque spanner to torque the nozzle body to the specified value, refer to section
16.1 Tightening instructions.
8 Carefully use the slugging wrench (004) and the hydraulic cylinder (001) to add an angle
of 35° to 40° to the position of the coupling nut.
Fig 7-45 Direct controlled injection valve - assemble
9 Do a function test of the injection valve, refer to section 7.6.2 Direct controlled injection
valve - do a functional test.
CLOSE UP
• None
X62DF
AA00-2722-00AAA-710A-A
Maintenance Manual Direct controlled injection valve - assemble
Winterthur Gas & Diesel Ltd.
- 269 - Issue 002 2020-10