PROCEDURE
1 Clean all the parts of the starting air valve.
2 Apply a thin layer of oil to all the parts of the starting air valve.
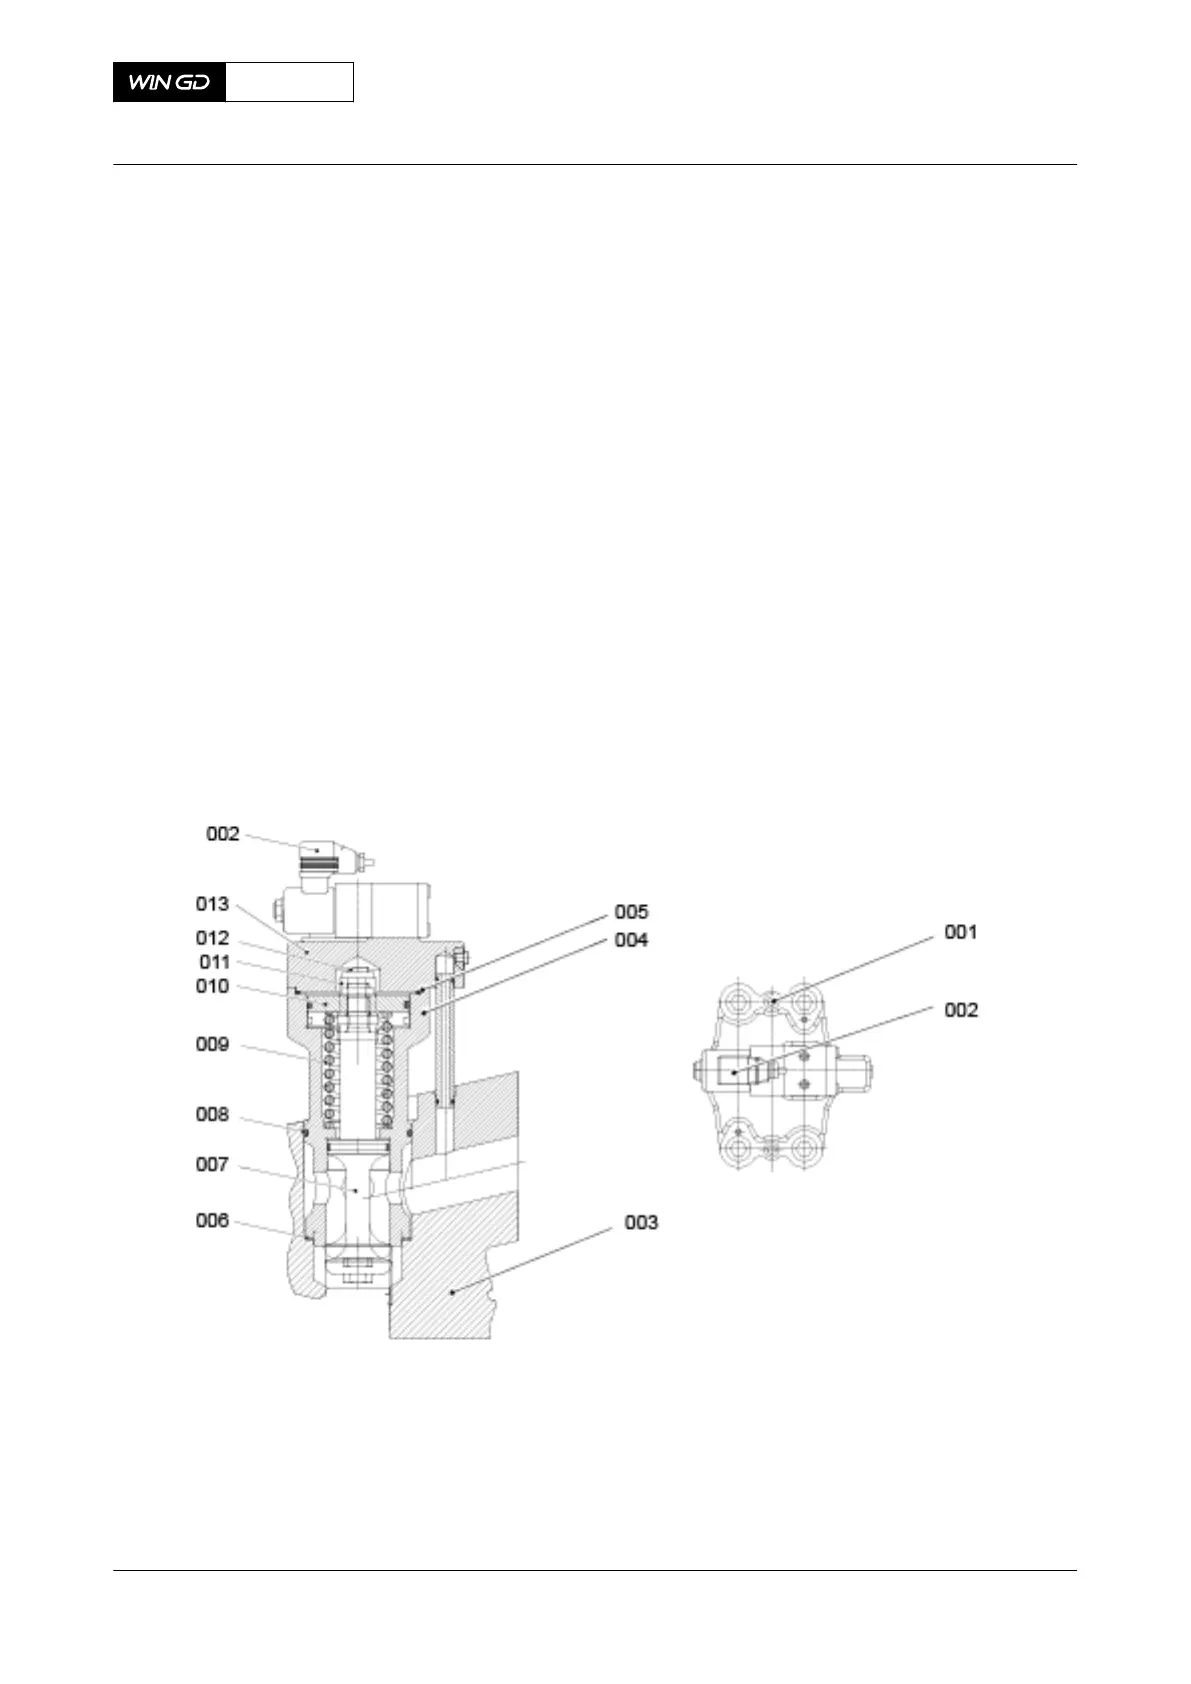
NOTE: Do not apply lubricant to the spindle thread (012, Figure 7-52) around the
synthetic locking ring.
3 Apply a thin layer of oil to the O-rings (005, 008).
4 Attach the O-rings (005, 008) to the housing (004).
5 Put the valve spindle (007) in the housing (004).
6 Put the compression spring (009) into the housing (004).
7 Put the piston (010) in position on the valve spindle (007).
8 Attach the hexagon nut (011) to the valve spindle (007).
9 Torque the hexagon nut (011) to the value given in section 16.1 Tightening instructions.
10 Tap the top of the valve spindle (007) with a soft mallet. The valve spindle must spring
back to its initial position.
11 Attach the cover (013), together with the solenoid valve (002), to the housing (013) with
the Allen screws (001).
12 Torque the Allen screws.
Fig 7-52 Starting air valve - assemble
CLOSE UP
• None
X62DF
AA00-2728-00AAA-710A-A
Maintenance Manual Starting air valve - assemble
Winterthur Gas & Diesel Ltd.
- 283 - Issue 002 2020-10