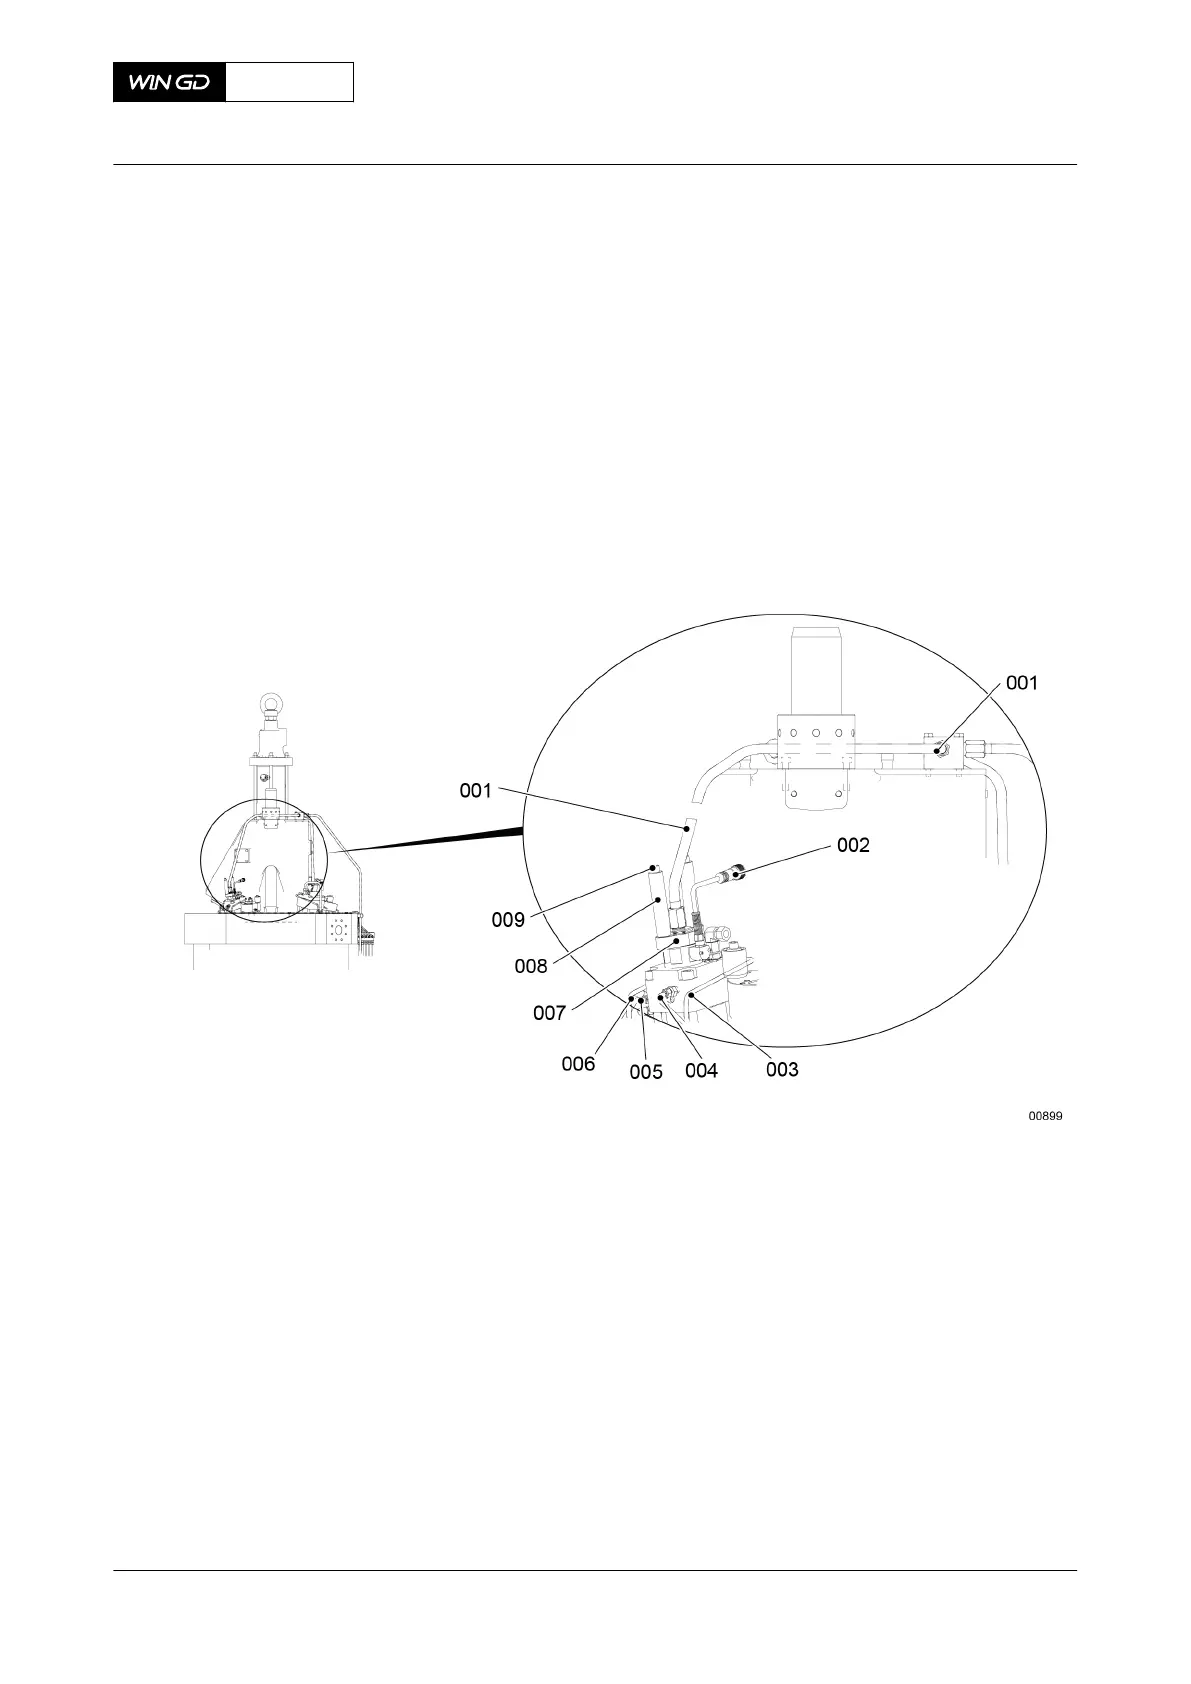
PROCEDURE
1 Make sure that the drain from the pilot injection valve to the sludge tank is open.
2 Remove the applicable HP pilot fuel pipe (001, Figure 7-72), refer to section 13.4.1 HP
pilot fuel pipe - remove.
3 If necessary, remove the pipes (003, 004, 005 and 006).
4 Disconnect the electrical cable (002) from the solenoid valve.
5 Remove the Allen screws (009) together with the distance pieces (008).
6 Remove the flange (007).
Fig 7-72 Pilot injection valve
7 Put the plate (002, Figure 7-73) on the pilot injection valve (004) as shown.
8 Put the stud bolts (001) in the plate (002).
9 Turn equally the stud bolts (001) until they touch the valve holder (003).
10 Turn equally the screws of the stud bolts (001) to lift the pilot injection valve (004)
approximately 44 mm.
NOTE: The valve holder (003) stays in the cylinder cover (005).
11 Remove the pilot injection valve (004) from the valve holder (003).
X62DF
AA00-2790-00AAA-520A-A
Maintenance Manual Pilot injection valve - remove
Winterthur Gas & Diesel Ltd.
- 327 - Issue 002 2020-10