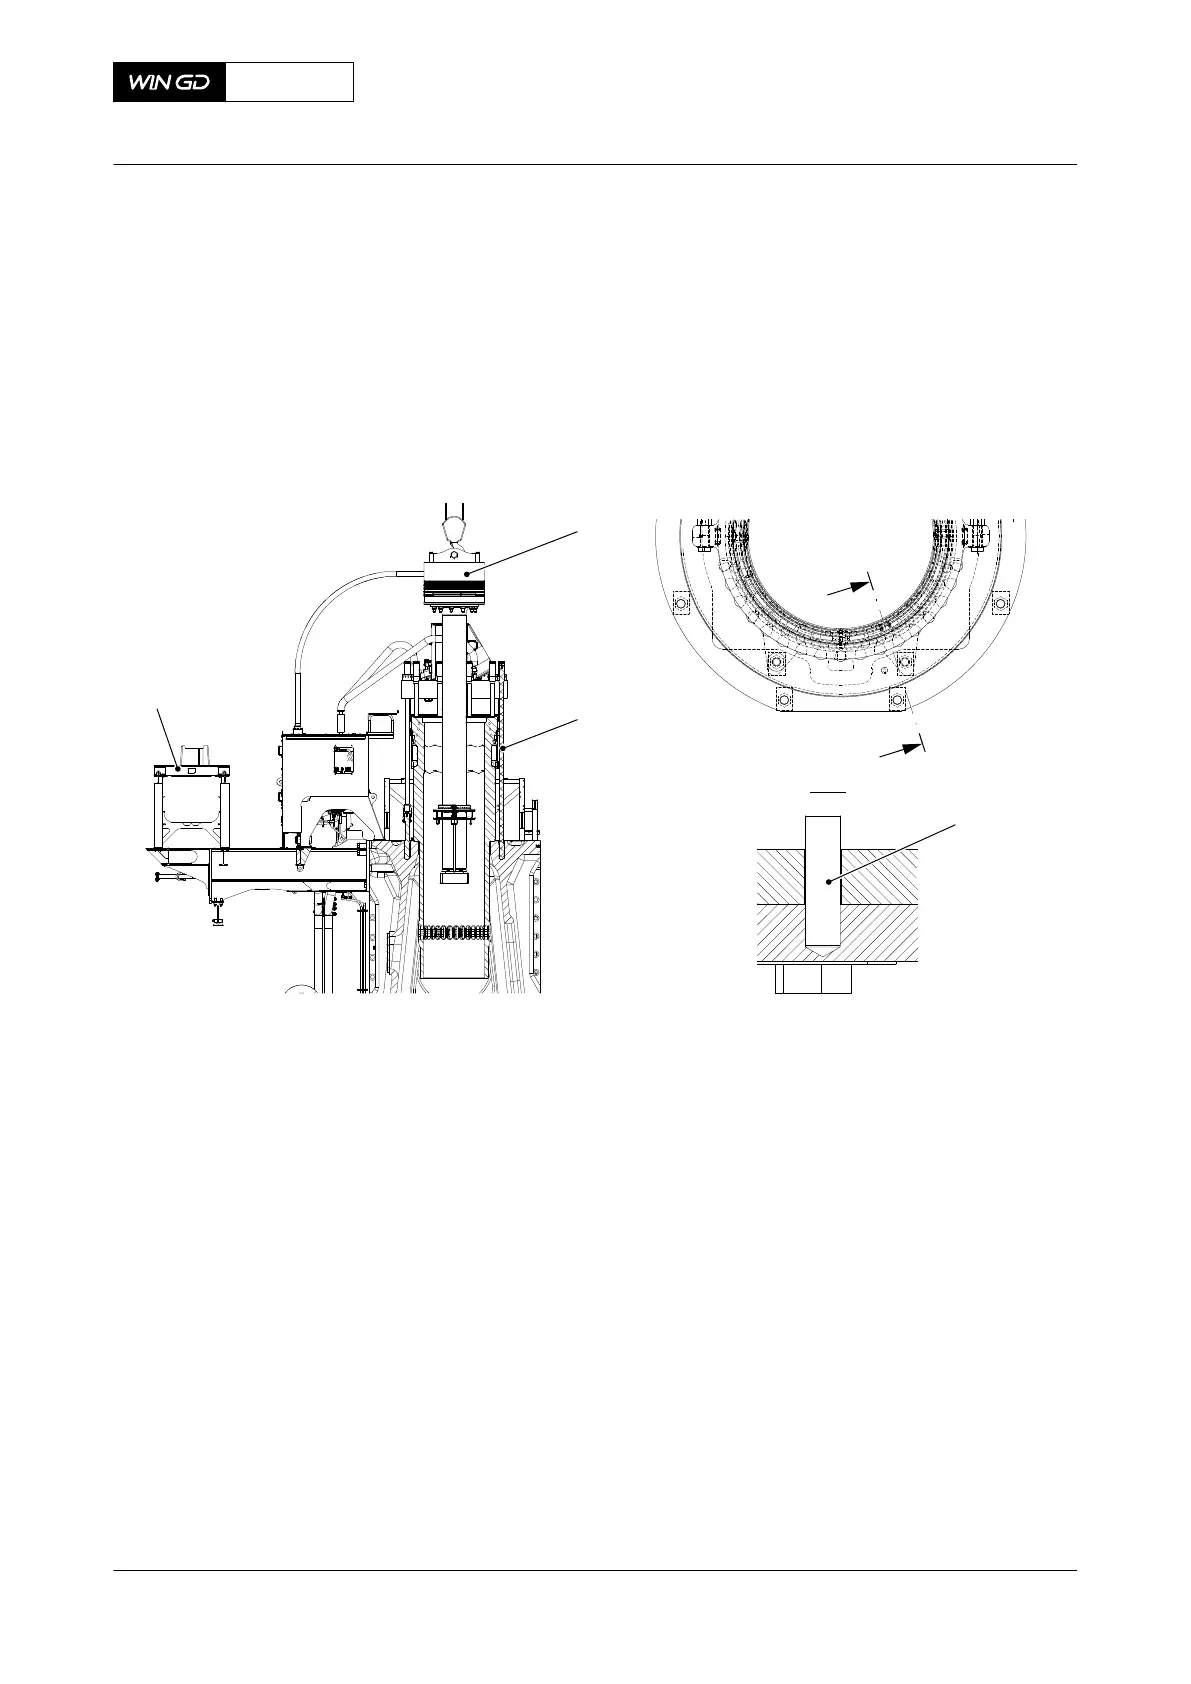
19 Operate the engine room crane to remove fully the piston from the piston support 003,
Figure 8-77).
20 Carefully lower the piston (001) into the cylinder liner (002).
21 Operate the turning gear to turn the crank to BDC.
22 Make sure that the piston rod gland is in the correct position for the dowel pin (004) to
align with the crosshead.
Fig 8-77 Piston - install (example)
23 Put oil on the four bolts (002, Figure 8-78).
24 Attach the piston rod gland (001) to the cylinder block with the four bolts (002) and new
locking plates.
25 Torque the four bolts (002) to the correct value, refer to section 16.1 Tightening
instructions.
26 Bend the locking plates to lock the bolts.
X62DF
AA00-3403-00AAA-720A-A
Maintenance Manual Piston - install
Winterthur Gas & Diesel Ltd.
- 500 - Issue 002 2020-10