PROCEDURE
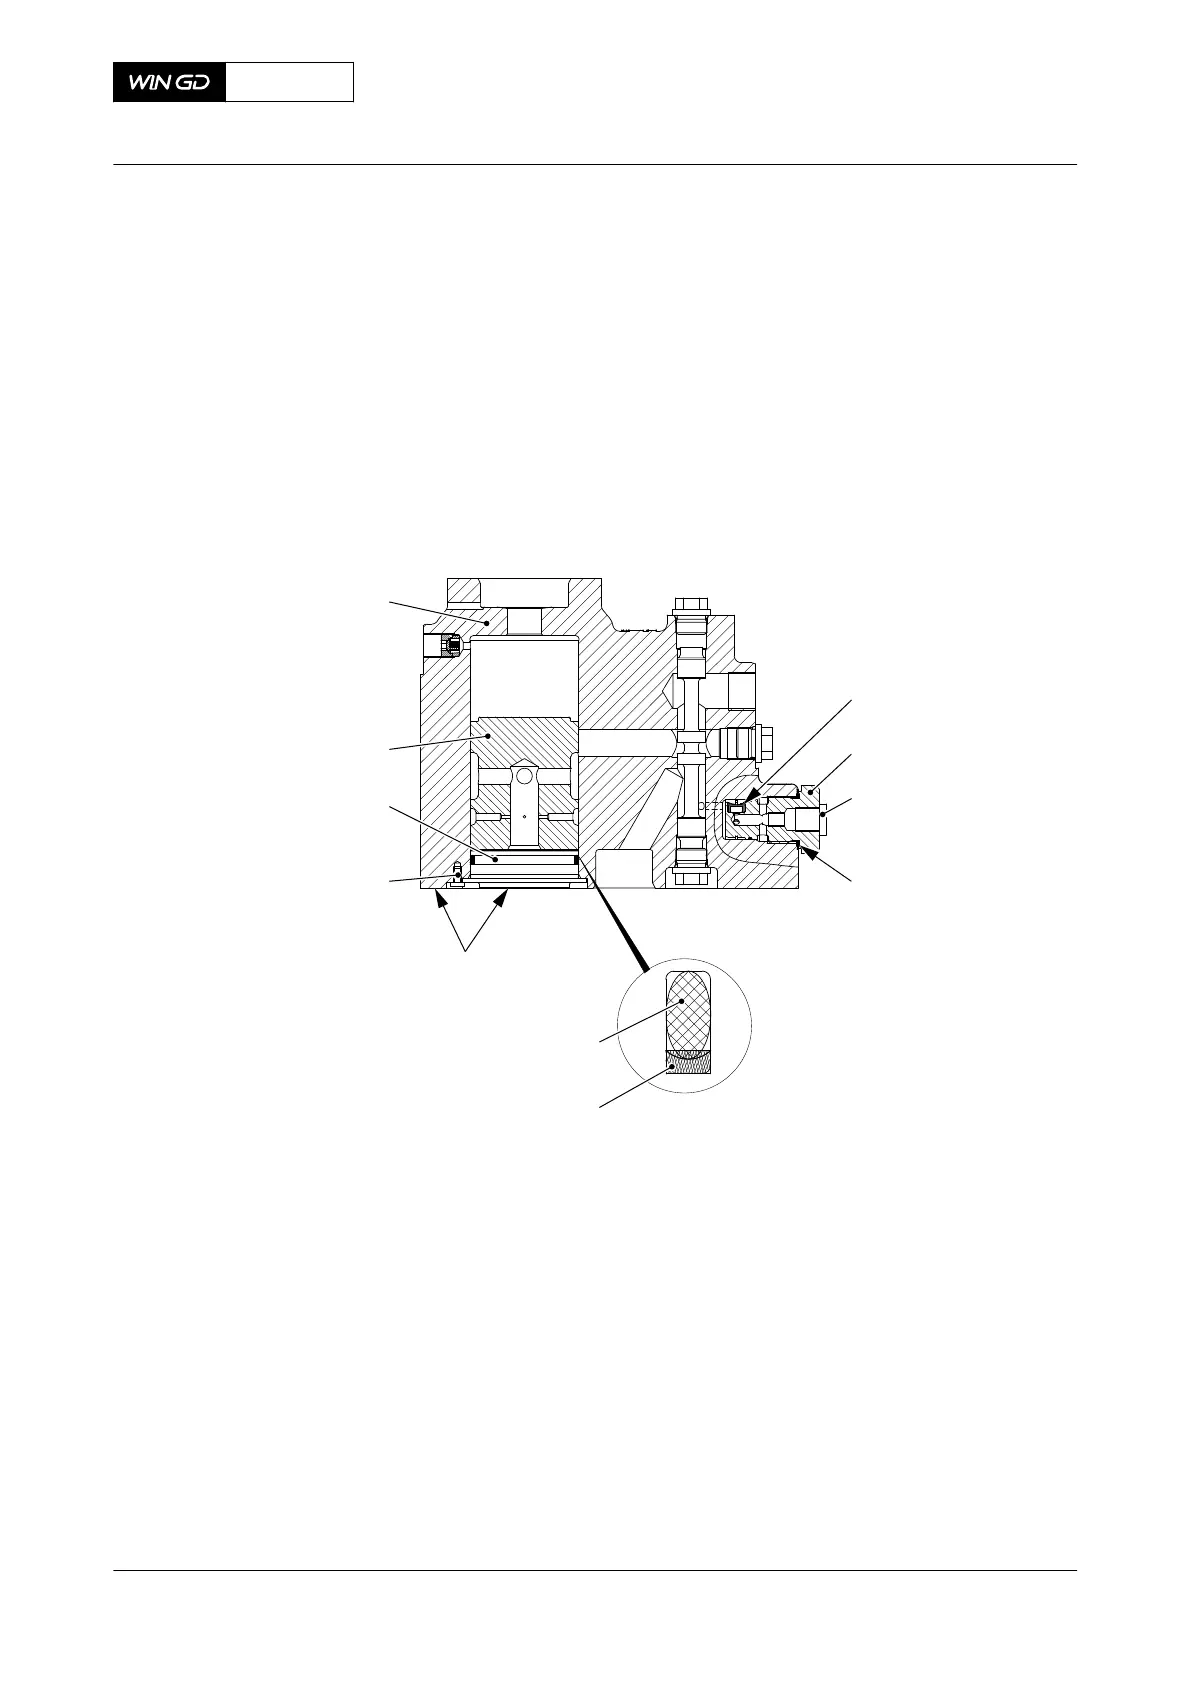
1 Put a new oil filter (001, Figure 10-37) in the valve block (010).
2 If necessary, put a new seal (004) on the filter holder (002).
3 Apply oil to the thread of the filter holder (002).
4 Put the filter holder (002) and the screw plug (003) into the control block (010).
5 Torque the filter holder (002) to the correct value, refer to section 16.1 Tightening
instructions.
6 Put a new O-ring (006) and back-up ring (005) on the plug (008).
Fig 10-37 Exhaust valve control unit - disassemble/assemble
001
002
003
004
005
006
FLUSH
007
008
009
010
00401
7 Push the plug (008) into the valve control block (010).
8 Install the pan head screw (007).
9 Make sure that the plug (008) is flush with the bottom of the control block (010).
CLOSE UP
• None
X62DF
AA00-5612-00AAA-710A-A
Maintenance Manual Exhaust valve control unit (VCU) - assemble
Winterthur Gas & Diesel Ltd.
- 617 - Issue 002 2020-10