PROCEDURE
1 Use the applicable grade of emery cloth (005, Figure 13-14) related to the quantity of
metal you want to remove.
NOTE: To remove the deep notches of more than 0.1 mm, use the emery cloth of
medium to coarse grain (30 to 80 CAMI). For smooth grinding, use the emery
cloth with fine or ultra fine grains (100 to 600 CAMI).
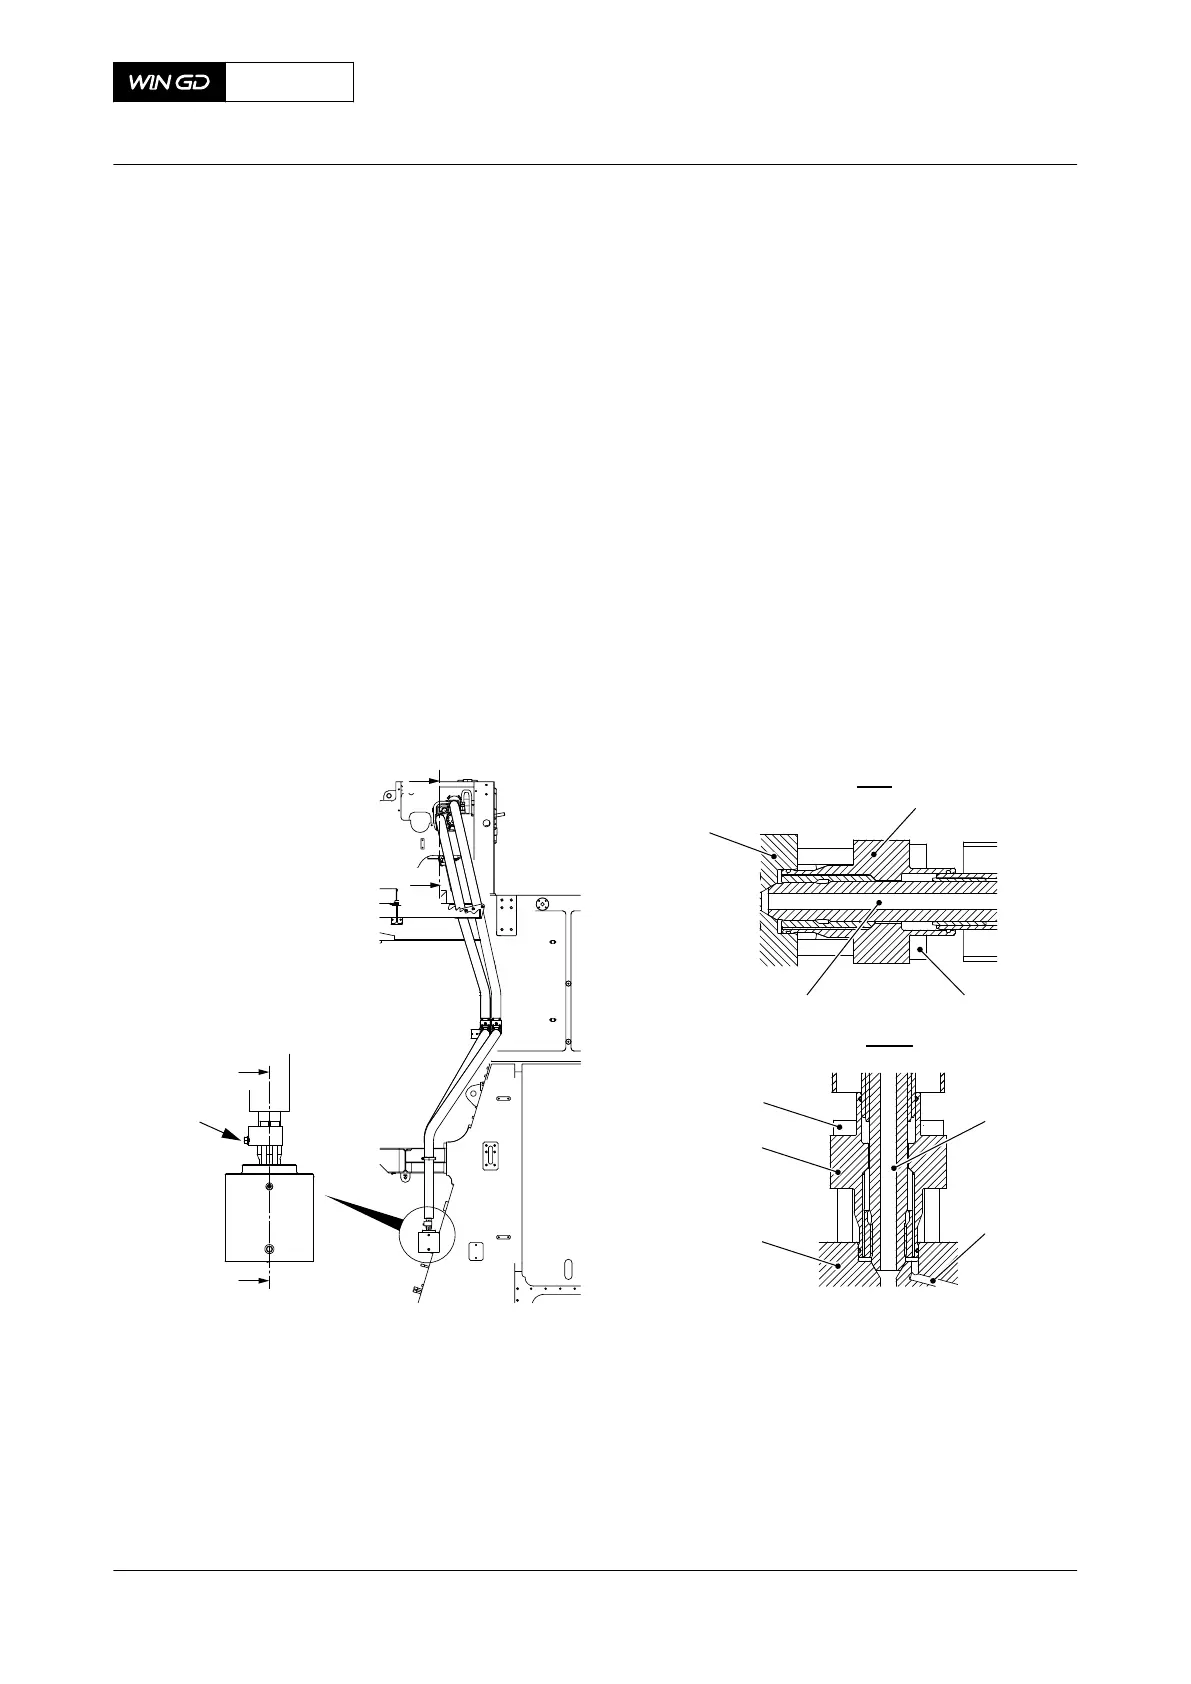
Fig 13-14 HP fuel pipe - grind
00566
009004
3.0 mm
008
002
003
004
006
001
005
007
002
003
2 Put the stencil (001) on the emery cloth (005).
3 Use a pencil or a ball pen to make the inner shape.
4 Cut out accurately the shape.
5 Attach the emery cloth shape to the grinding tool (007) with the countersunk screw
(008).
6 Remove the claw from the end of the HP fuel pipe (004).
7 Attach the HP fuel pipe (004) to a vice in a horizontal position.
8 Attach the hexagon nut (003) to the HP fuel pipe (004).
9 Turn the hexagon nut (003) to the threaded end of the HP fuel pipe (004).
10 Attach the hexagon nut (002) to the HP fuel pipe (004).
11 Lock the screw-on sleeve (002) to the HP fuel pipe (004) with the hexagon nut (003).
12 Attach the grinding tool (007) to the hand-drill (006).
13 Put the hand drill (006) and grinding tool (007) accurately into the screw-on sleeve
(002).
14 Adjust the speed of the hand-drill (006) to a maximum of 500 rpm.
15 Use light pressure and operate the hand-drill (006) for approximately five seconds.
16 Regularly remove unwanted material from the grinding tool (007).
X62DF
AA00-8752-00AAA-655A-A
Maintenance Manual HP fuel pipe (fuel pump to fuel rail) - grind the sealing face
Winterthur Gas & Diesel Ltd.
- 757 - Issue 002 2020-10