1128600 SmartPAC 2 with WPC 2000 Integration User Manual
4-64 Initialization Mode
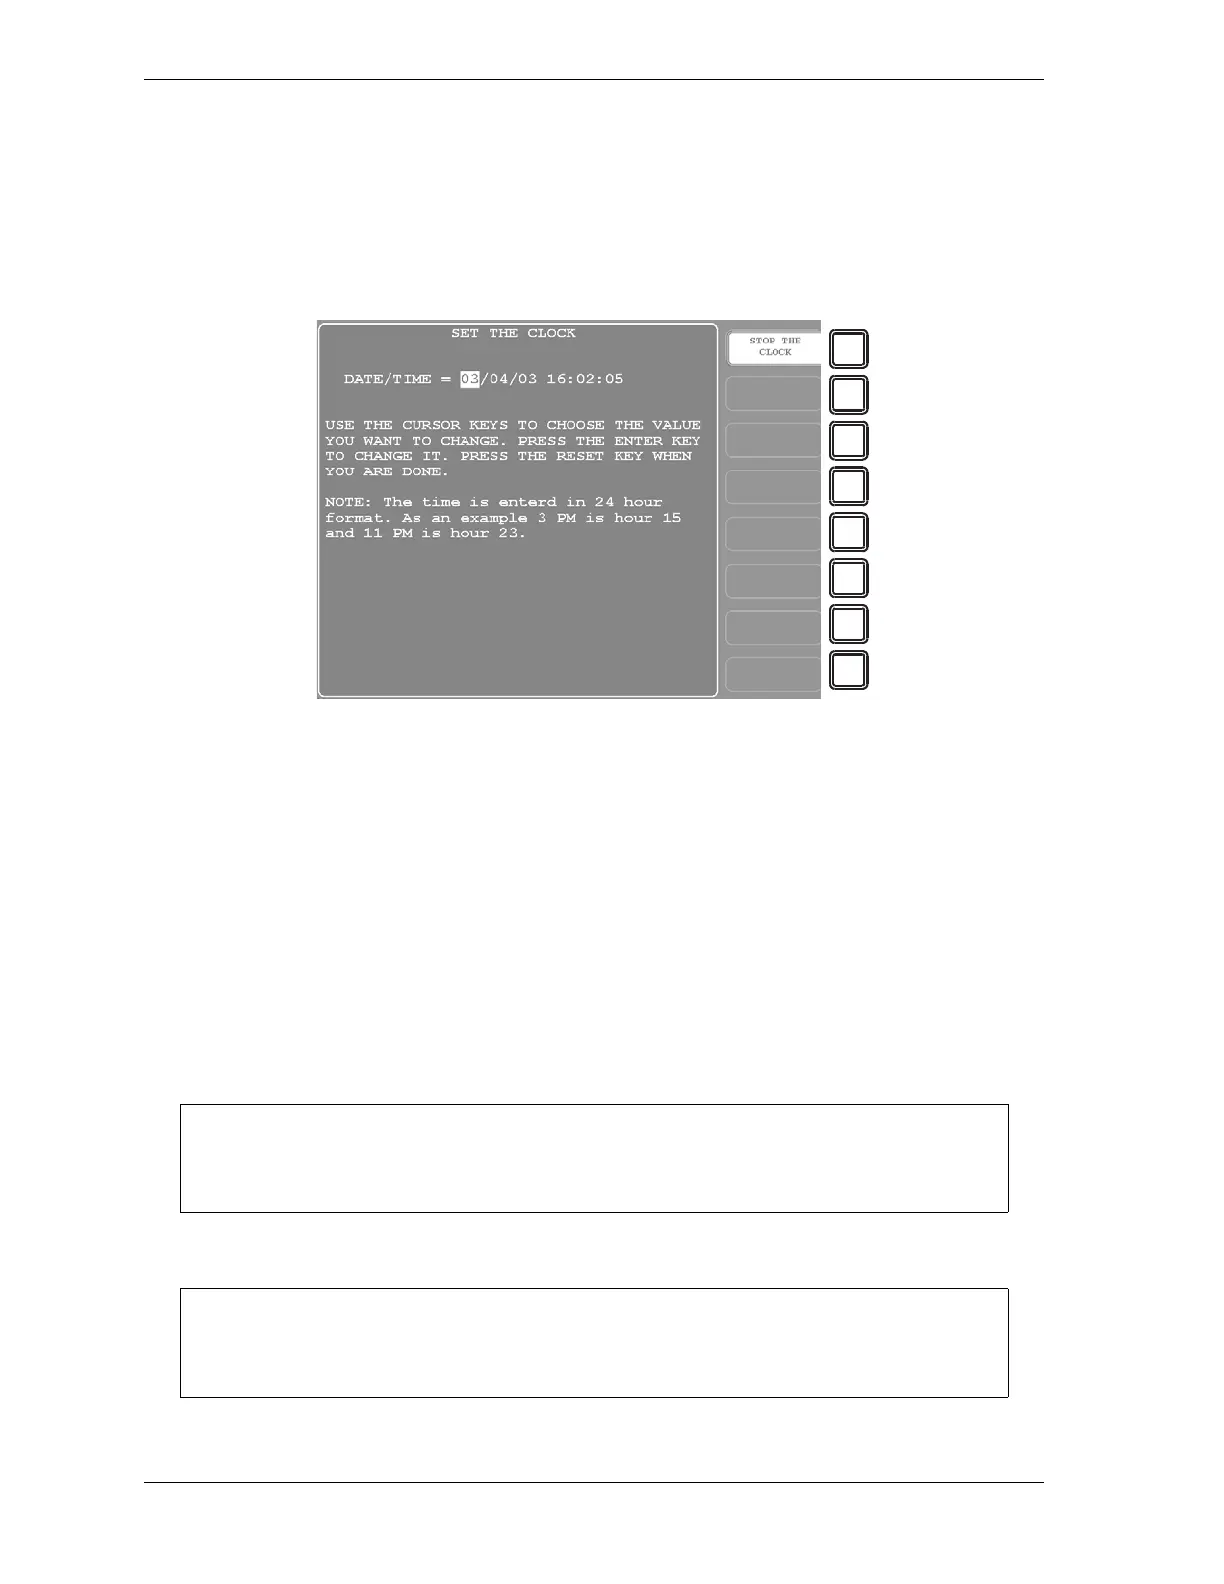
SET CLOCK
(INITIALIZATION – DIAGNOSTICS – SET CLOCK)
When you select the SET CLOCK item on the Diagnostics Menu, the Set the Clock screen,
shown in Figure 4-43, displays.
On this screen you can set the date in month/day/year (mm/dd/yy) format and the time in
military hours/minutes (hh:mm) format (i.e., 1:30 p.m. = 13:30, 11:00 p.m. = 23:00). To do
so, perform these steps:
1. Highlight the segment of the date or time that you want to change, using the Left () and
Right () cursor keys, then press ENTER. The Numeric Entry window (see Figure 3-6,
page 3-4) displays.
2. Key in a value, using the numeric keypad or the Up () and Down () cursor keys, and
press ENTER. You are returned to the Set the Clock screen with your entry displayed in
the date or time segment you selected in step 1.
3. Repeat steps 1 and 2 for other date/time segments.
4. Press RESET when you are done to return to the Diagnostics Menu.
Figure 4-43. Set the Clock Screen
To stop the clock, press F1 (Stop the Clock). The F1 label changes to START THE
CLOCK. To restart the clock, press F1 (Start the Clock).
You will have to change the clock setting in the spring and fall when your local time
changes from Standard to Daylight Savings and from Daylight Savings to Standard.
 Loading...