SmartPAC 2 with WPC 2000 Integration User Manual 1128600
Run Mode 6-19
2. Adjust cam timings for the selected channel, following the instructions in the following
sections in Chapter 5:
• Making an ON/OFF Setting, page 5-40
• Setting Multiple ON/OFF Cycles, page 5-41
• Making a Timed Output Setting, page 5-43
• Making an Auto Advance Setting, page 5-44
• Setting DSV ON Channel Timing, page 5-46
3. When you are finished, press RESET to return to the Cam Switch Menu.
Viewing Cam Timing
(RUN – CAM SWITCH – F7-SHOW CAM TIMING)
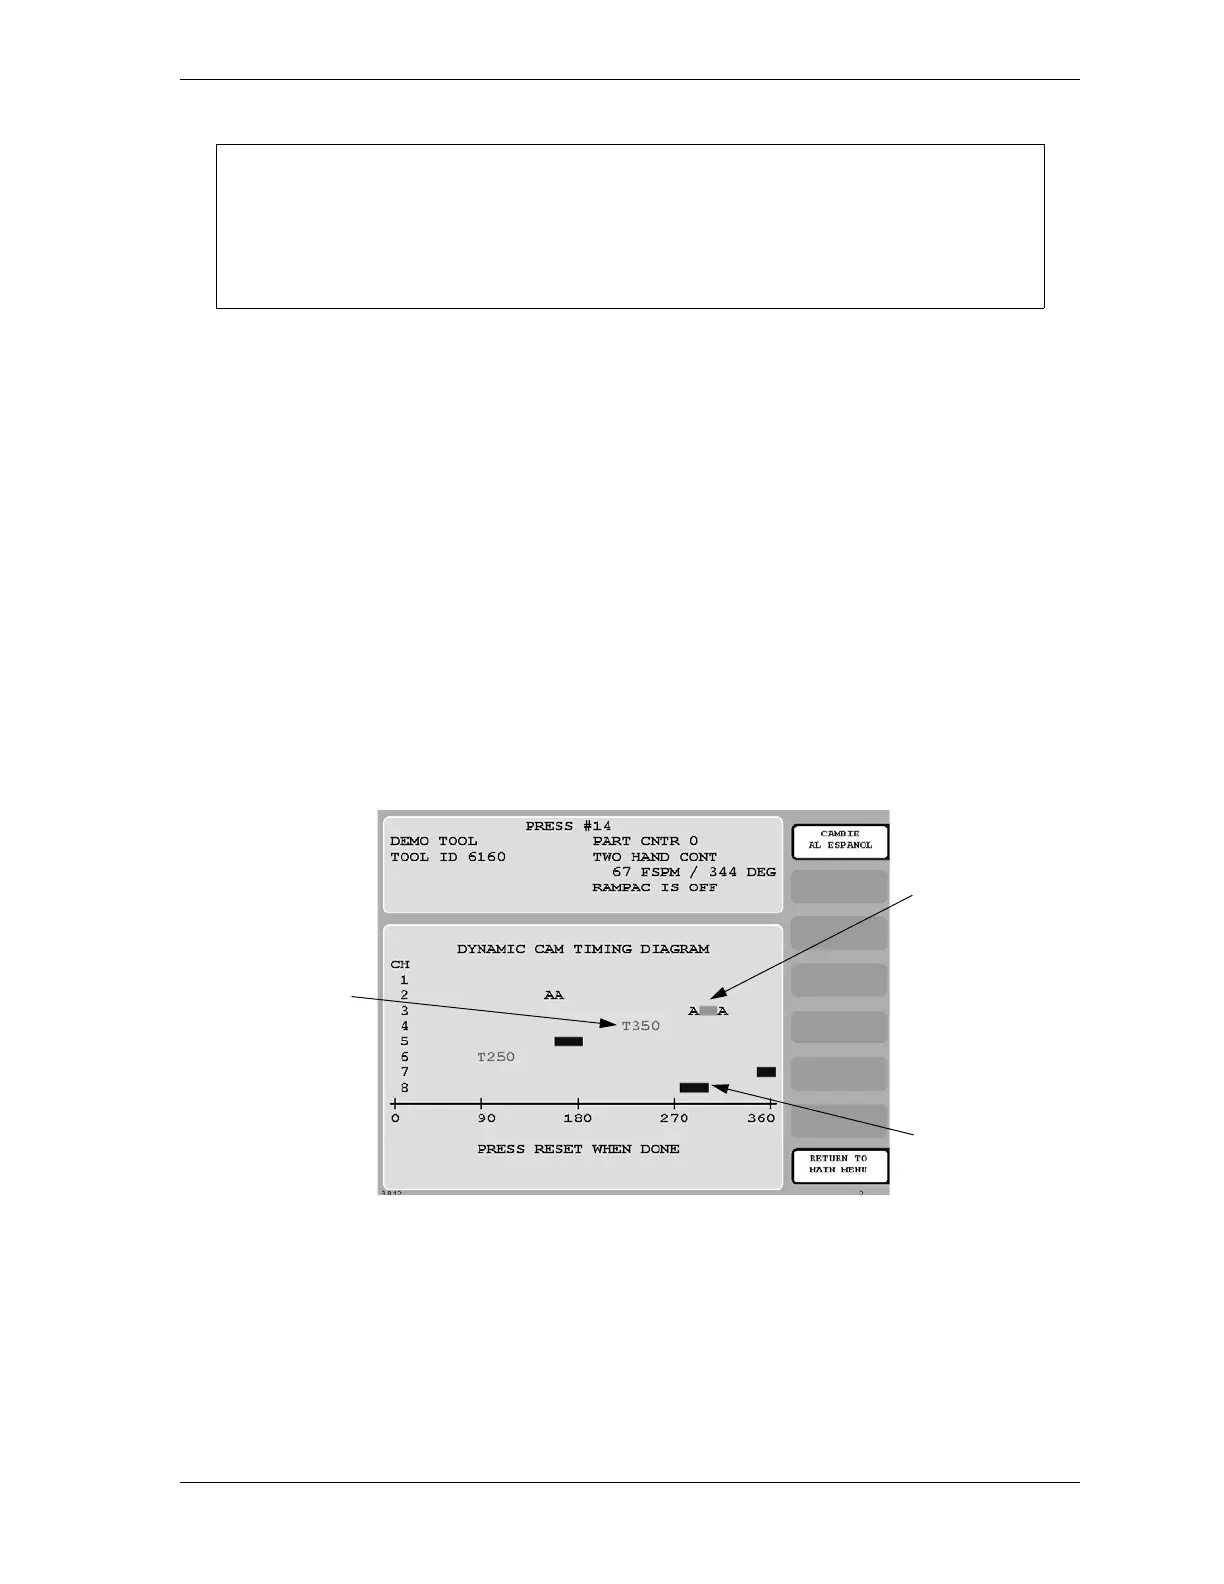
You can view a real-time graphic display of the timing settings for your cams by pressing the
F7 (Show Cam Timing) function key. The screen that displays when you press F7 is shown in
Figure 6-21.
Cam channels are displayed by number on the Y-axis. Only eight channels can be displayed
at a time, so if a 16-channel ProCamPAC is installed, you must press ENTER to display
channels 9 through 16. The X-axis displays the number of degrees of crankshaft rotation
(from 0° to 360°) at which channels turn on and off. The timing for each channel is shown as
a colored horizontal bar, the end points of which, when read against the crank angle “ruler” on
the X-axis, specify on and off settings for that channel. Bars are distinguished as follows:
ARE YOU LOCKED OUT?
Access to items on this screen may be limited to Program mode or may require a
password. The security access settings in Initialization mode determine when changes
can be made. See Table 4-15, page 4-48.
Figure 6-21. Cam Timing Screen
Channel 4:
Timed output
(pink)
Channel 3:
Auto Advance
timing (green)
Channel 7:
ON/OFF timing
(dark blue)

 Loading...