1128600 SmartPAC 2 with WPC 2000 Integration User Manual
2-26 Installation
5. Measure and cut the resolver wires so they reach TB 106, then wire them to the L-shaped
connector, referring to Table 2-4, page 2-27, and Figure 1 at the end of the manual. Make
sure you connect the black and yellow wires correctly, based on the direction in which
your resolver will rotate–clockwise or counterclockwise. Refer to Installation Overview,
page 2-4 if you need help wiring the TB 106 connector.
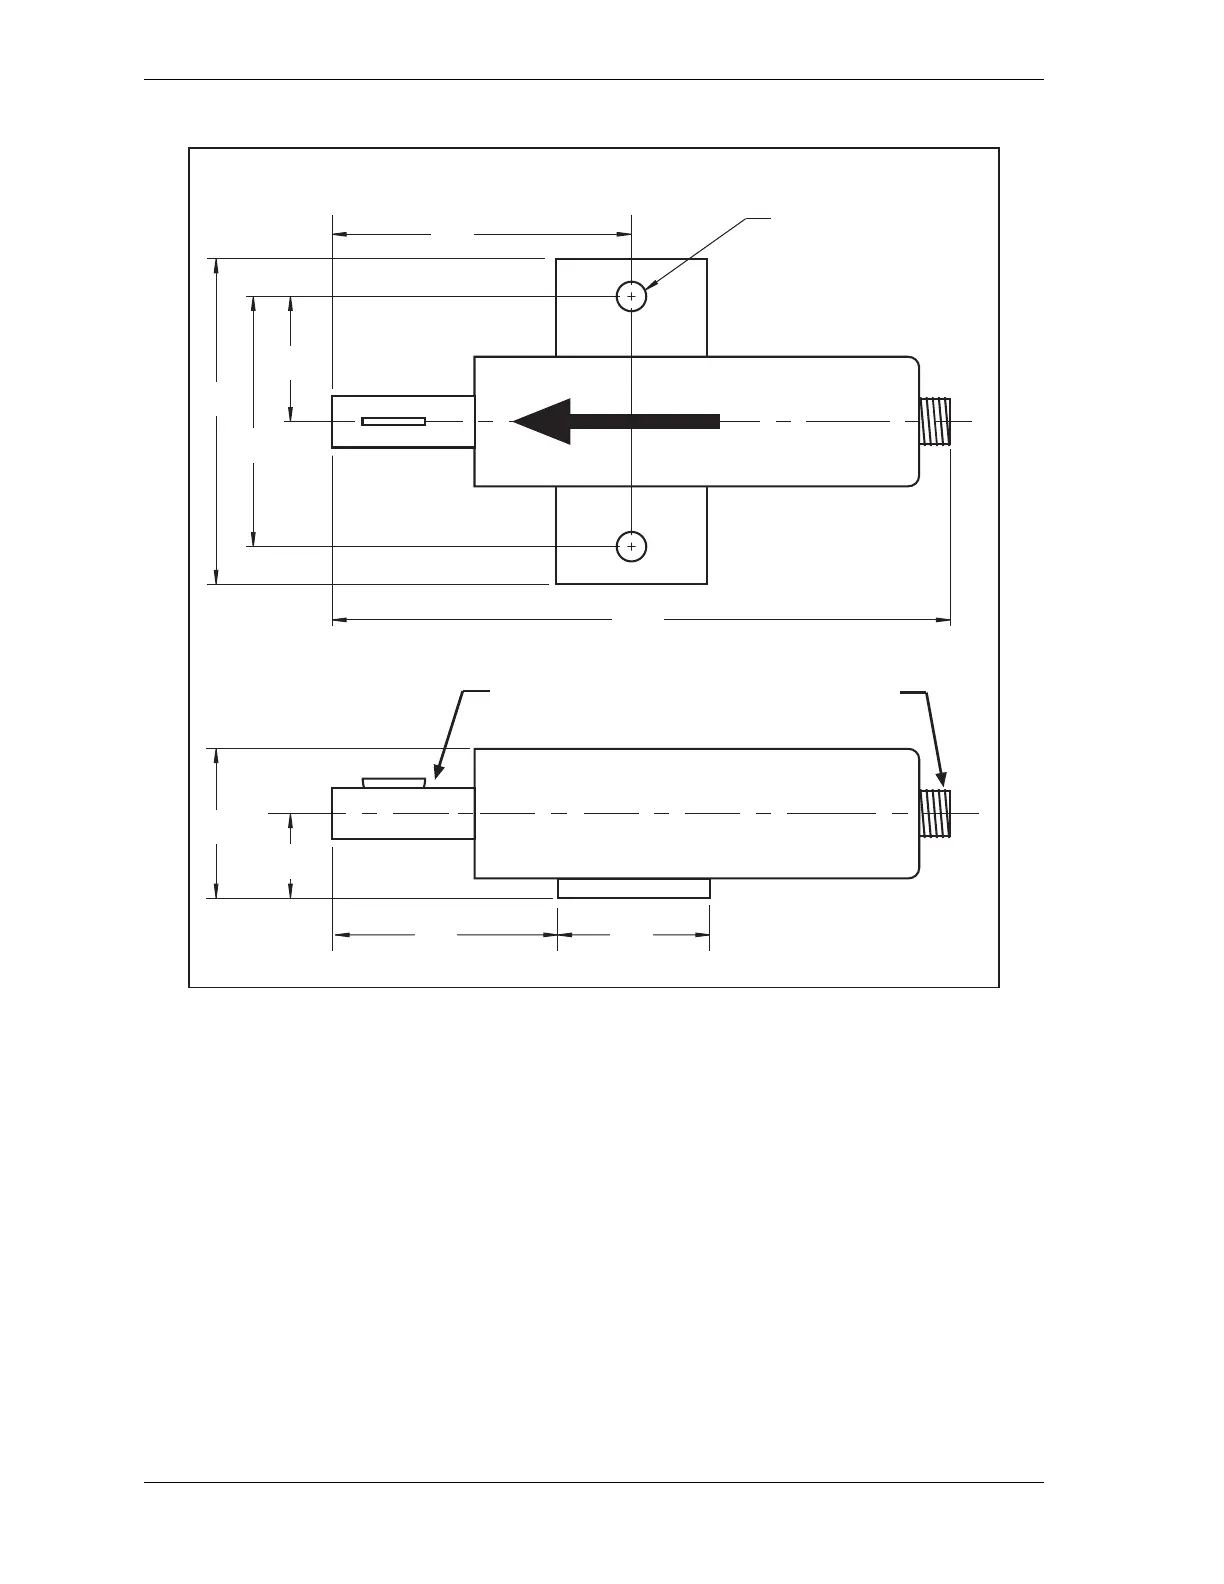
Figure 2-13. Resolver: Mounting Dimensions
2.75
(69.9)
1.06
(26.9)
1.75
(44.5)
2.00
(50.8)
3/4 dia. shaft (19.05)
standard key
Electrical connector
for cable
3.62
(91.9)
0.34 (8.6) dia holes
2 places
9.16
(232.7)
RESOLVER IS AT ZERO WHEN
KEYWAY IS ALIGNED WITH ARROW
3.00
(76.2)
3.75
(95.3)
1.50
(38.1)
Resolver shown in
zero-degrees position,
with key perpendicular
to base
Dimensions: inches
(mm)


 To Next Page