SmartPAC 2 with WPC 2000 Integration User Manual 1128600
Program Mode 5-27
2. Decrement the CRITICAL ANGLE default value of 185°, using the Down () cursor
key, until the value you want is displayed. SmartPAC 2 accepts Critical Angle values
between 0° and 184°.
3. Press ENTER when you are done.
If the sensor you are programming is a Green, Green Quick Check, or Green Constant
sensor, the Ready Signal Programming screen displays (see next section).
If the sensor you are programming is a red or yellow sensor, you are finished, and you are
taken to the Sensor Settings screen (see Viewing and Changing Sensor Settings,
page 5-30).
After you have programmed one or more Smart Stop sensors, you can change the critical
angle by performing these steps:
1. On the Die Protection Sensor Menu, select a sensor programmed as Smart Stop. The
Sensor Settings screen (see Figure 5-30, page 5-30) displays.
2. Select SMART STOP. The Sensor Stop Type screen displays with SMART STOP
highlighted.
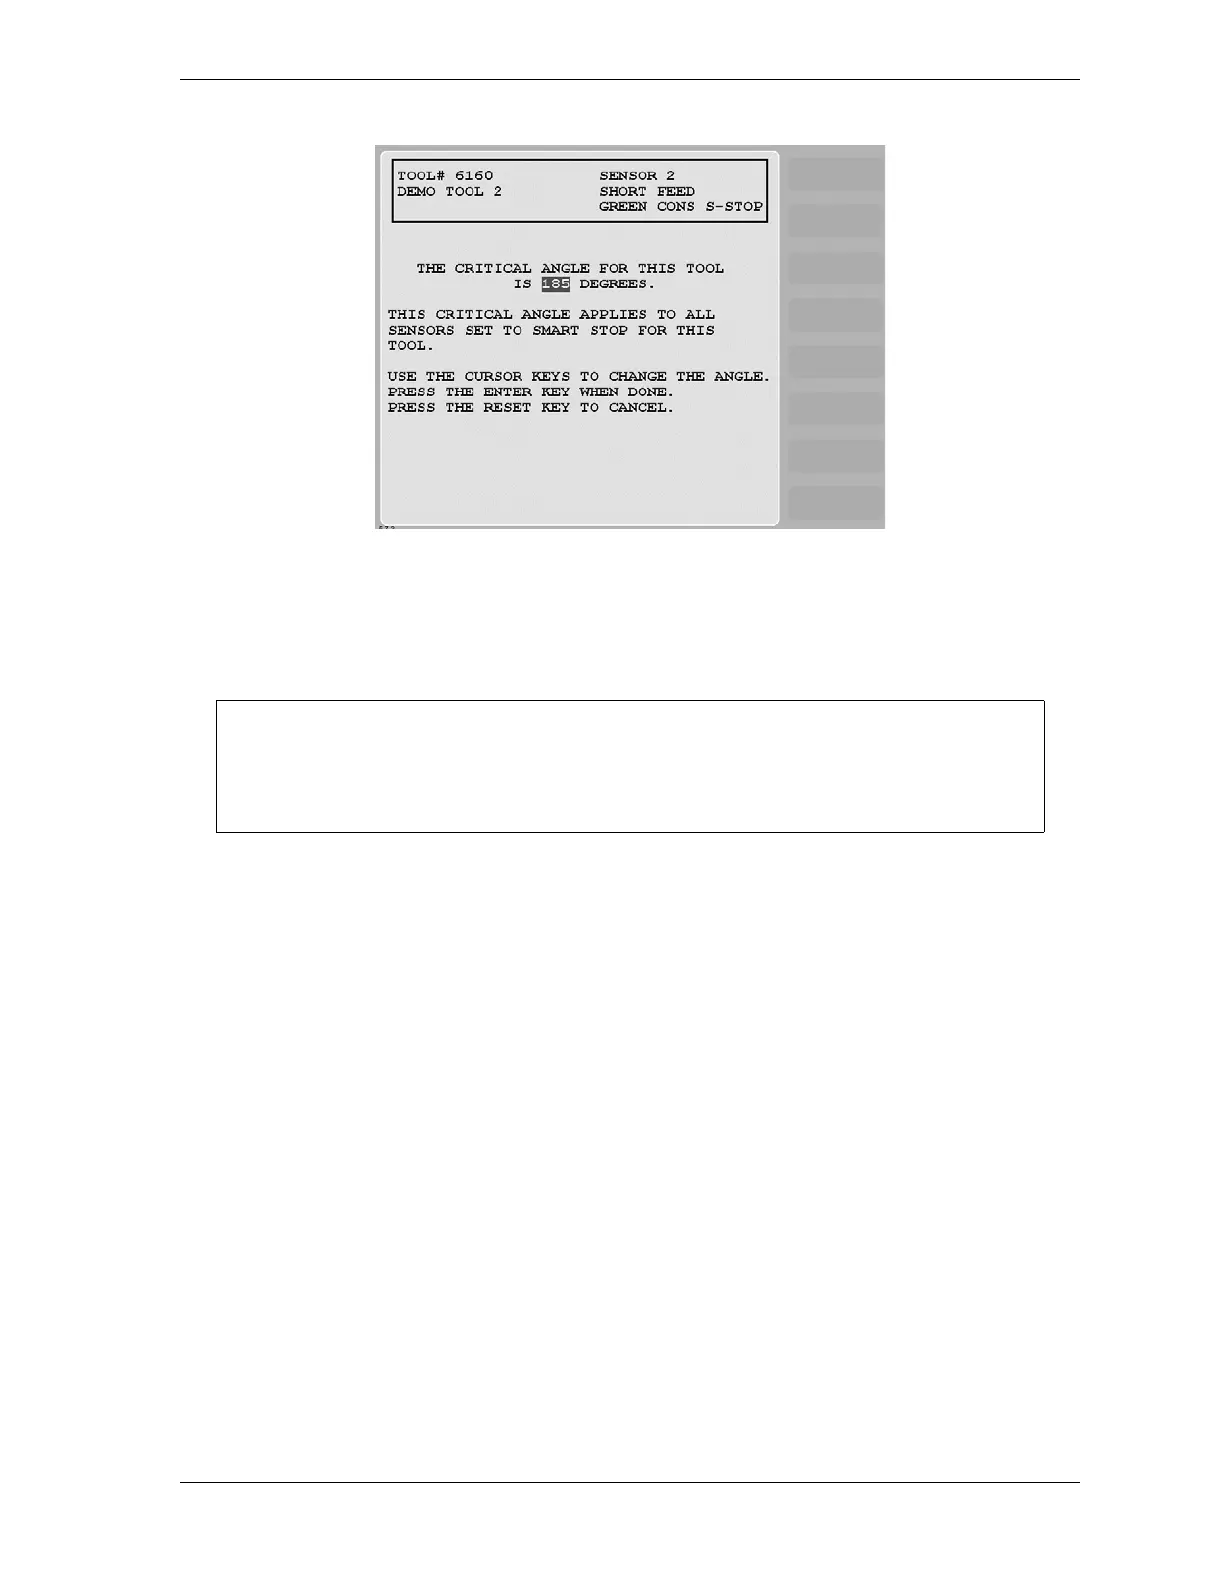
3. Press F5 (Set Critical Angle) to display the Critical Angle Programming screen.
4. Change the Critical Angle setting, using the Up () and Down () cursor keys.
Figure 5-27. Critical Angle Programming Screen
The Critical Angle default of 185° cannot be used as your Smart Stop critical angle setting.
If you attempt to enter 185° as the critical angle, a window will open, asking you to enter a
different value.
 Loading...