04/2016
4-9
Phaser 4600/4620/4622 Printer Service Manual
REP 1.5
4 Repairs and Adjustments
Revised
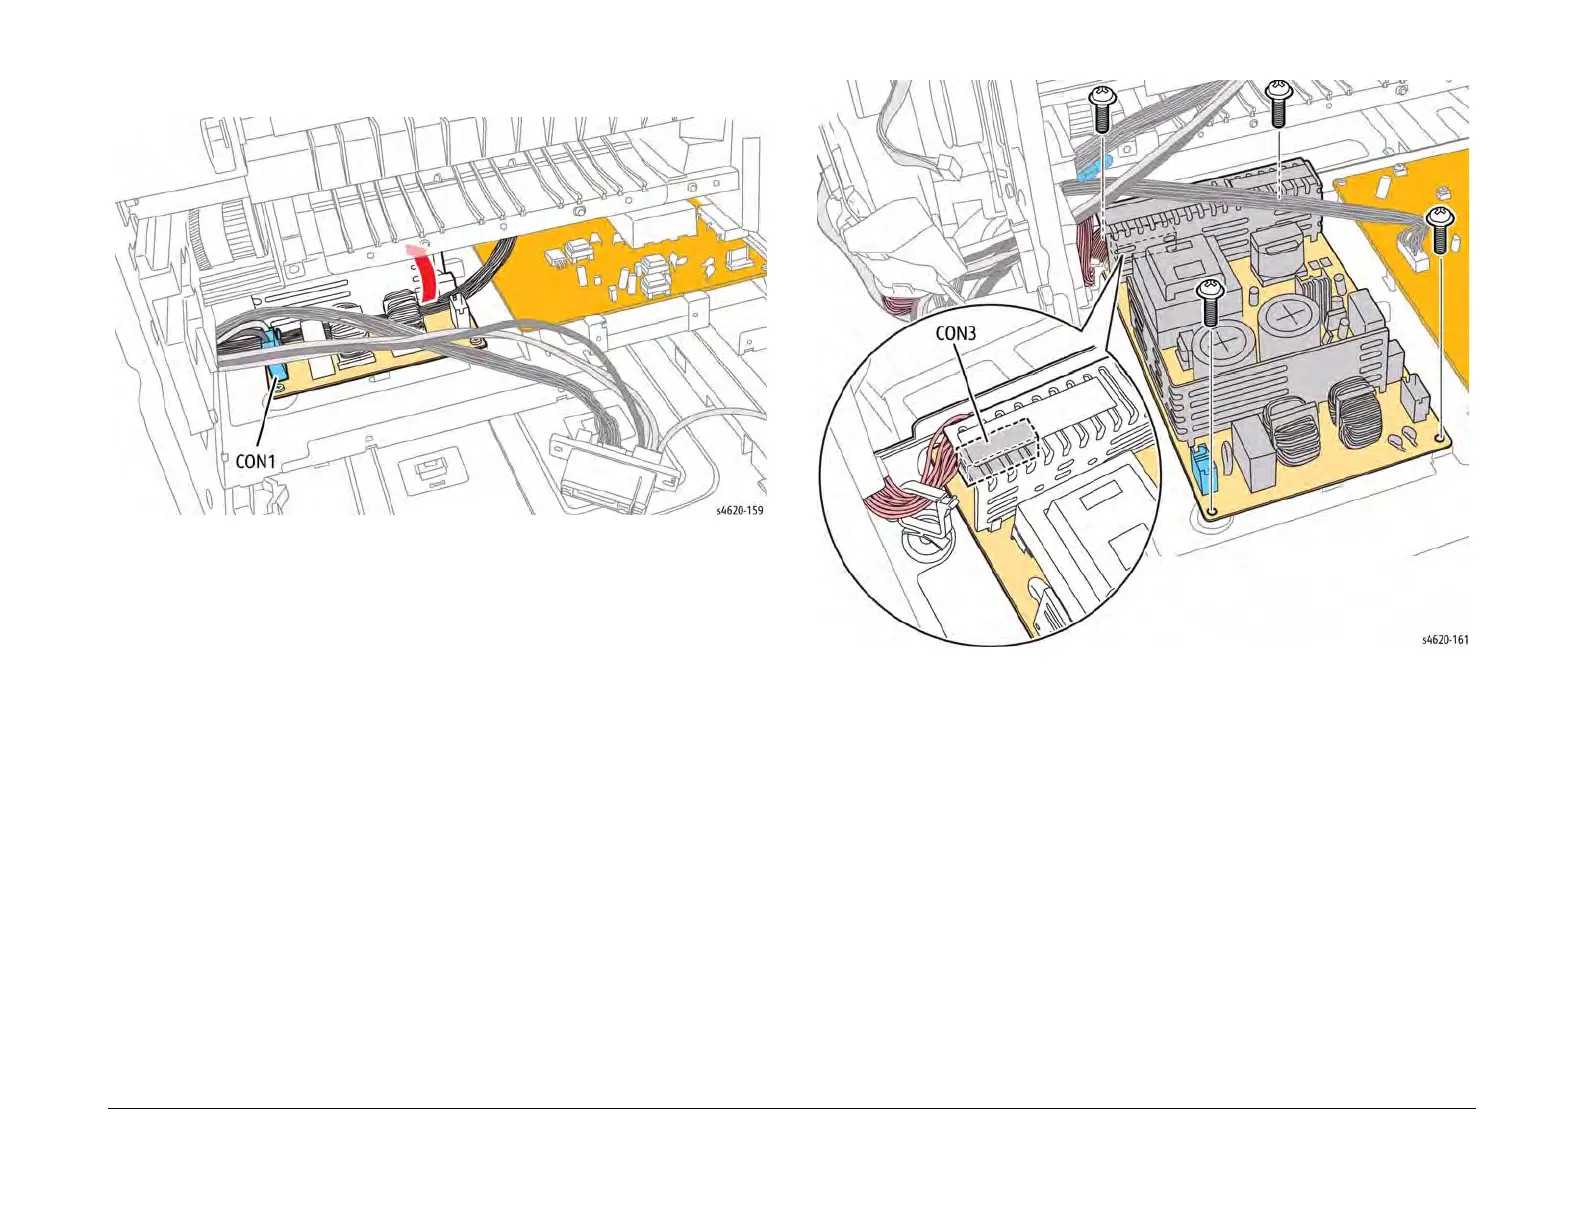
18. Disconnect CON1 from the SMPS and raise the harness over the SMPS heat sink to
release the power supply tray from the chassis, Figure 7.
Figure 7 Slide the power supply tray out of the chassis
19. Disconnect CON3, release the harness from the clamp, and remove 4 screws (metal) that
secure the SMPS to the power supply tray, Figure 8.
Figure 8 Remove the SMPS