EasyManuals Logo

Xerox Phaser 4600 Service Manual

Xerox Phaser 4600
409 pages
To Next Page IconTo Next Page
To Previous Page IconTo Previous Page
Page #153 background imageLoading...
Page #153 background image
04/2016
4-31
Phaser 4600/4620/4622 Printer Service Manual
REP 7.6
4 Repairs and Adjustments
Revised
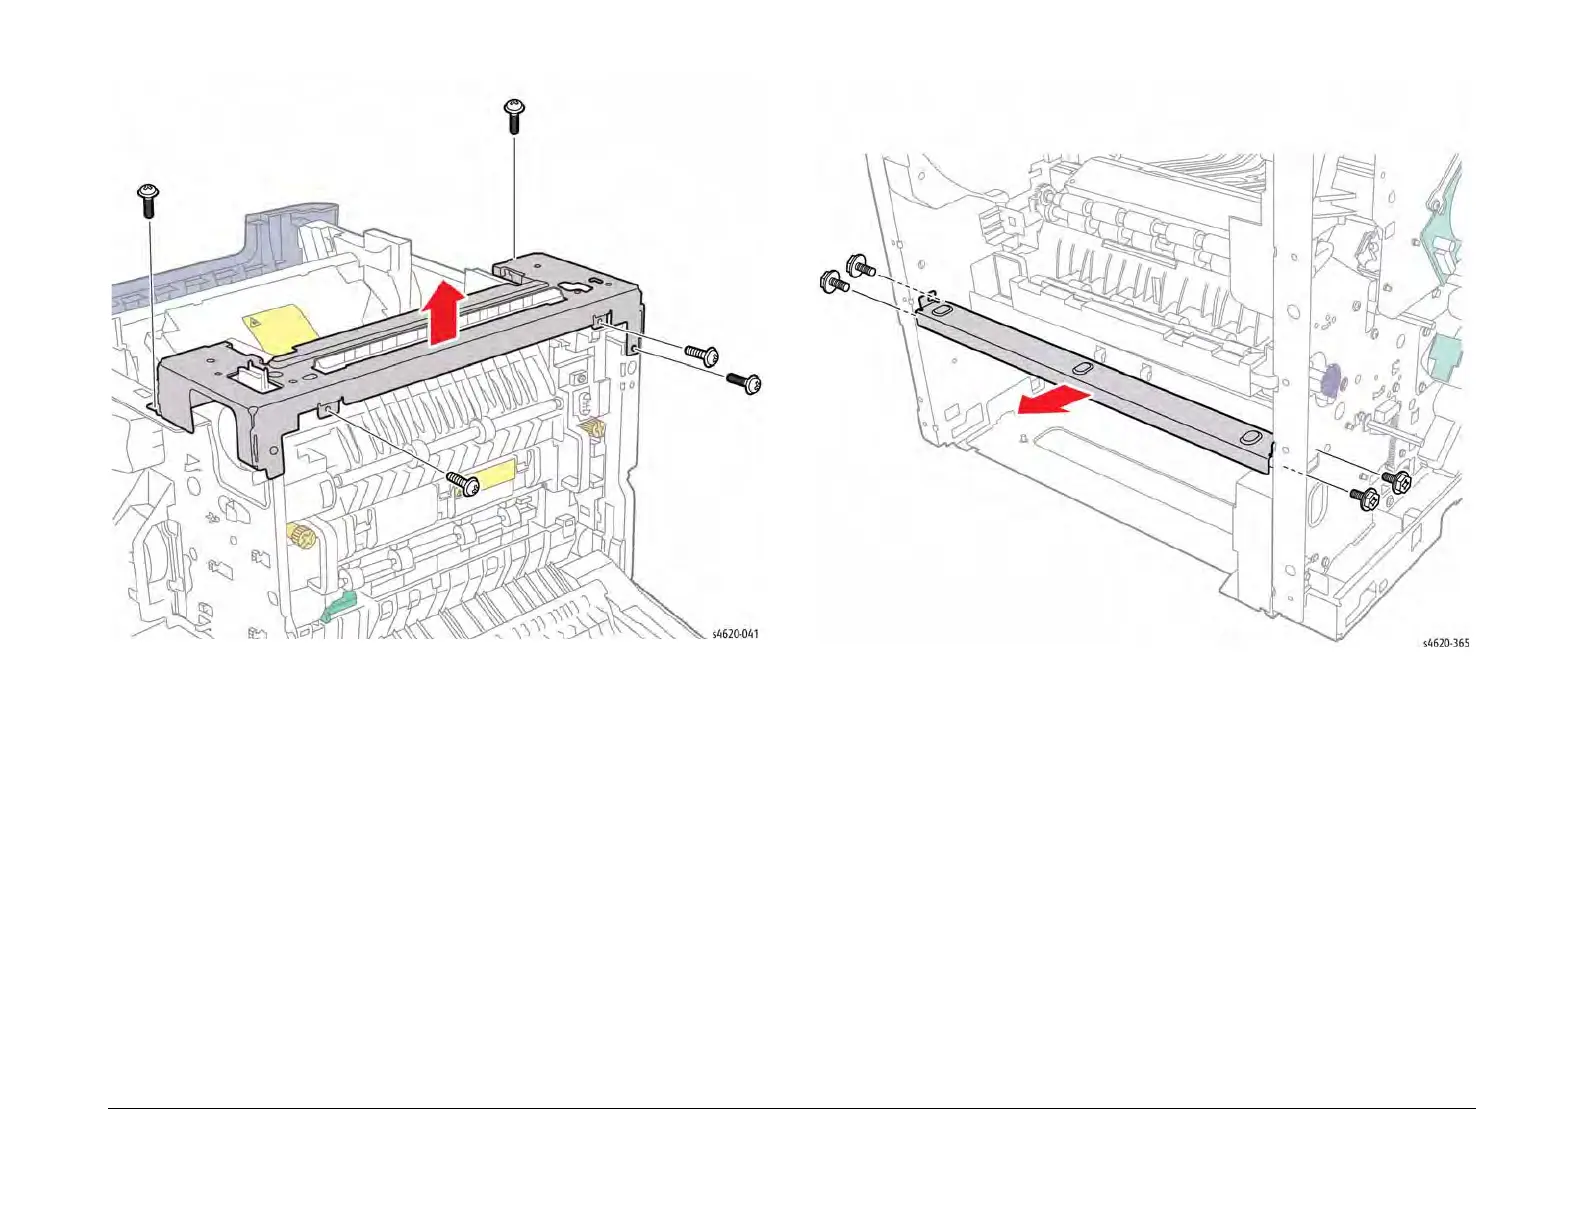
Figure 1 Remove the rear support bracket
11. Remove the Front Cover, REP 28.4.
12. Remove the Rear Door, REP 28.6.
13. Remove the Fuser, REP 10.10.
14. Remove the MCU Board and bracket, REP 3.4.
15. Remove the Tray 2 Feed Clutch, REP 4.2.
16. Remove the Registration Clutch, REP 4.3.
17. Remove the Feed Drive Assembly, REP 4.4.
18. Remove 4 screws (metal) that secure the front support bracket, Figure 2.
Figure 2 Remove the front support bracket
19. Remove 3 (plastic) screws, disconnect the Duplex Unit Detect Sensor P/J24, depress 1
tab and slide the guide to the rear to release the hooks and remove the left upper tray
guide from the chassis, Figure 3.

Table of Contents

Other manuals for Xerox Phaser 4600

Questions and Answers:

Question and Answer IconNeed help?

Do you have a question about the Xerox Phaser 4600 and is the answer not in the manual?

Xerox Phaser 4600 Specifications

General IconGeneral
Print TechnologyLaser
Print ResolutionUp to 1200 x 1200 dpi
Monthly Duty CycleUp to 275, 000 pages
Maximum Paper Capacity3, 750 sheets
Processor533 MHz
Supported Operating SystemsWindows, Mac OS, Linux
ConnectivityUSB 2.0, Ethernet 10/100/1000Base-T
Memory256 MB
Maximum Paper Size8.5 x 14 inches
Print LanguagesPCL 6, PostScript 3
Duplex PrintingStandard
Weight25.9 kg

Related product manuals