04/2016
4-90
Phaser 4600/4620/4622 Printer Service Manual
REP 10.6
Revised
4 Repairs and Adjustments
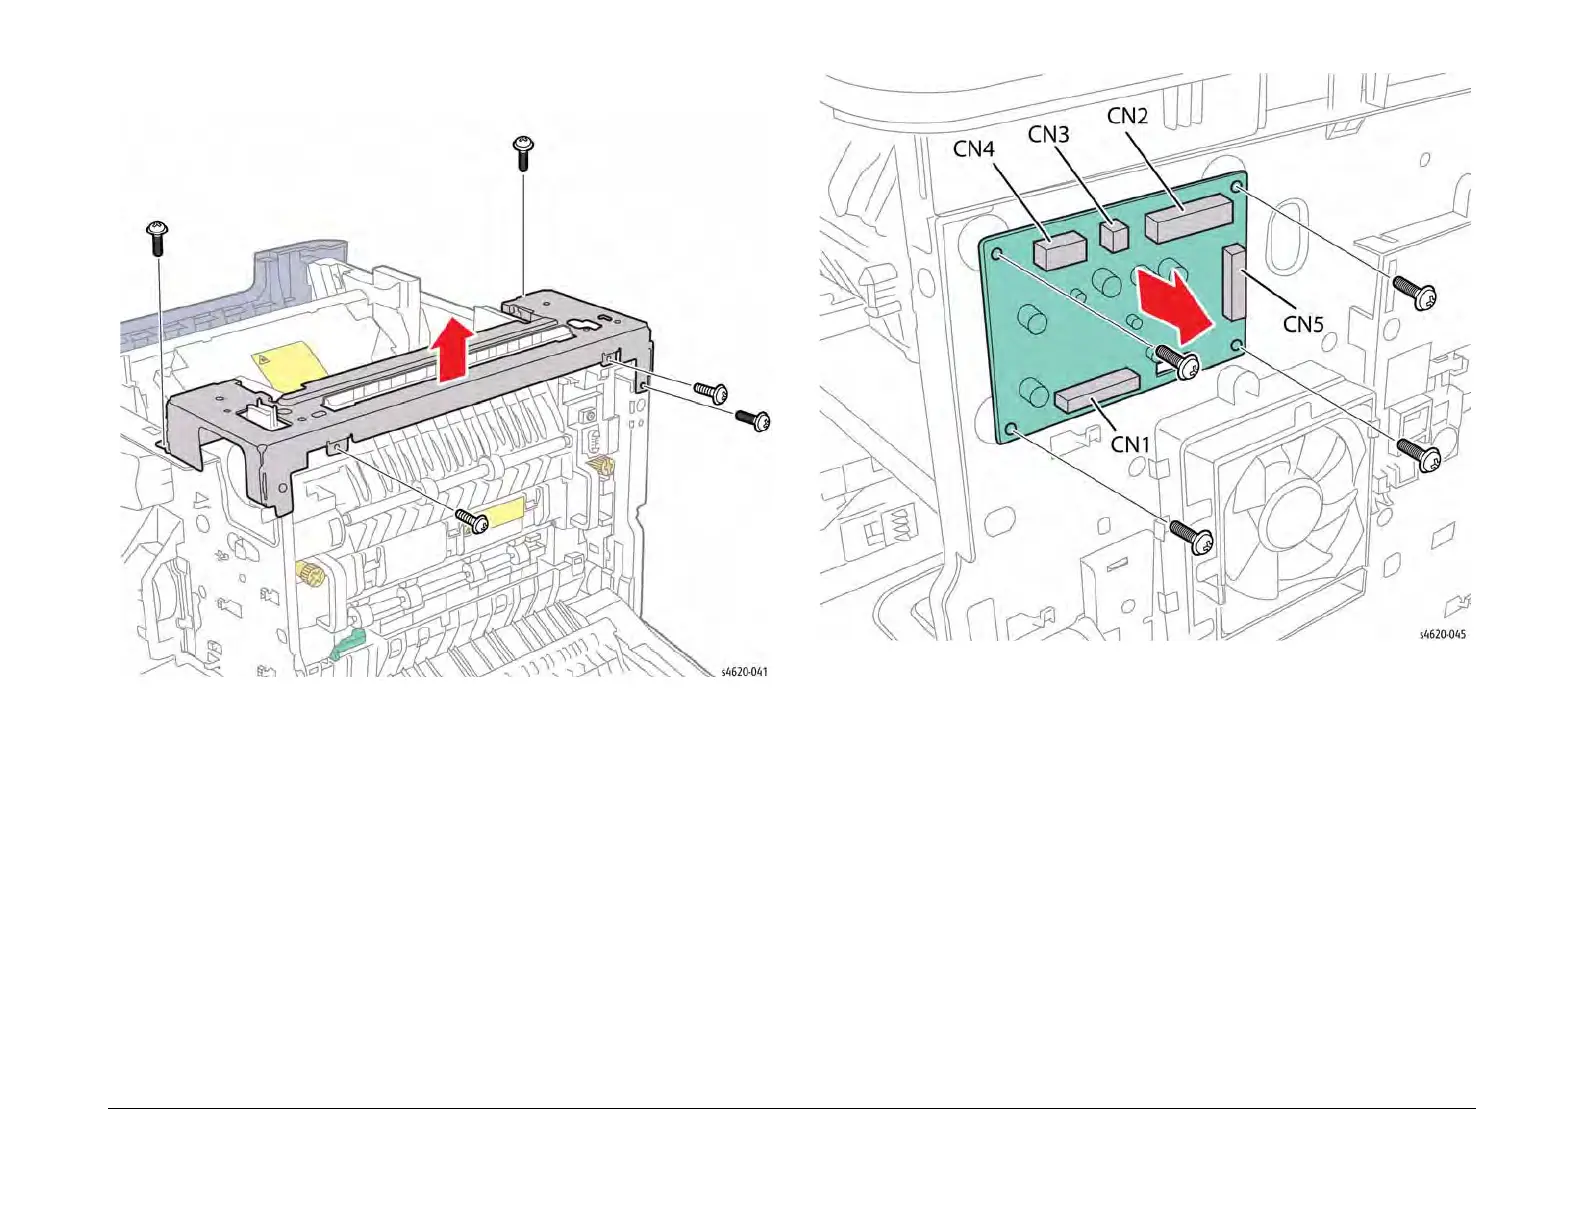
10. Lift the bracket and rest on the printer chassis, Figure 2.
Figure 2 Remove the rear support bracket
11. Disconnect CN3 and CN4 from the Joint Board and feed into the chassis.
12. Remove 4 screws (metal) that secure the Joint Board to the chassis, Figure 3.
Figure 3 Remove the Joint Board screws
13. Disconnect P/J40 from the Exit Assembly, Figure 4.