04/2016
4-95
Phaser 4600/4620/4622 Printer Service Manual
REP 10.8
4 Repairs and Adjustments
Revised
9. Disconnect P/J52 (Feed Clutch) and P/J36 (Registration Clutch).
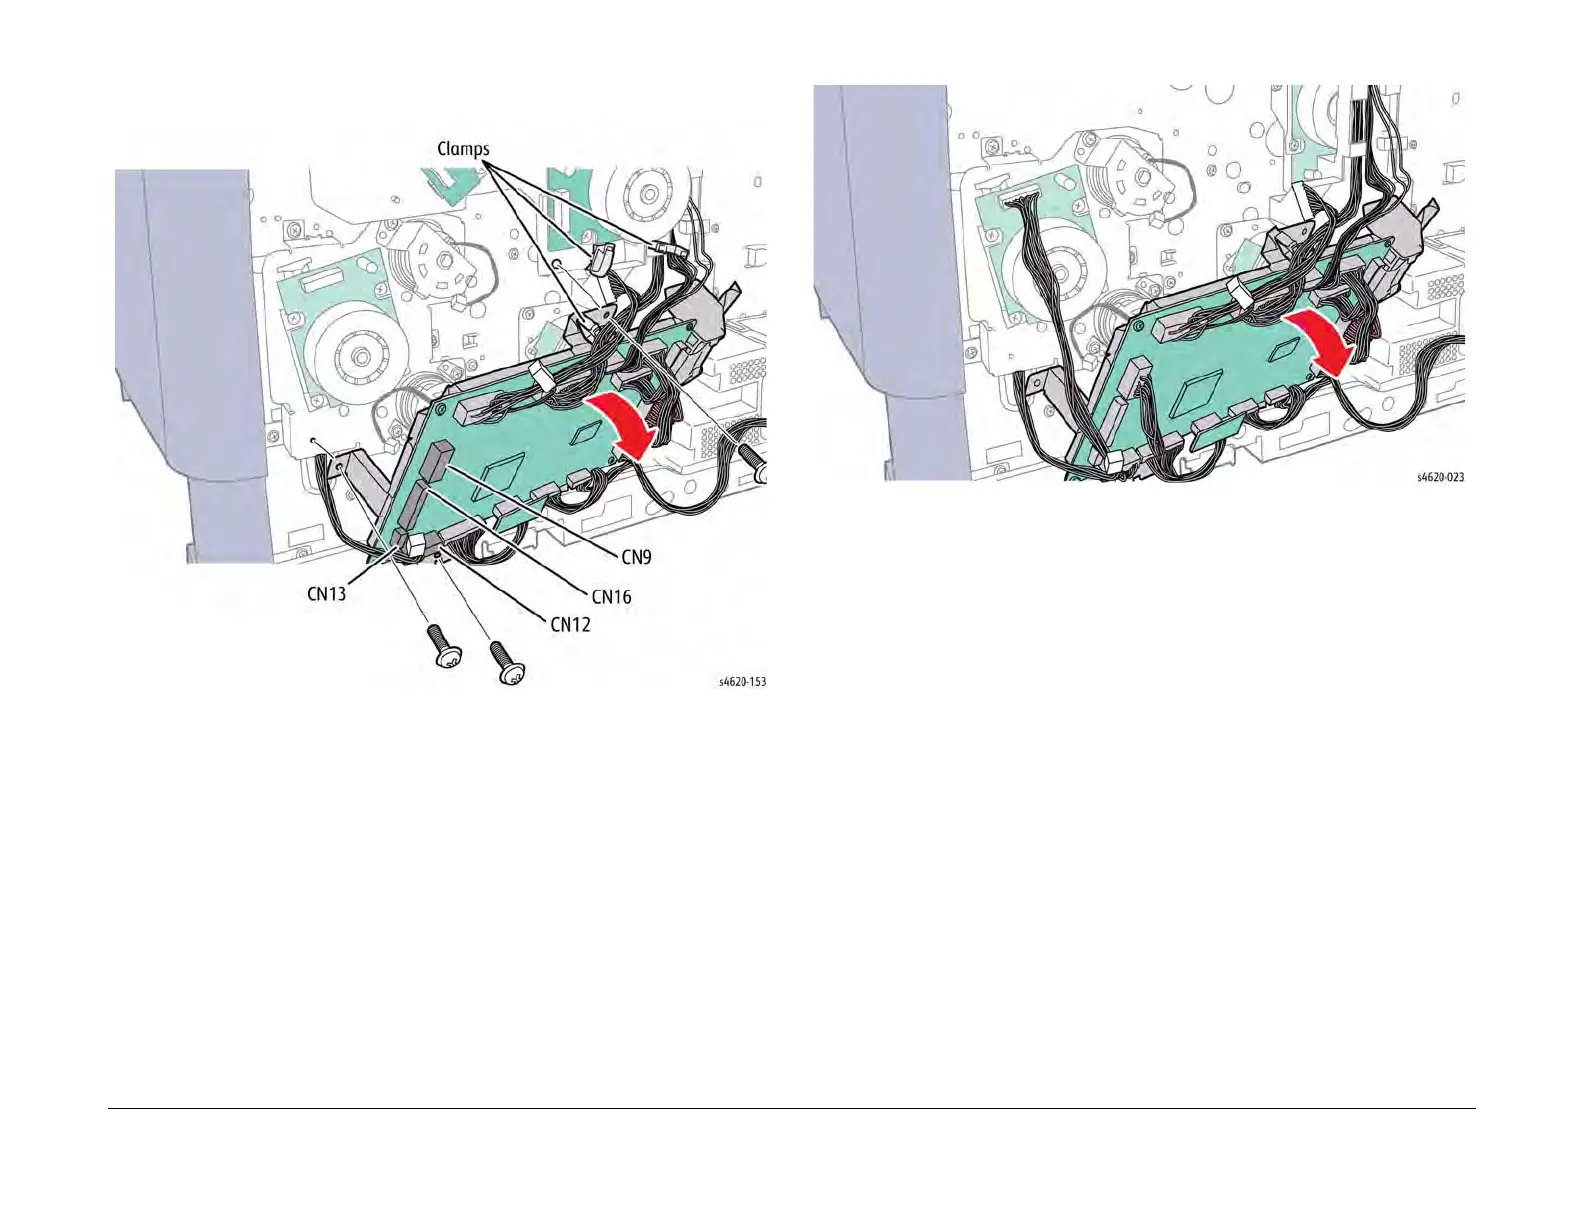
10. Remove 3 screws (metal) that secure the MCU Board bracket to the chassis, Figure 2.
Figure 2 Remove the MCU Board and bracket
11. Raise the MCU Board bracket to release the tabs from the chassis and move the board
away from the center harness guide, Figure 3.
Figure 3 Position the MCU Board bracket to access the center harness guide
12. Remove 3 screws (metal) that secure the center harness guide to the chassis and move
the guide away from the Fuser Drive Assembly, Figure 4.