4.3 Setting System Menu
4-11
4
4.3.3 Screen Copy
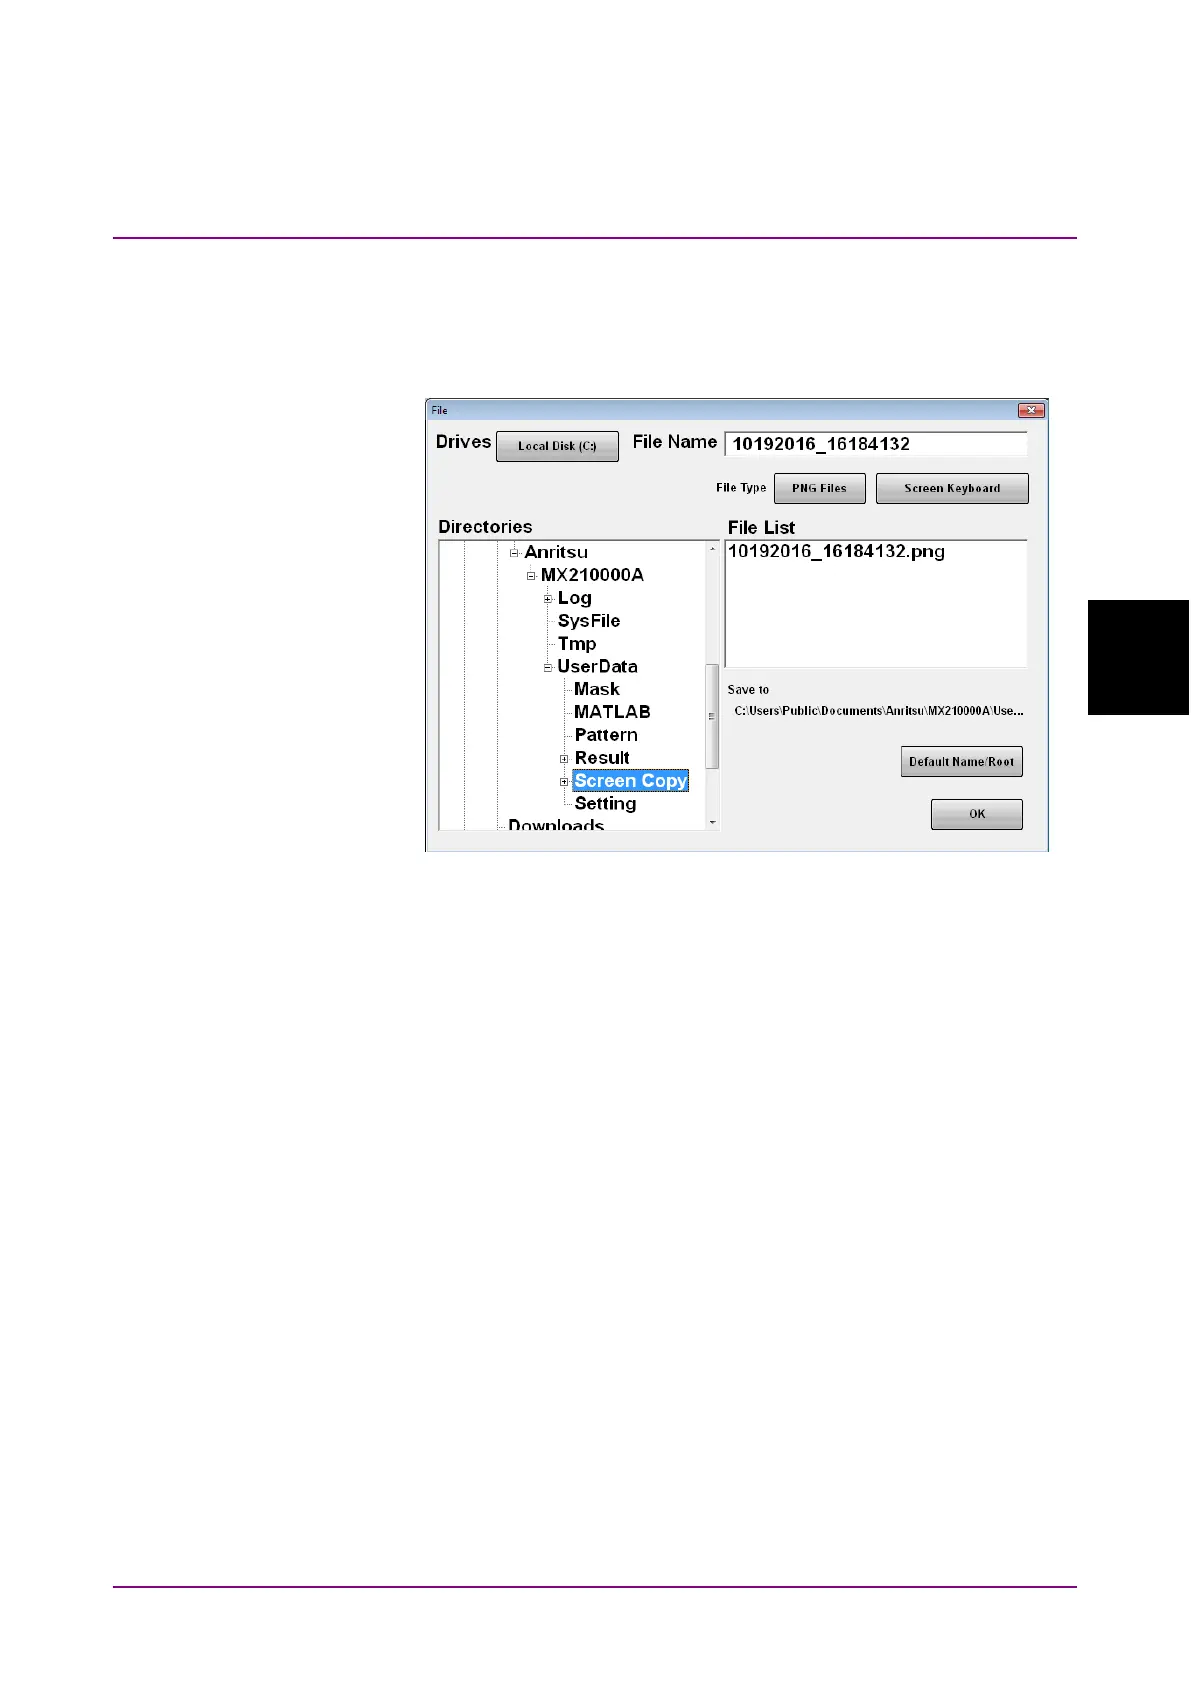
Saving screenshots as image files
1. Click Screen Copy.
The file selection dialog box is displayed.
2. Click the
Drives button, and then in the Directories area, select a
save destination folder. The folder name is displayed at Save to.
3. The file format to be saved is displayed in the right button of the file
type. The file format can be toggled between
PNG Files and JPEG
Files by clicking the button.
4. To input the file name, click
Screen Keyboard to set the file name.
5. To overwrite an existing file, click the file name in the
File List area.
6. Click
OK to save a screenshot as a file.
When overwriting an existing file, a confirmation message is
displayed.
When clicking
Default Name/Root, the folder and file names are set to the
default values.
The default folder is as follows:
C:\Users\Public\Documents\Anritsu\MX210000A\UserData\Screen Copy
The default file name is the date and time.
For example, the name of the file saved at 12:05:55.523 on 17 January
2017 will be as follows:
For
JPEG Files: 01172017_120555523.jpg
For PNG Files: 01172017_120555523.png