15. Convergence
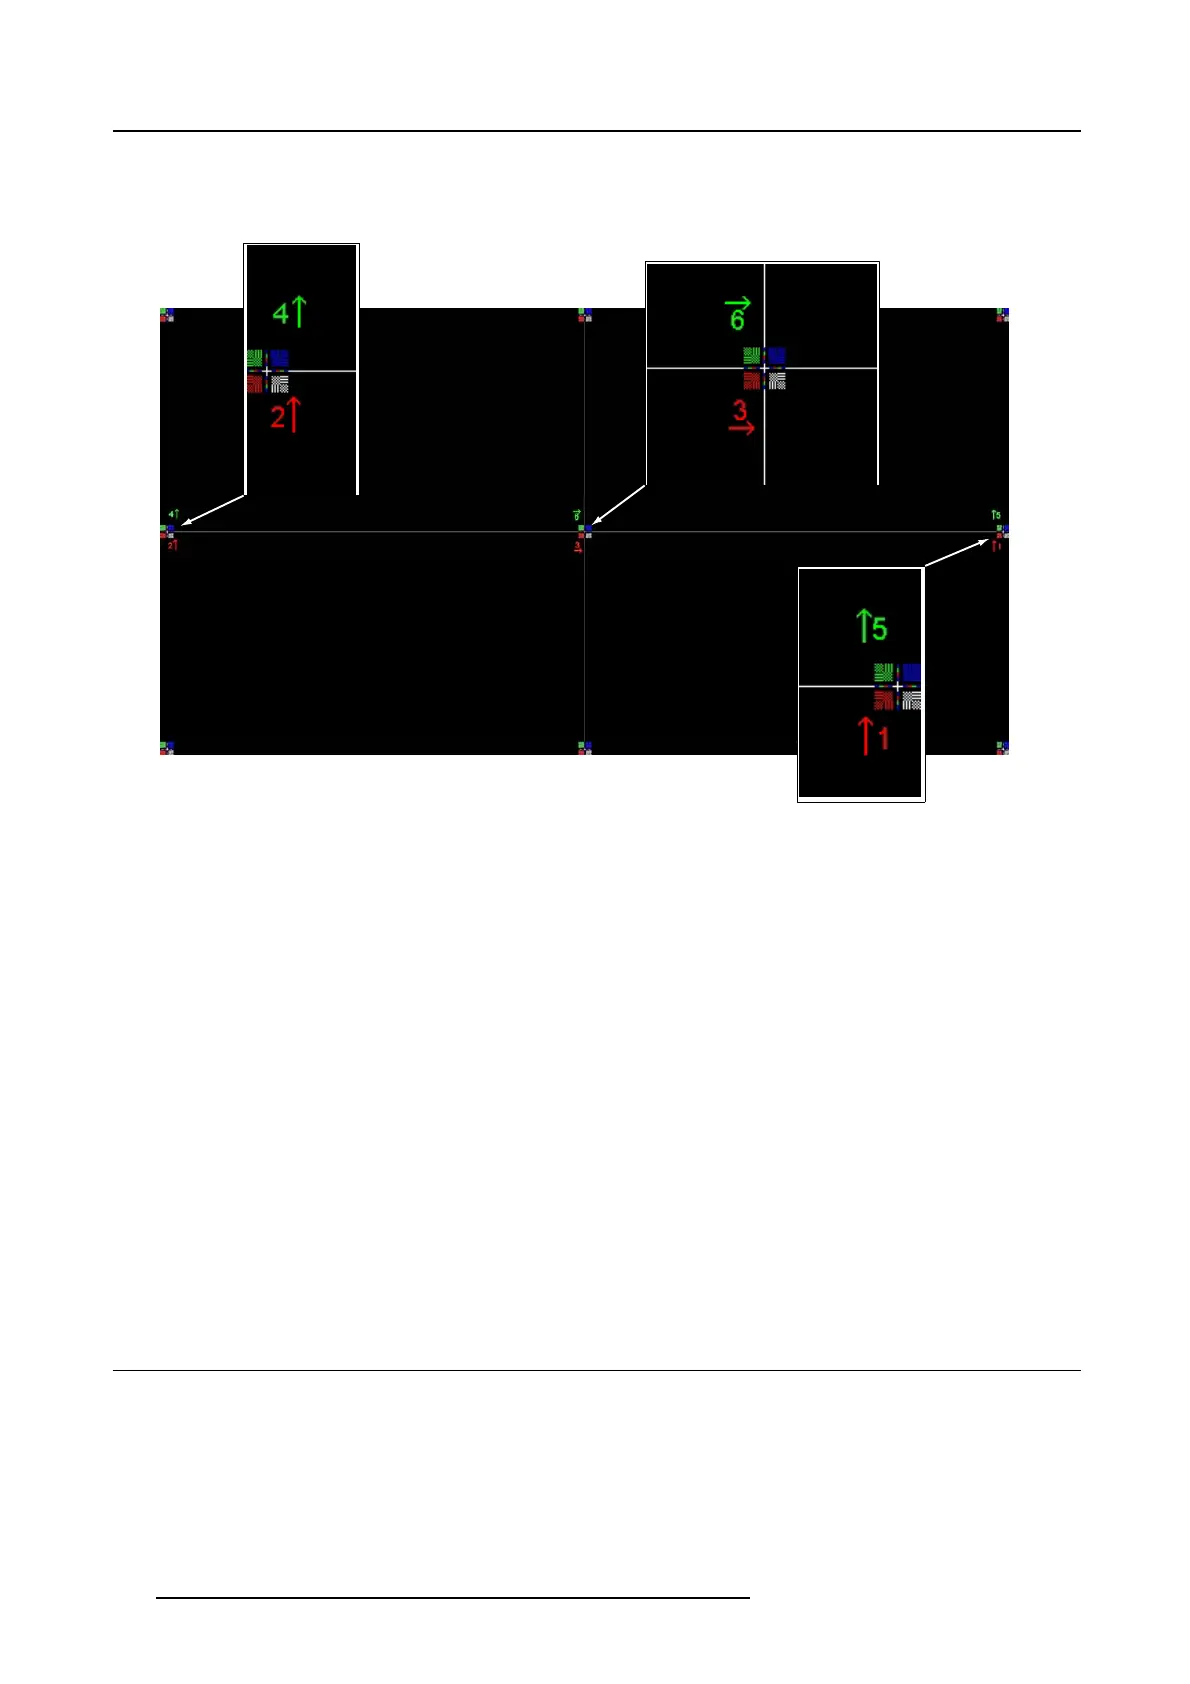
Convergence Test pattern
For the manual correction of the DMD convergence, a typical co nvergence test pattern is generated. For a 4K projector, use the 4K
test pattern.
Image 15-6
Convergence test pattern
Work Instructions:
• GREEN and RED DMD’s are to be adjusted with reference to the BLUE dmd.
• Each adjustment allows for approximately 10 pixels (for 2K projectors) or 20 pixels ( for 4K projectors) maximum displacement
to either side of the nominal BLUE position
• Rotation is lim ited to approximately +/- 5pixels on the left sc reen flank and +/- 5 pixels on the right screen flank
• One turn of an adjustment screw relates to an approx. 5-pixel displacement on the screen.
• Let the projector warming up for 30 m inutes, while projecting the convergence test pattern, before starting to a djust the conver-
gence.
Take Care:
• In rare cases it can happen that the nomina
l dmd position falls within a dead zone, where the mechanism changes from a
pushing to a pulling function. This dead zone is due to inherent tolerances within the mechanism. Approxim ately 2 turns are
required to get out of the dead zone. If it so happens that the nominal position of an adjustment falls within this dead zone,
it is preferable to c ontinue screwing
through the dead zone for another 2 turns. Then return to the required nominal position.
The dead zone should now be displaced away from the required end position. The DMD is now securely held in the nominal
position.
• Each adjustm ent is limited to approximately 10 pixels (for 2K projectors) or 20 pixels (for 4K projectors) displacement. DO NOT
try to force the adjustment beyond this point. The system has an end of travel in b oth directions, but with ex cessive force one
could cause dam age.
15.4 Red on blue convergence
Necessary tools
No tools.
Converging the RED patte
rn onto the BLUE pattern
Start with aligning the RED DMD in the vertical directions [1] and [2] and then proceed with the horizontal d irection [3]
1. To translate RED vertically in the Y + direction, turn both [1] and [2] clockwise . Turn screws in equal increments.
152
R5906753 DPXK BLP SERIES 20/11/2017

 Loading...


