4. Physical installation projector
4.6 Power loop through to the projector electronics
This procedu re explains ho w to provide the projector e lectronics with pow er in case n o UPS unit is used.
Note that the projector is by default configured for use without UPS. So, the short power link cable is already
installed.
Necessary tools
No tools.
Necessary parts
Short power link c able w ith p lug type C13/C14
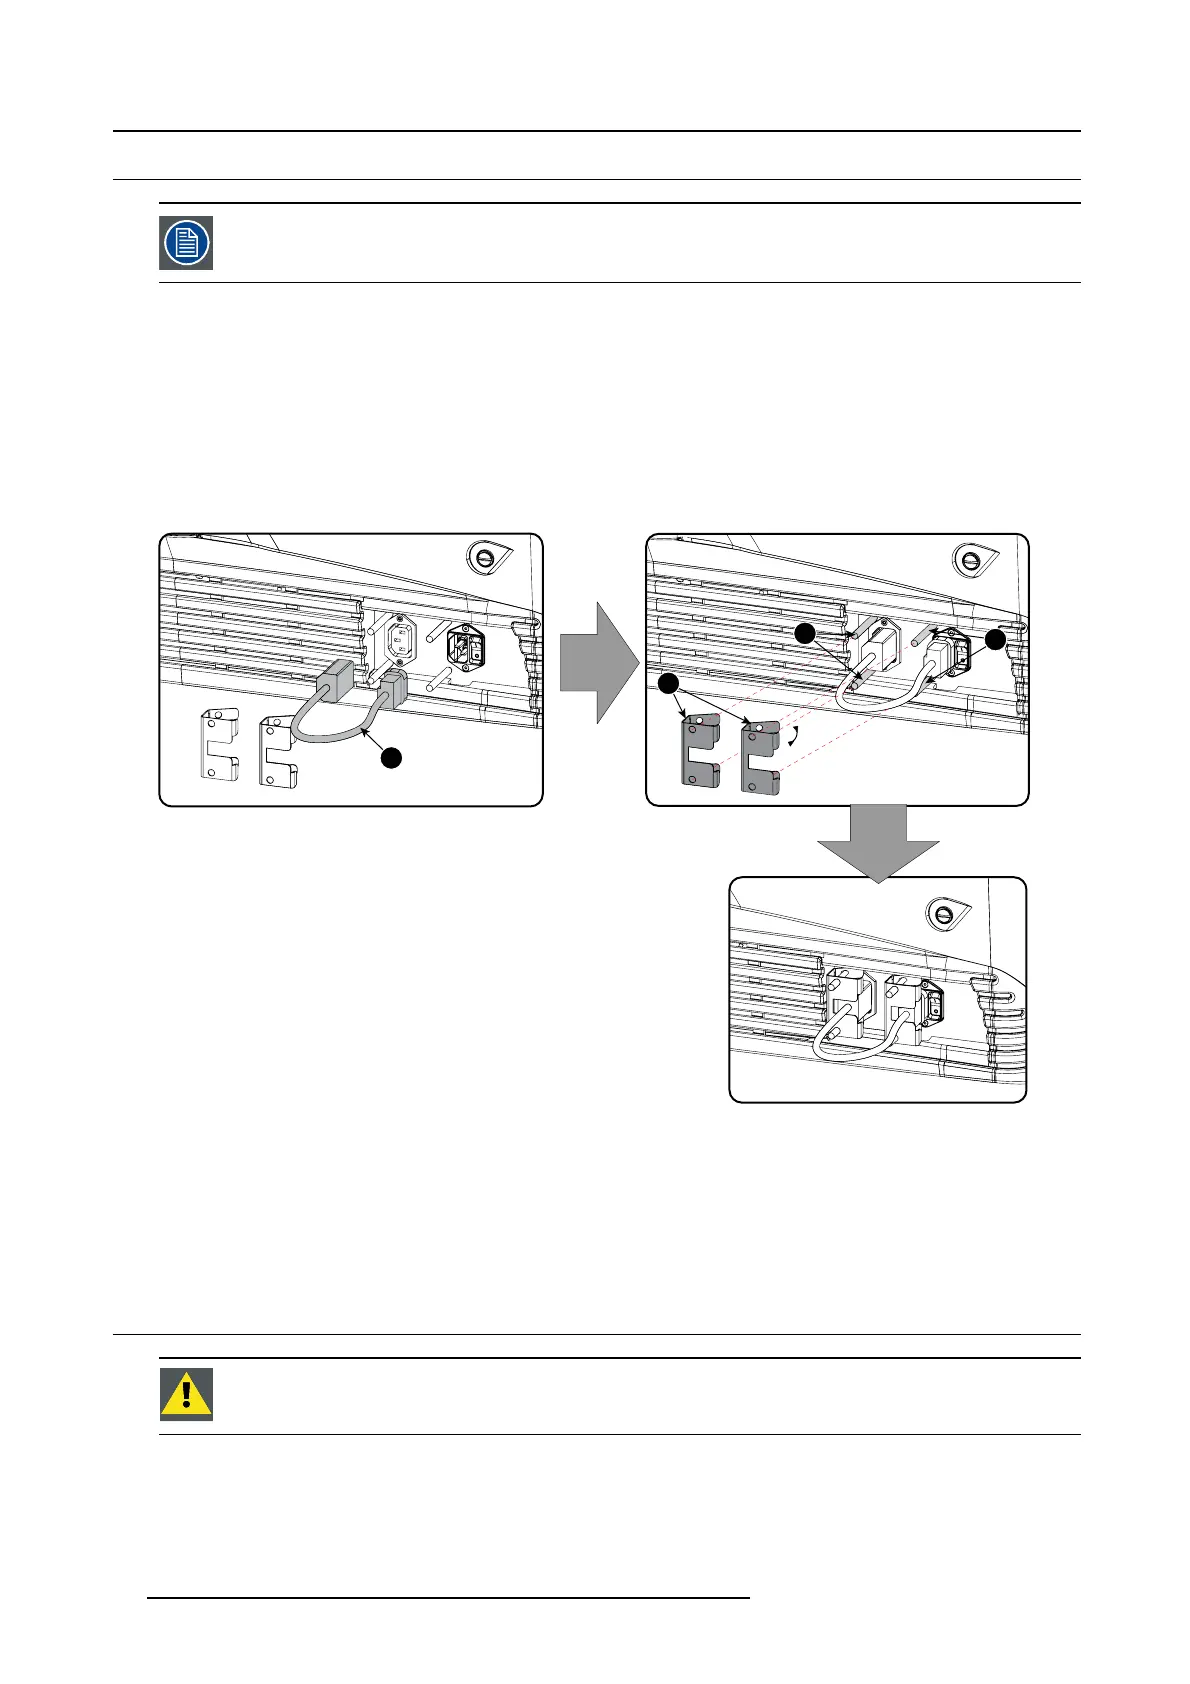
How to loop through the power
1. P lug in the short power cable (1) which was delivered with the projector.
Warning: Always us e the Barco short power cable which is delivered w ith the projector.
1
2
3
3
Image 4-14
Power loop through connection
2. S ecur e both plugs o f the short cable with
a fixation spring (2). Ha ndle as follow:
- Squeeze t he fixation spring together.
-Slidethefixa t io n spring on the fixation pins (3) while squeezing together and push it against the power plug.
- Release the fixa tion sp ring.
4.7 Connecting a UPS to the projector electronics
WARNING: Only use U PS units w hich are suitable for the DPxK BLP series projector. See chapter ” General”,
“Installation requirements” for more information about the requirements of the UPS.
How to connect the UPS
1. Install the UP S according to the instructions of the man ufacturer a nd the local regulations.
2. Connect the power output cord from
the UPS unit t o the UPS inlet socket of the projector (right socket).
34
R5906753 DPXK BLP SERIES 20/11/2017