6. Physical installation stand alone cooler
Image 6-10
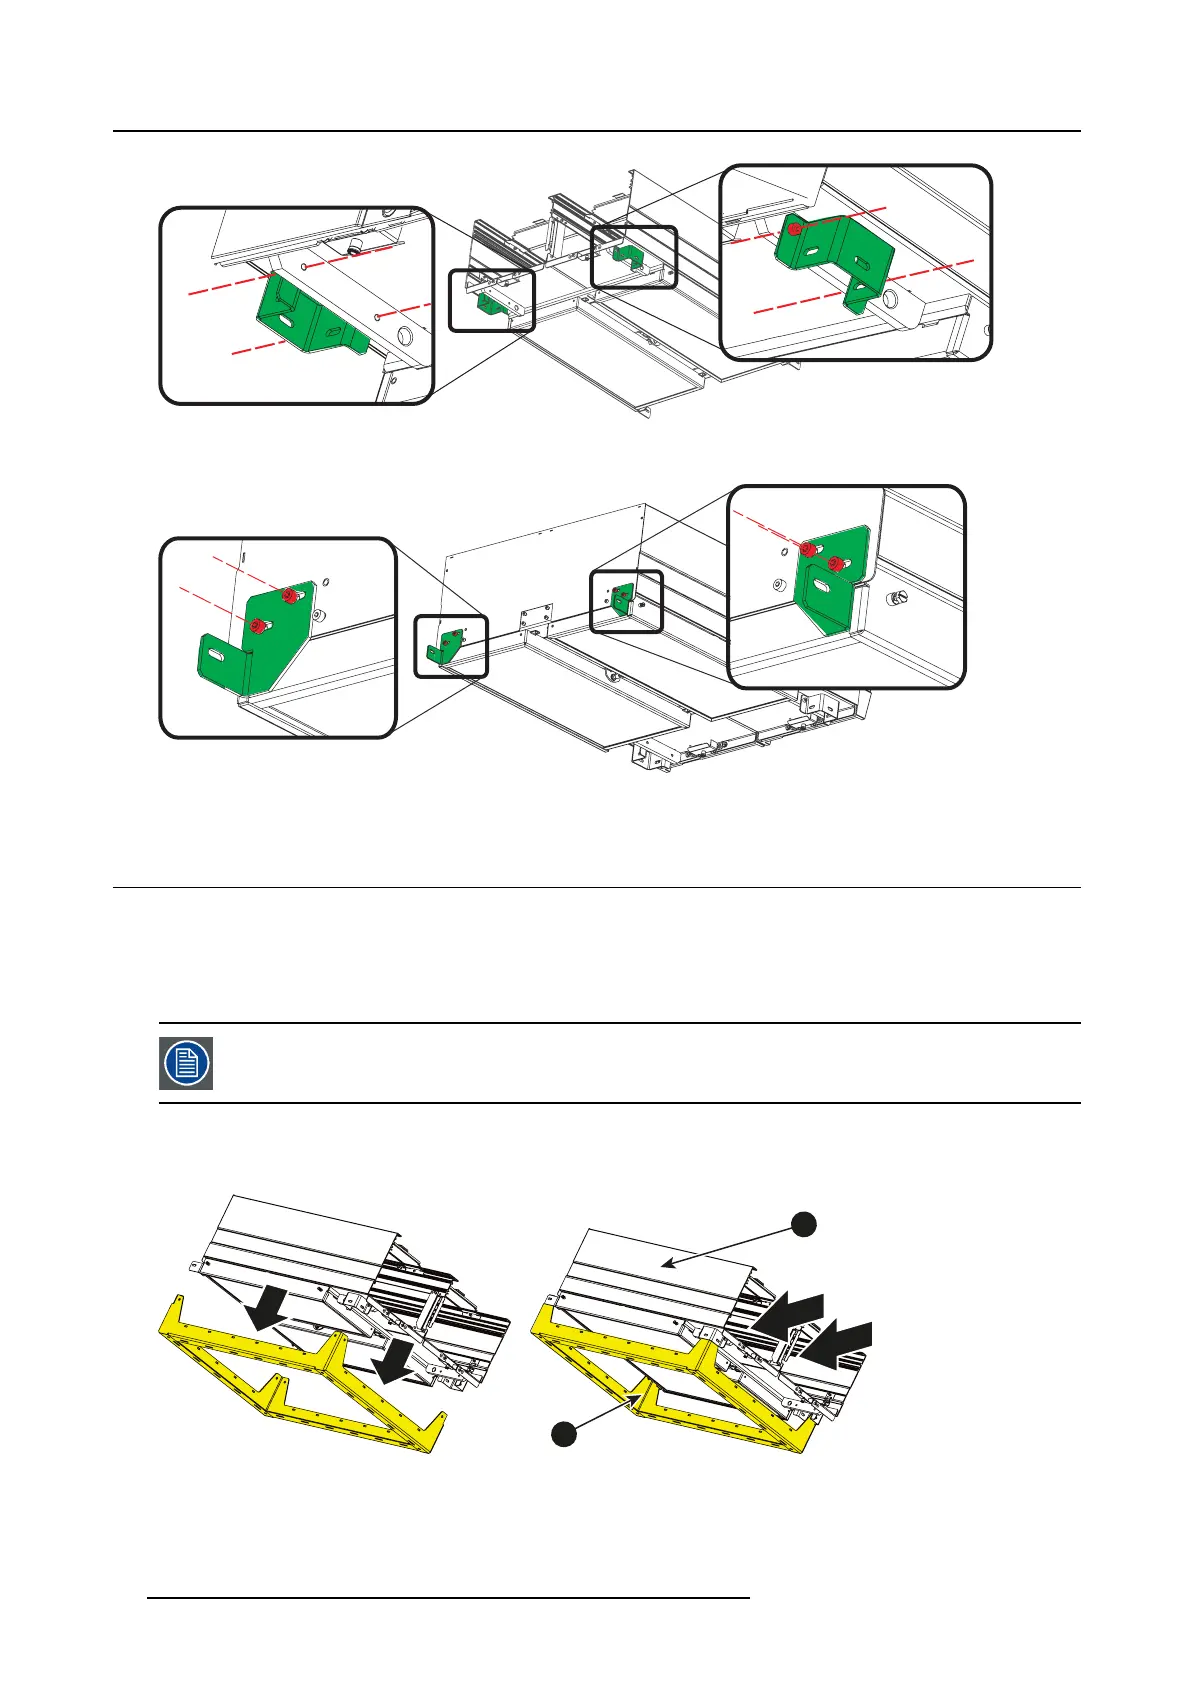
2. F ixate the rear brackets to the backside of the cooler housing with 2 screws (M 5x8) each.
Image 6-11
6.6 Mounting the cooler housing on the frame
Necessary parts
• Cooler housing a lready assembled
• Frame
• 5HexScrewsM5x8
At this s tep o f t he procedure, the fram e is considered as b eing in its final position , a nd already fixed, if the
wall mounting option has been cho sen. See chapter dedicated to the standa lone frame preparation.
How to mount
1. P lace the housing on the frame.
1
2
3
3
Image 6-12
1 cooler housing
2Frame
3 cooler inputs
2. F ixate the first U-bracket to the frame with 2 screws (M5x8) as shown in the following drawing.
56
R5906753 DPXK BLP SERIES 20/11/2017