5. Physical installation top cooler
Necessary parts
• Cooler housing already assembled.
•4xM5x10
•1xM4x8
How to mount
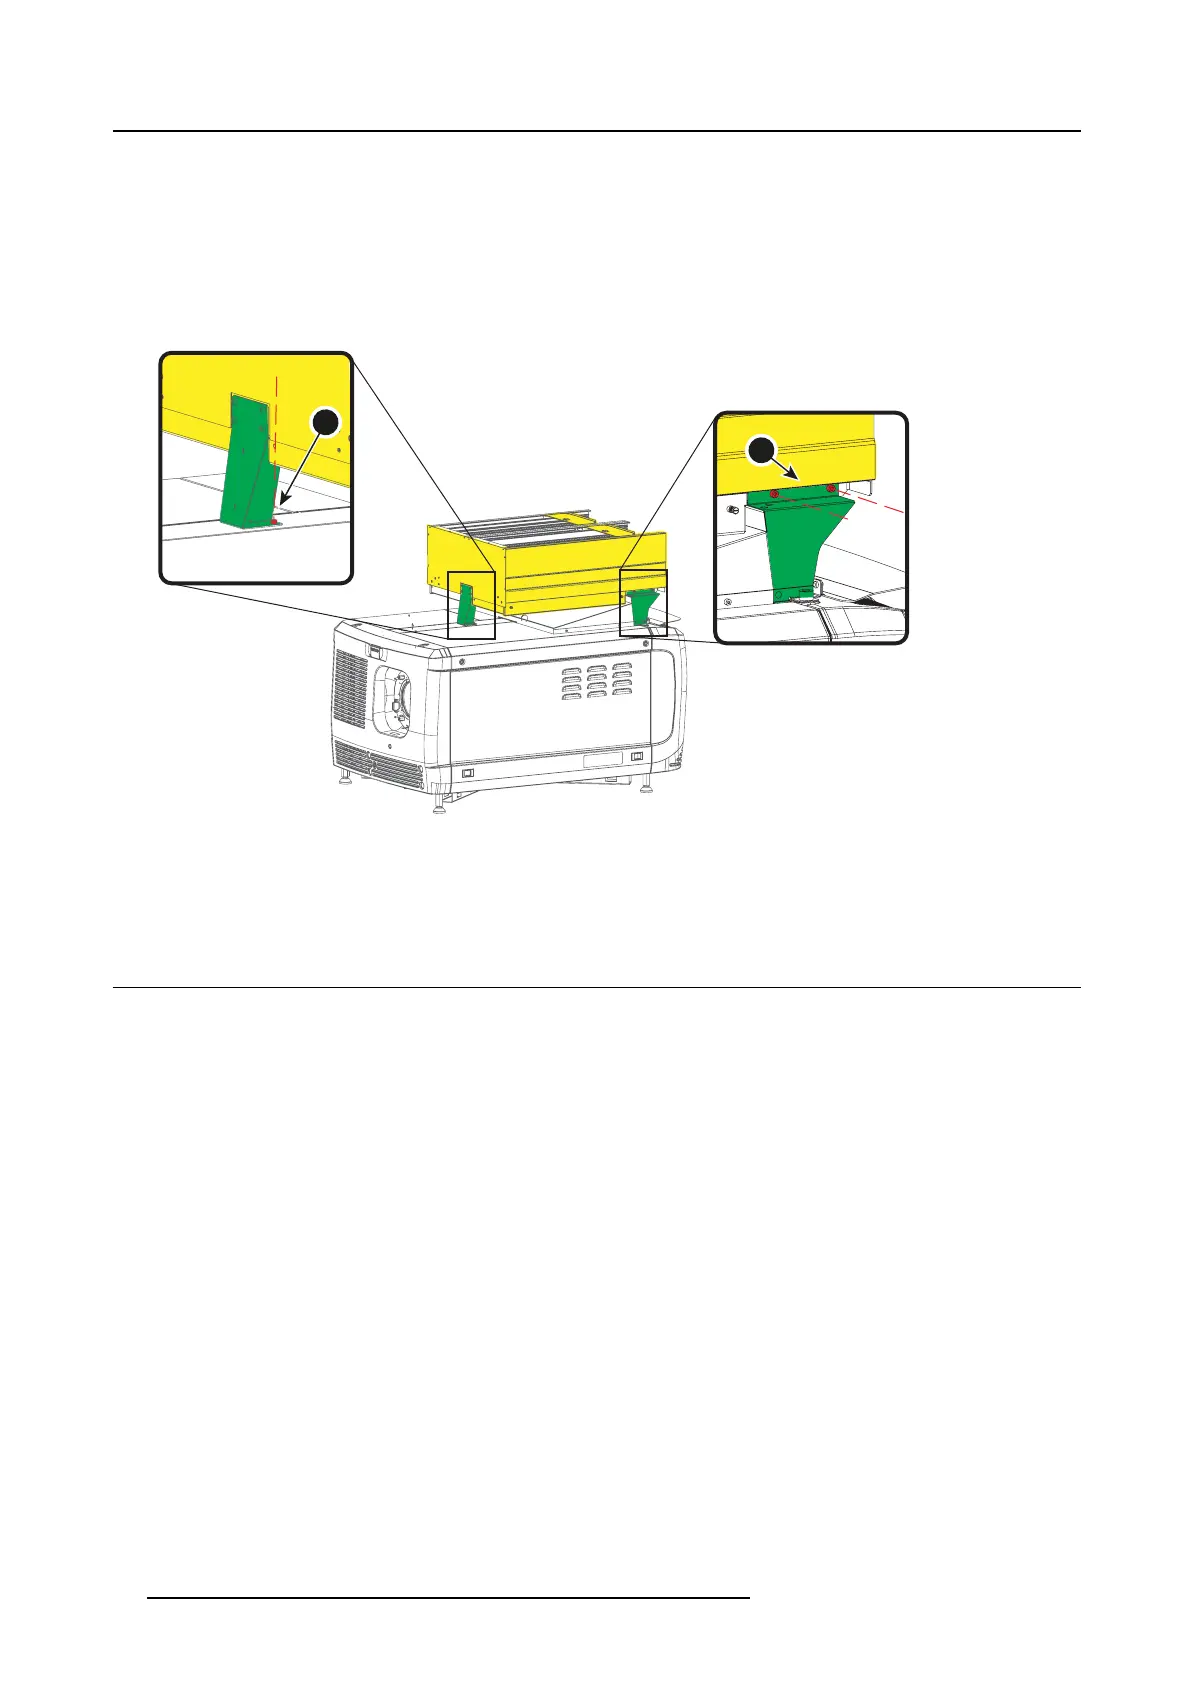
1. P lace the frame assem bly on the projector as indicated. Make sure that the holes of both feet (ref 1) of the projector matches
the holes of the cooler housing.
1
2
Image 5-15
2. Drive in both screws M5 (ref 1) on each side.
3. Driveinthelastfixation screw M 4 (ref 2).
5.5 Insert the cooler un its
Necessary tools
Flat screwdriver
Before you start
Check if the two indicated screws (reference 1) are present. If it is the case, remove this screws.
The use of these screws m ay beco me necessary to fixate the cooler in the cooler assem bly when the captive screws (reference 2)
does not work.
46
R5906753 DPXK BLP SERIES 20/11/2017